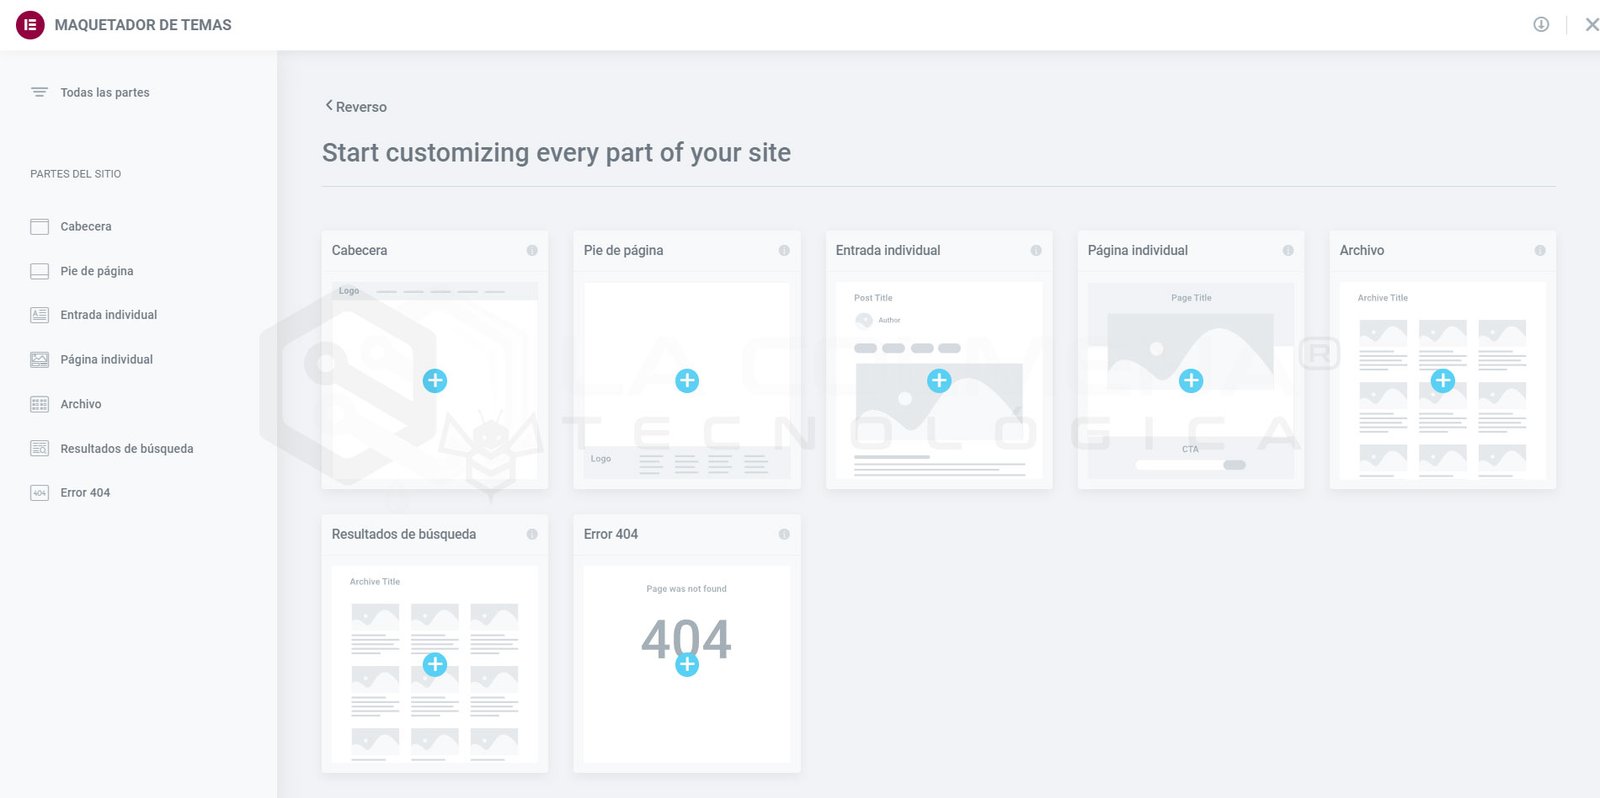
Layout panel to customize every part of the website. Manage headers, pages, and archives from one place.
Table of contents
What is the page header?
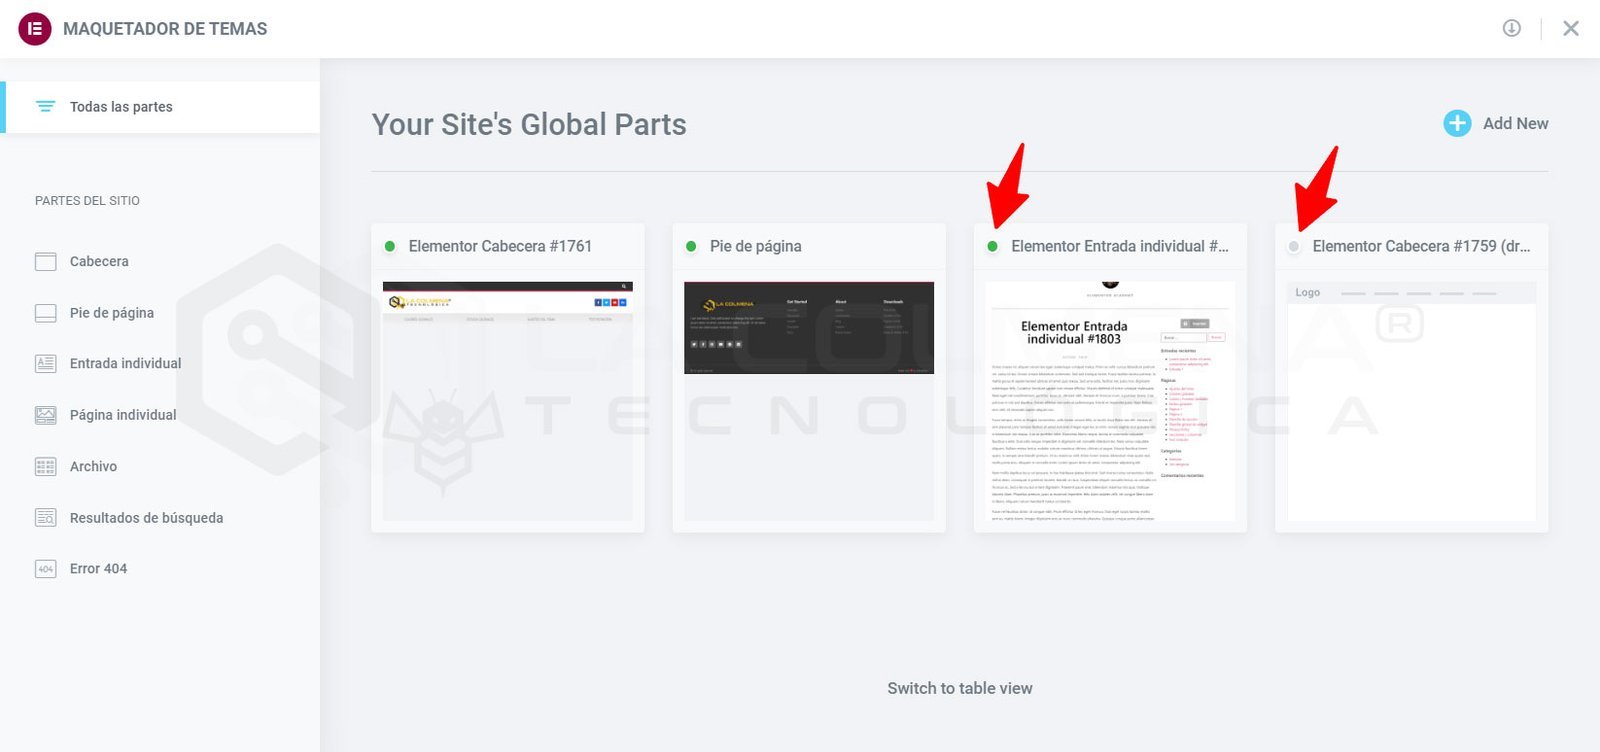
With Elementor’s Theme Builder (Theme Builder), you can add new site parts (for example, add a new Header), edit existing site parts, or delete site parts. Existing site parts include a visual indicator to let you know whether a condition applies to that site part.
For example, a global template for posts can have a condition to display only for a specific category. A green indicator lets you see at a glance that this site part has a condition. A gray indicator means a site part has no conditions set, so it won’t be displayed until one is set.
Elementor’s Theme Builder includes the SITE PARTS side menu, which helps you see each site part you need to create to build a complete website.
Elementor’s Theme Builder (Theme Builder) lets you globally customize every core part of your website—no coding required:
Header
Footer
Single post
Single page
Archive
Search results
404 error
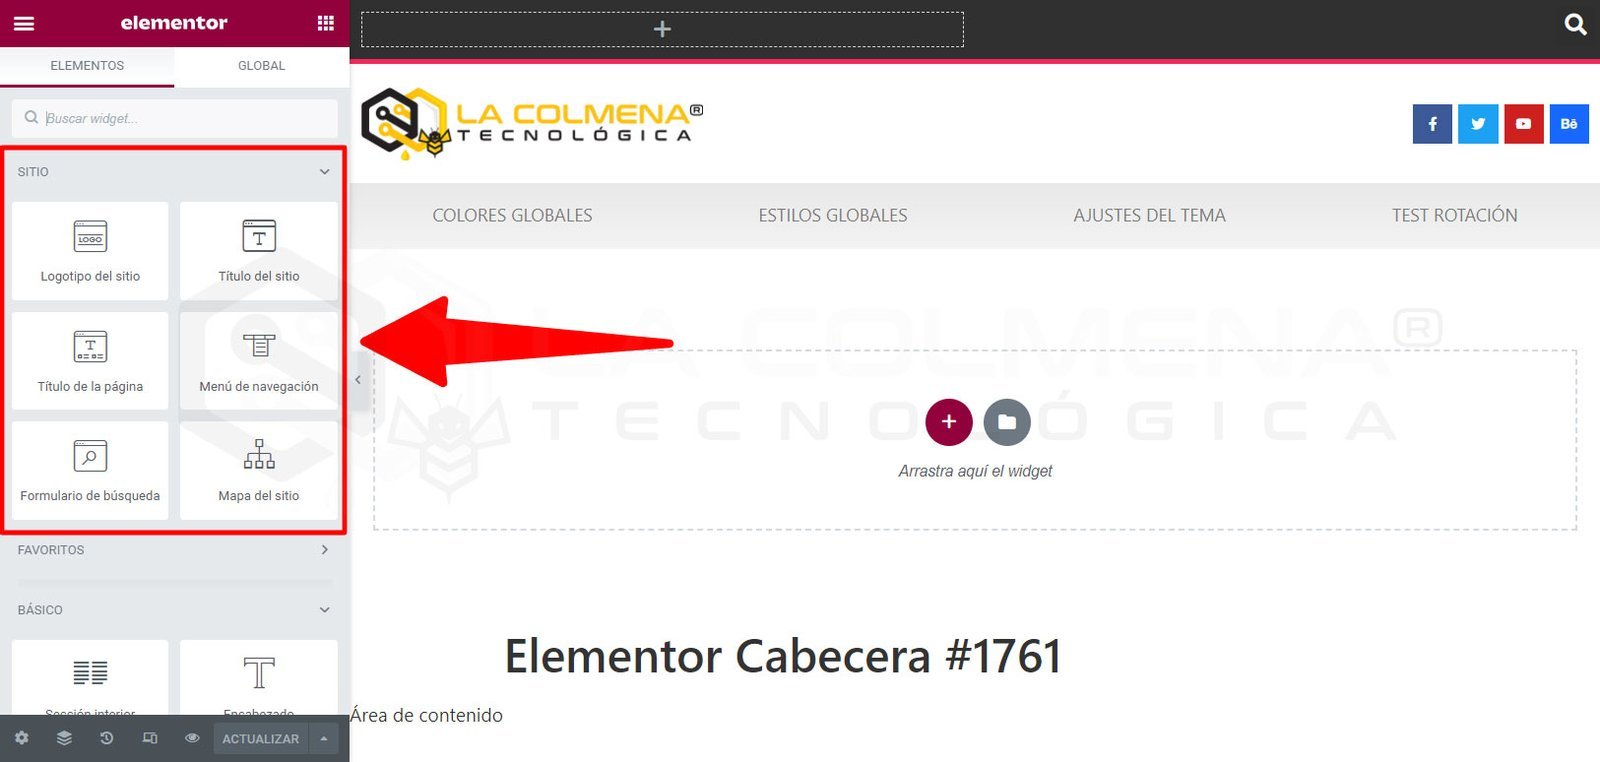
Elementor Pro includes specific widgets to create each of these template types; some will only appear when we’ve selected that content type. Let’s see which additional widgets we can use to create the Header and the Footer.
Design the Header and Footer
When we edit a site part, the builder Elementor Pro makes things easier by showing, at the top of the widgets list, the ones that are especially related to the part we’re about to create. For example, in the following image you can see the widgets that appear first when creating the Header or the Footer.
How to access the Theme Builder
There are several ways to access the Theme Builder. Choose the one that’s most convenient for you.
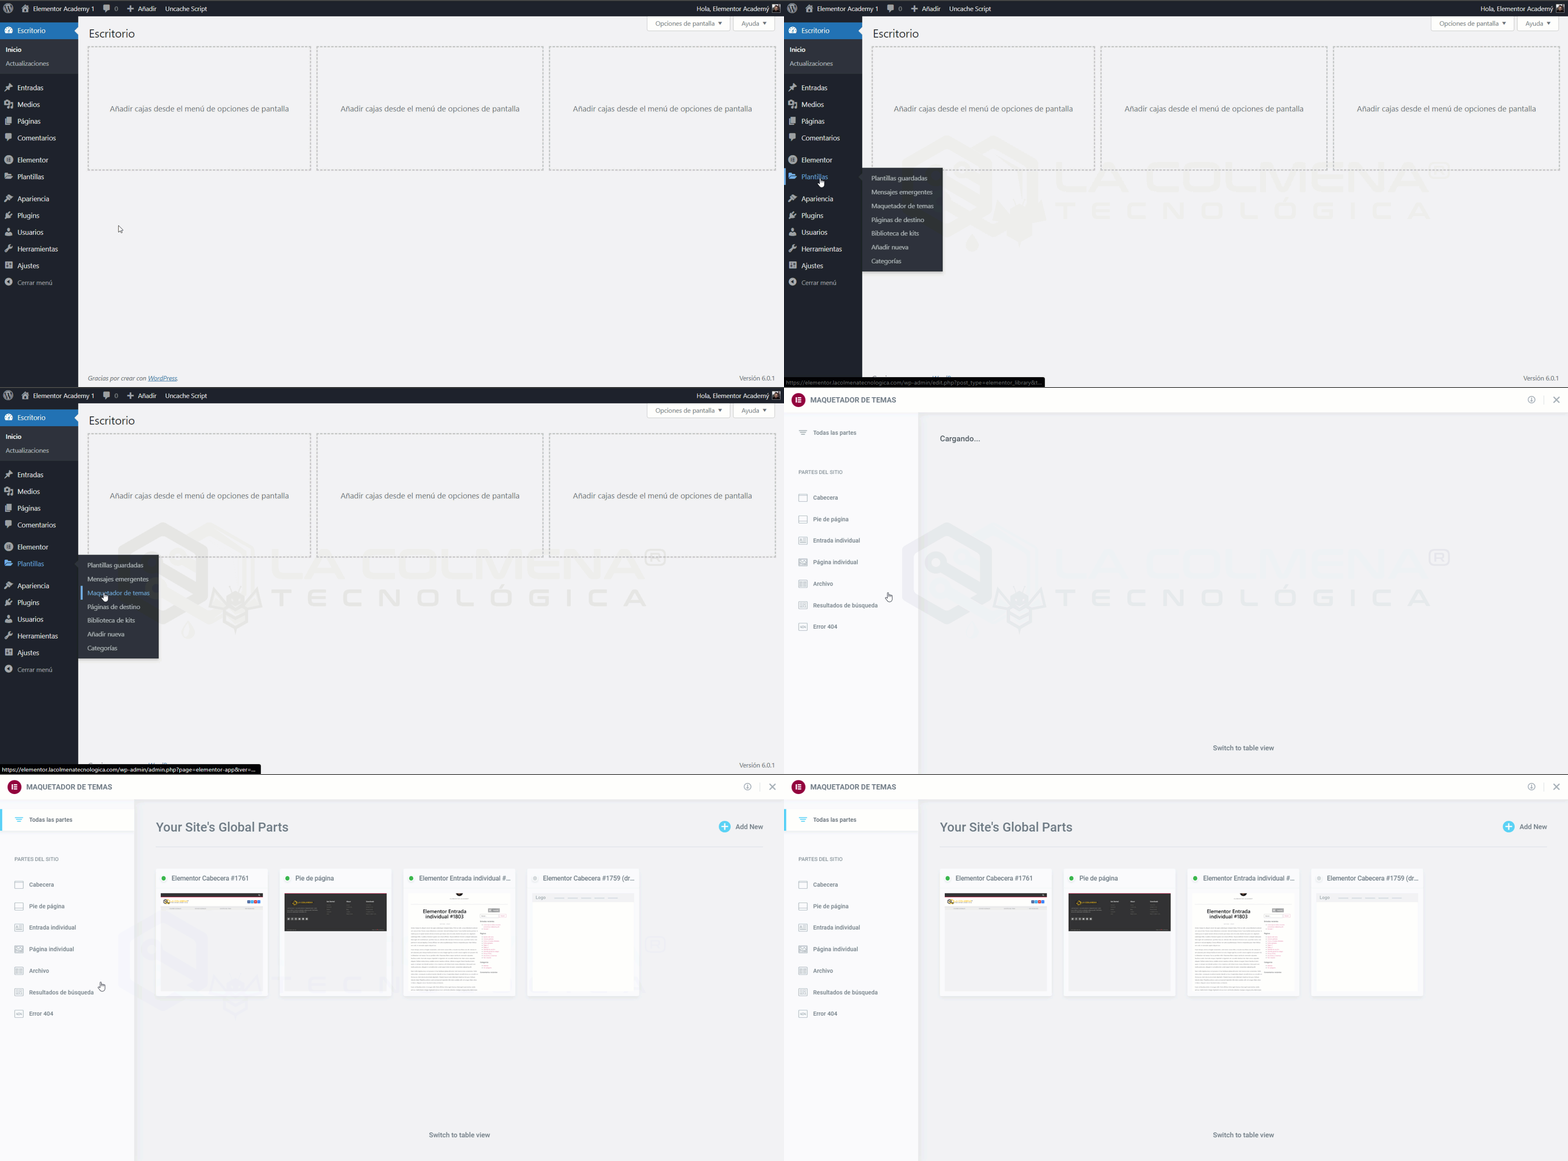
From the WordPress admin menu
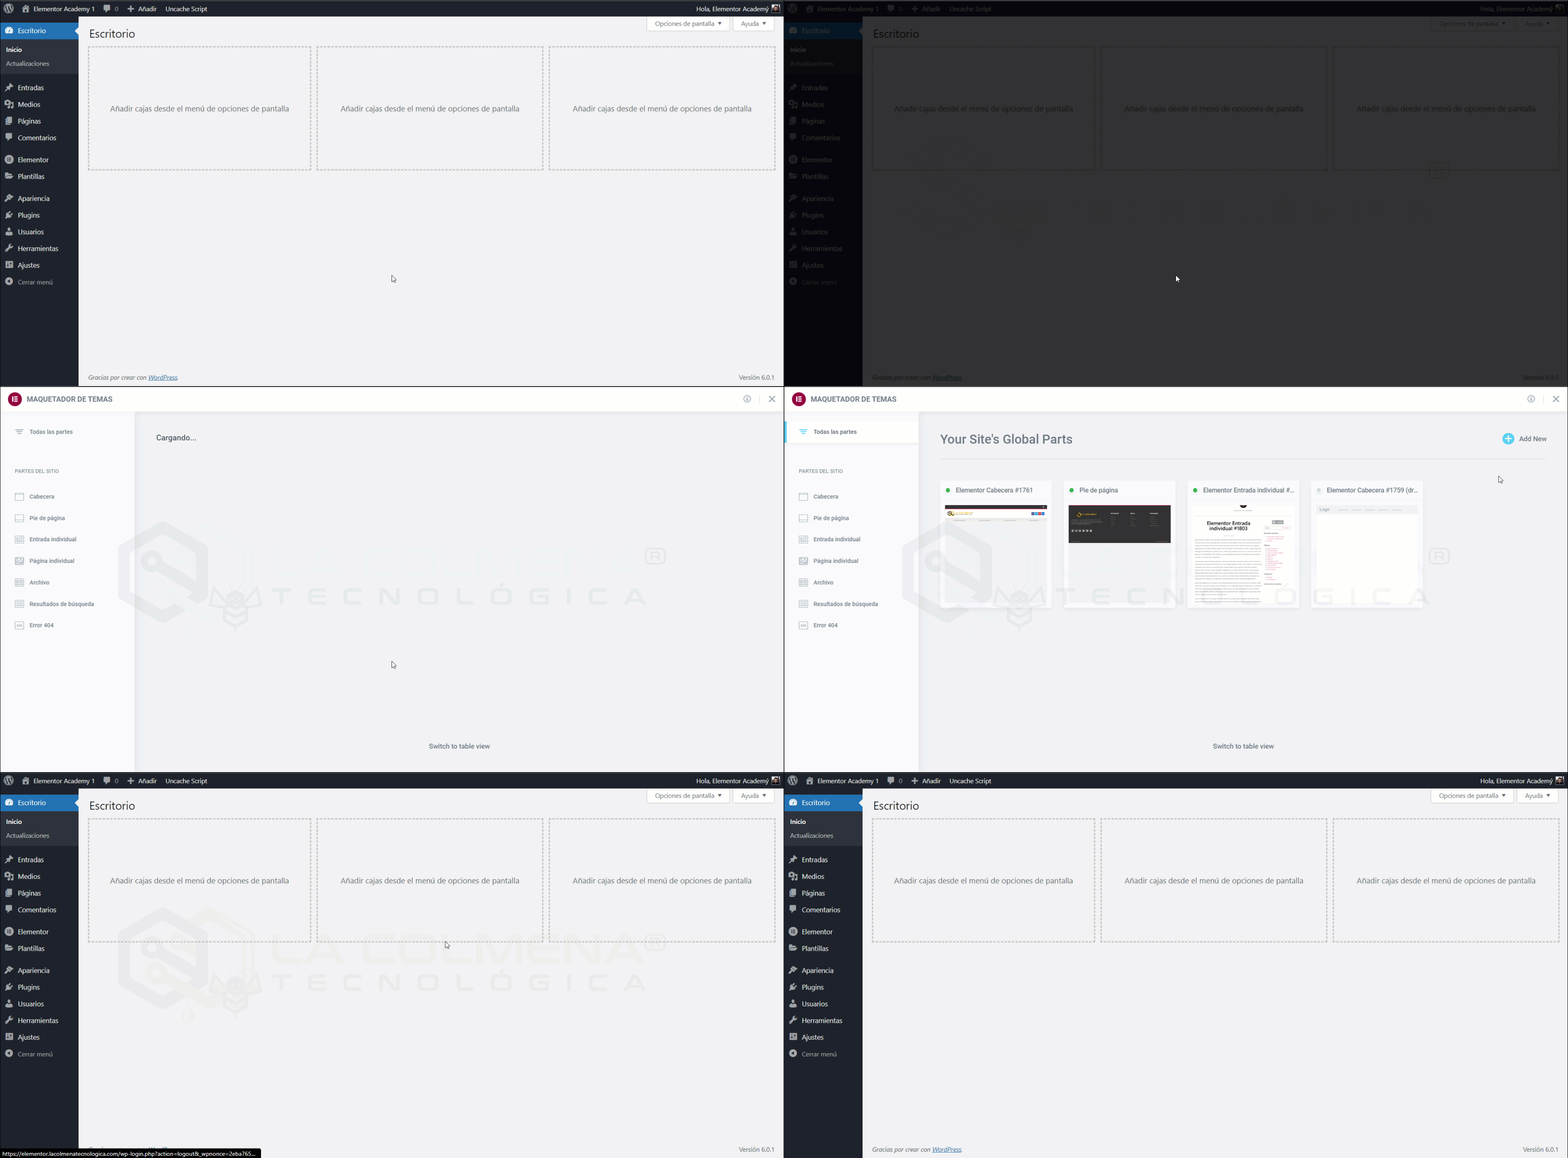
From the WordPress admin menu, go to Templates > Theme Builder.
From the Elementor editor
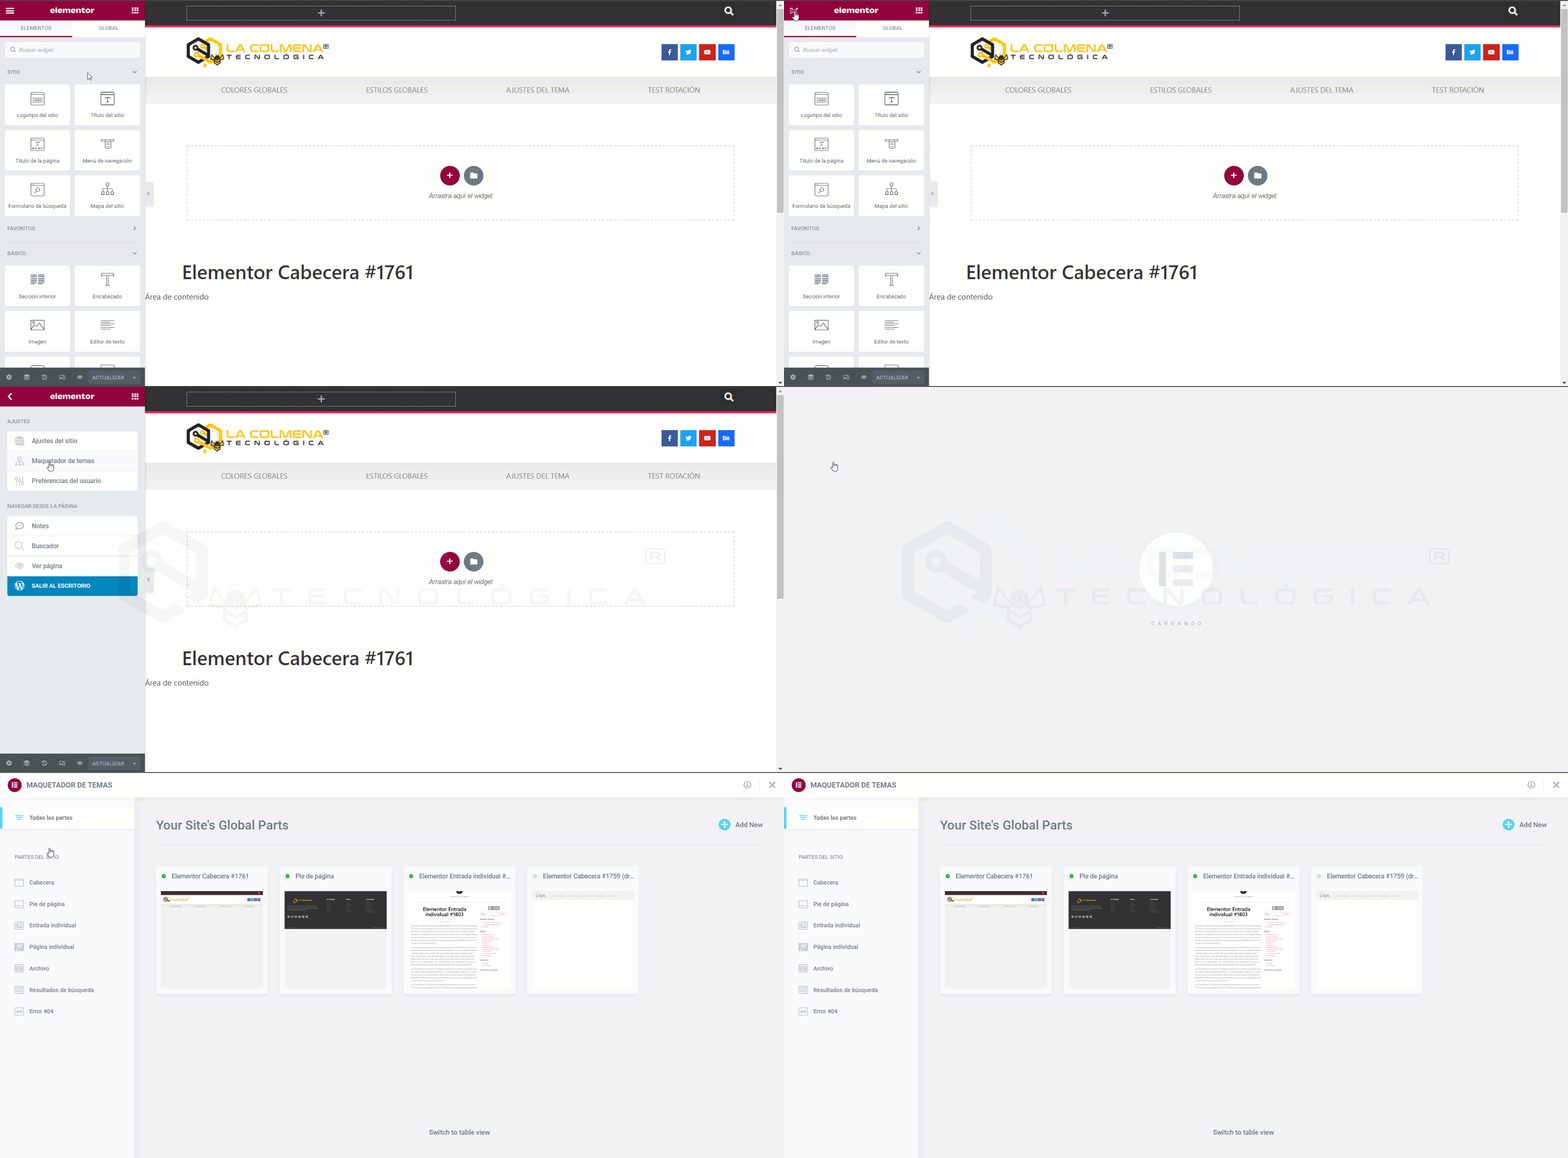
From any page or screen in the Elementor editor, click the hamburger menu in the top-left corner of the Widgets panel, then select Theme Builder under the Settings tab.
Using keyboard shortcuts
Quickly access the Theme Builder from any screen using its keyboard shortcut. On a Mac, press CMD+SHIFT+E. On Windows, press CTRL+SHIFT+E to instantly open the Theme Builder.
Theme Builder main dashboard
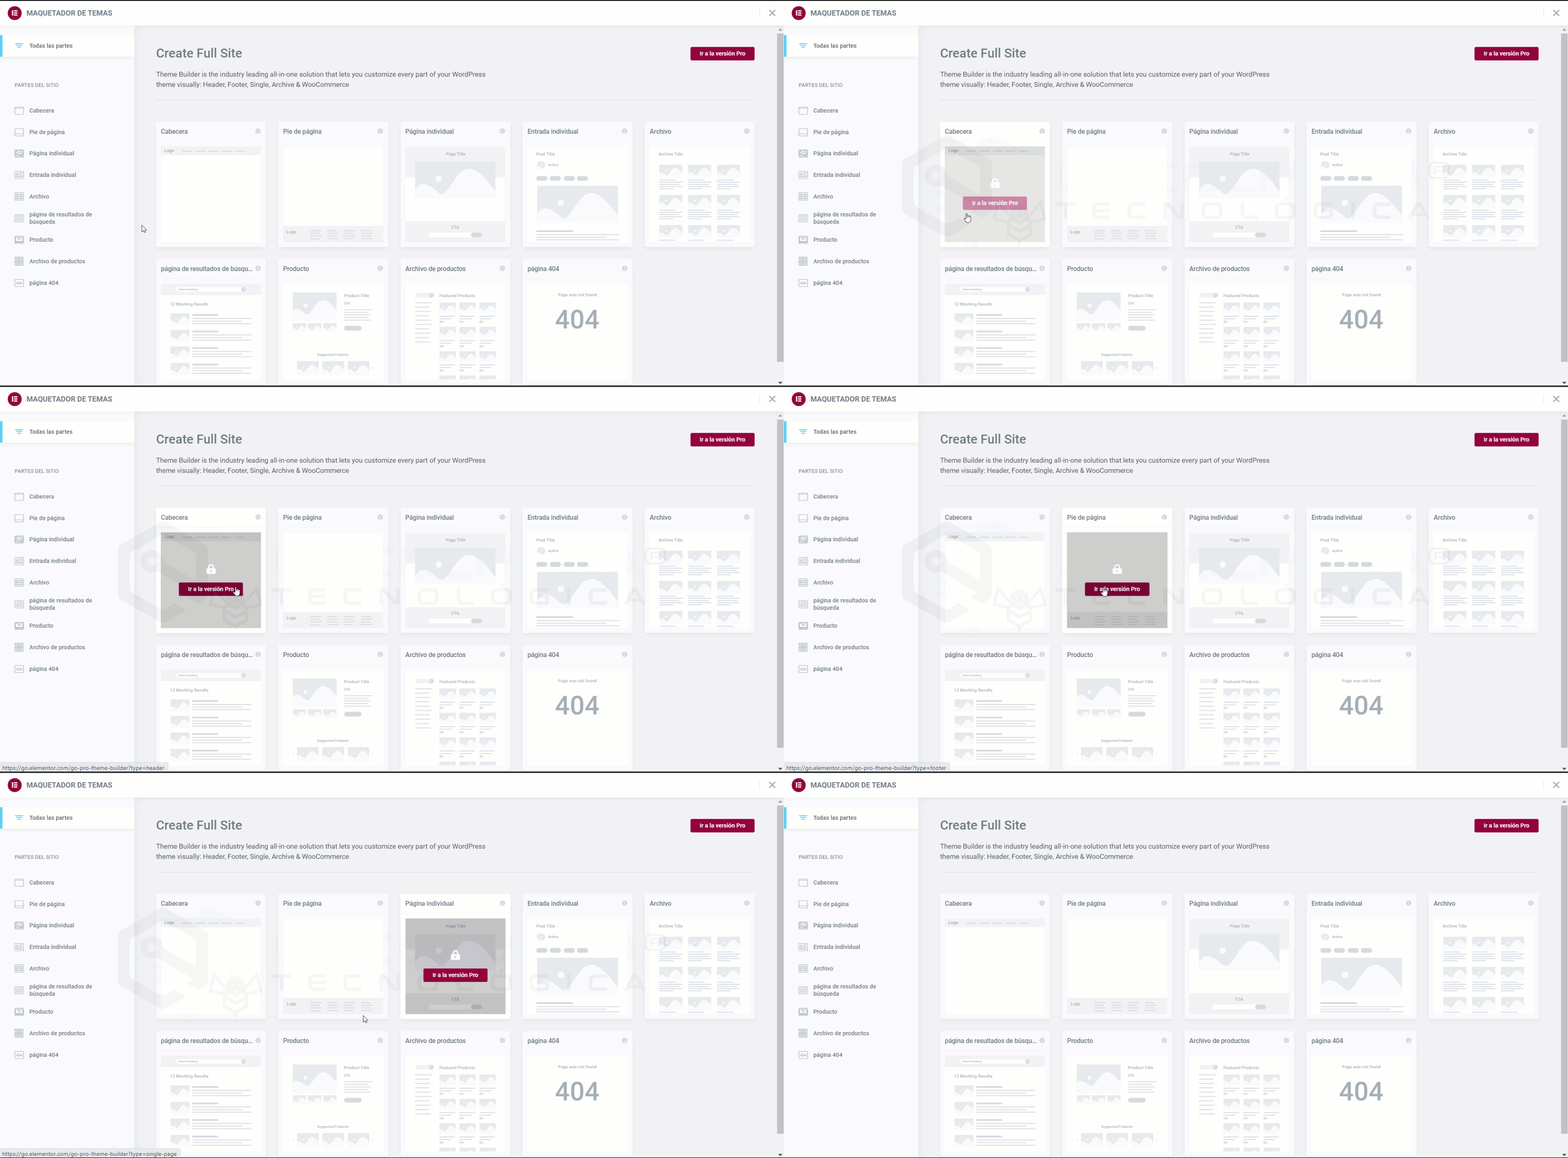
Free users can see which site parts would be available with Elementor Pro, but they can’t add or modify them.
Free version of Elementor
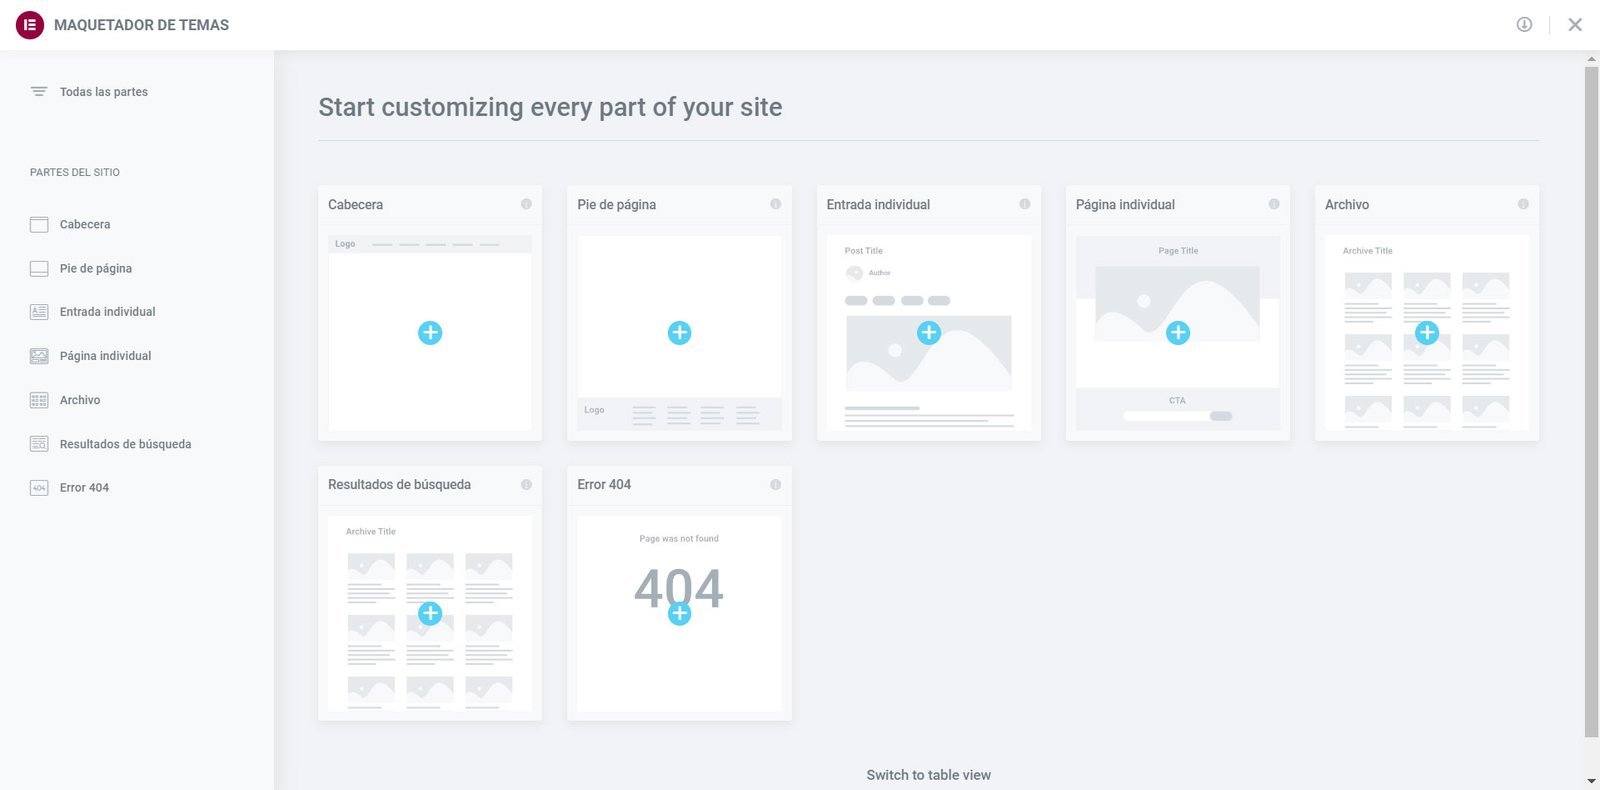
Elementor Pro with no templates created
If no site parts have been created yet, the default thumbnails for all available site parts will be shown.
Elementor Pro with templates created
For Pro users, existing Site Parts will be shown, if any have been created. Thumbnails for each site part will be generated automatically.
Add a new site part
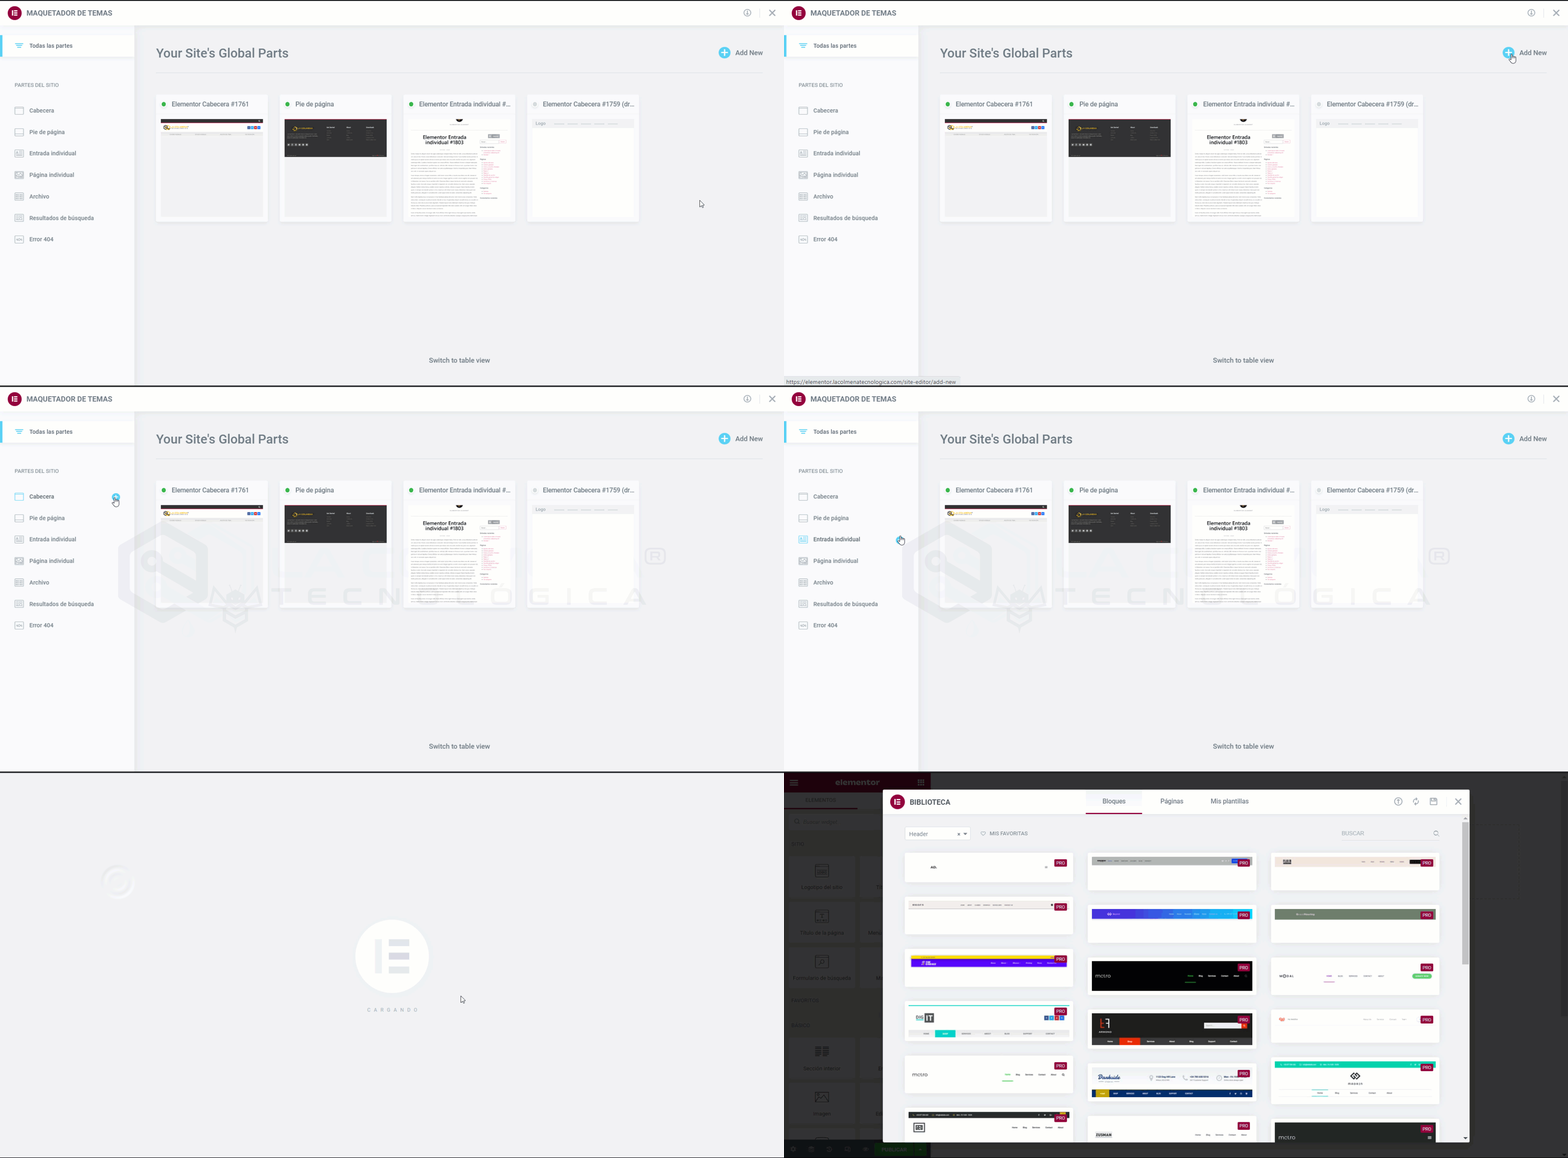
To add a new site part, click the Add New link in the top-right corner of the dashboard, or the PLUS sign that appears when you hover over a site part label in the sidebar, or the PLUS sign on its thumbnail.
Edit the design of an existing site part
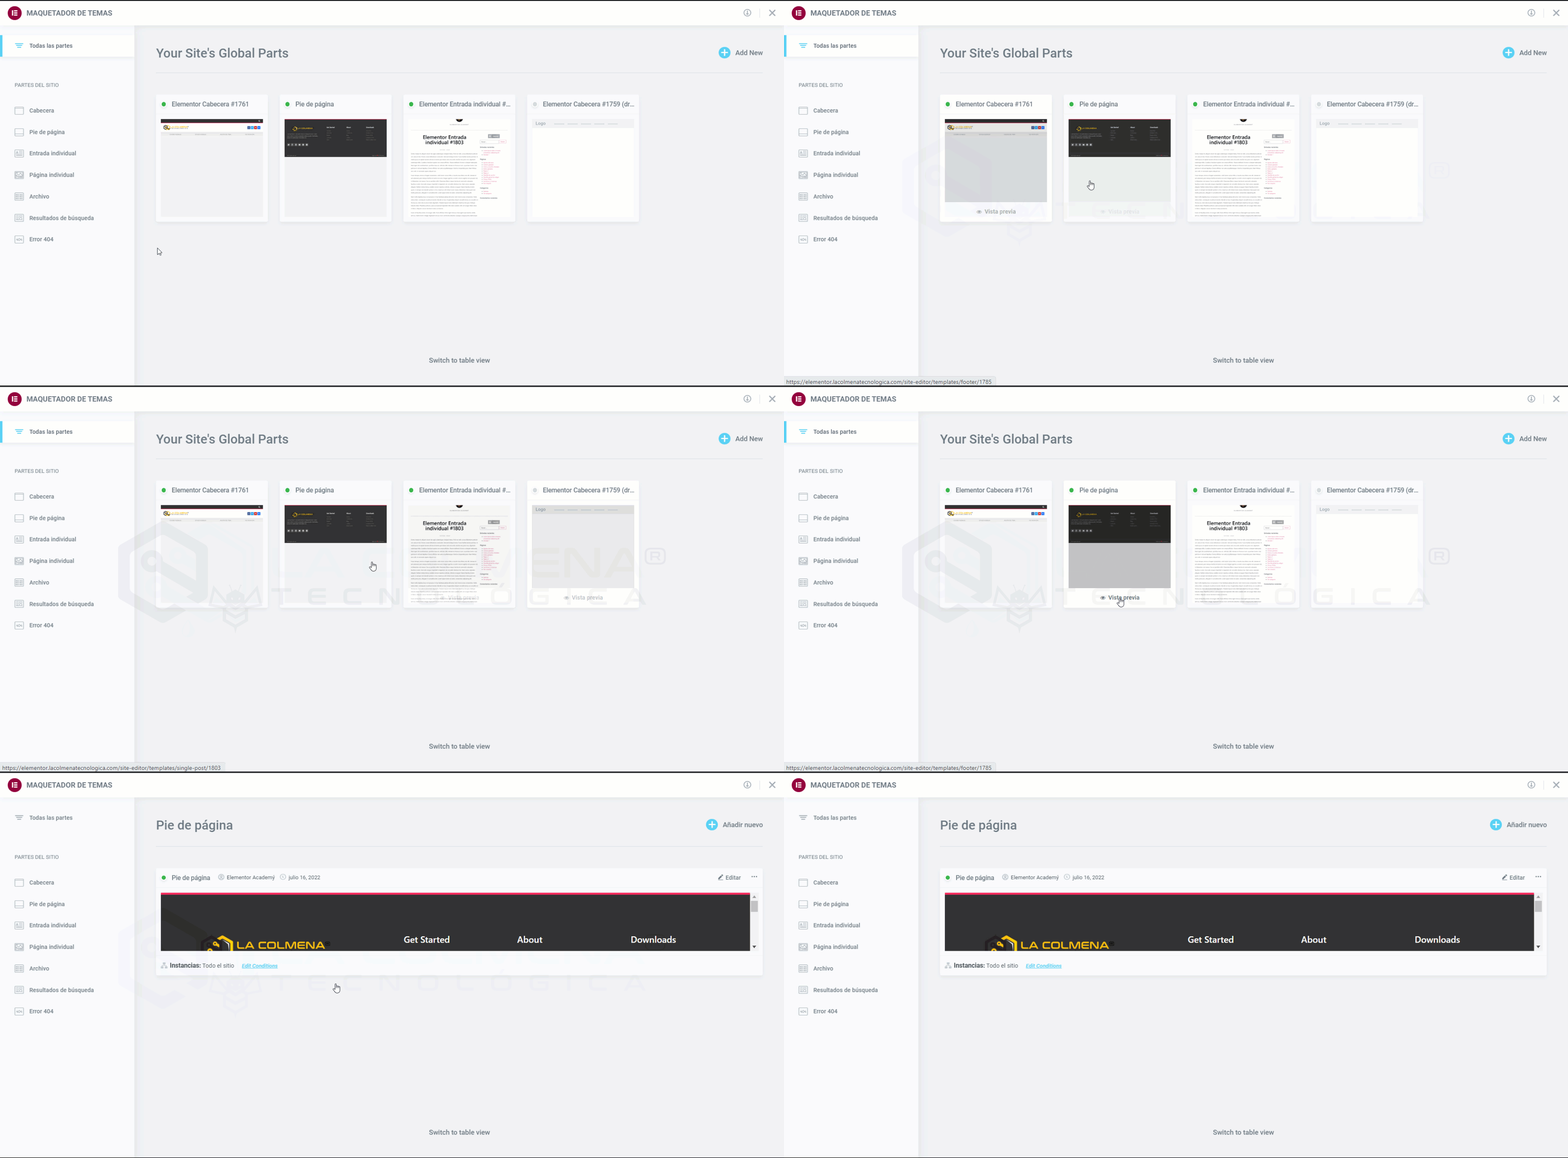
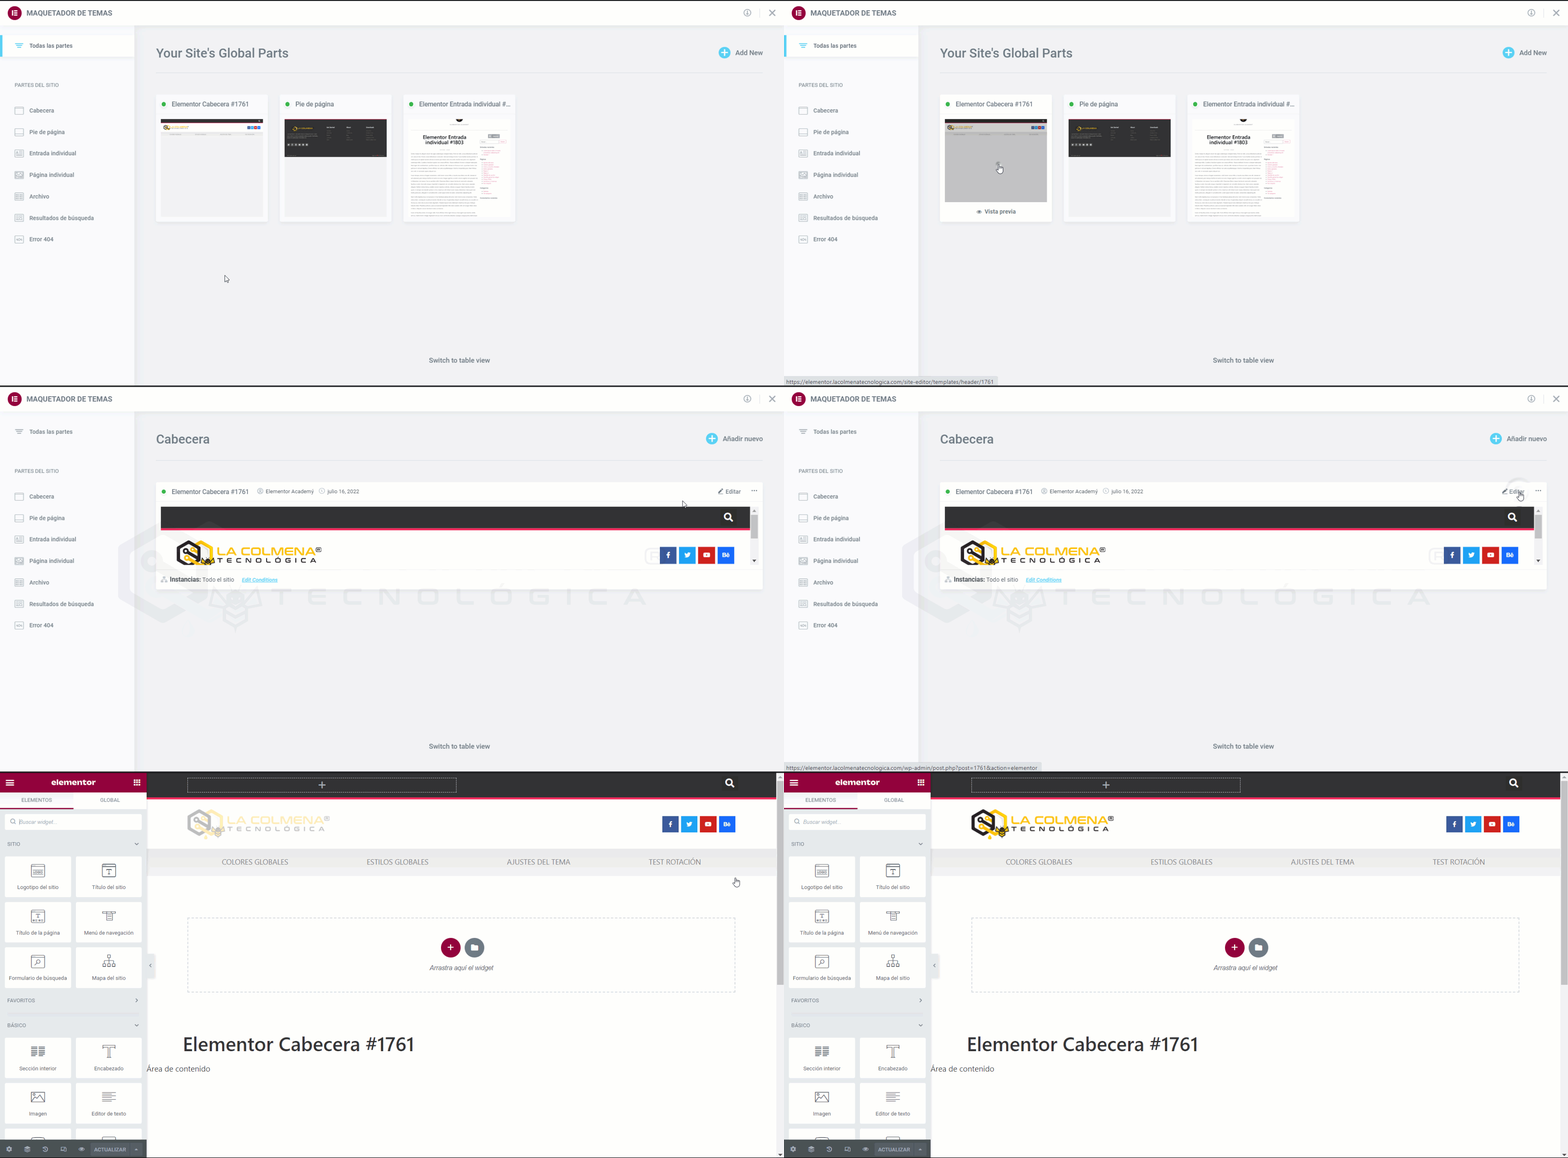
To edit an existing site part, click the site part label in the sidebar. This will open the site part details panel.
Click the Edit link in the top-right corner of the site part you want to edit. This will open the Elementor editor for that site part.
Export a site part
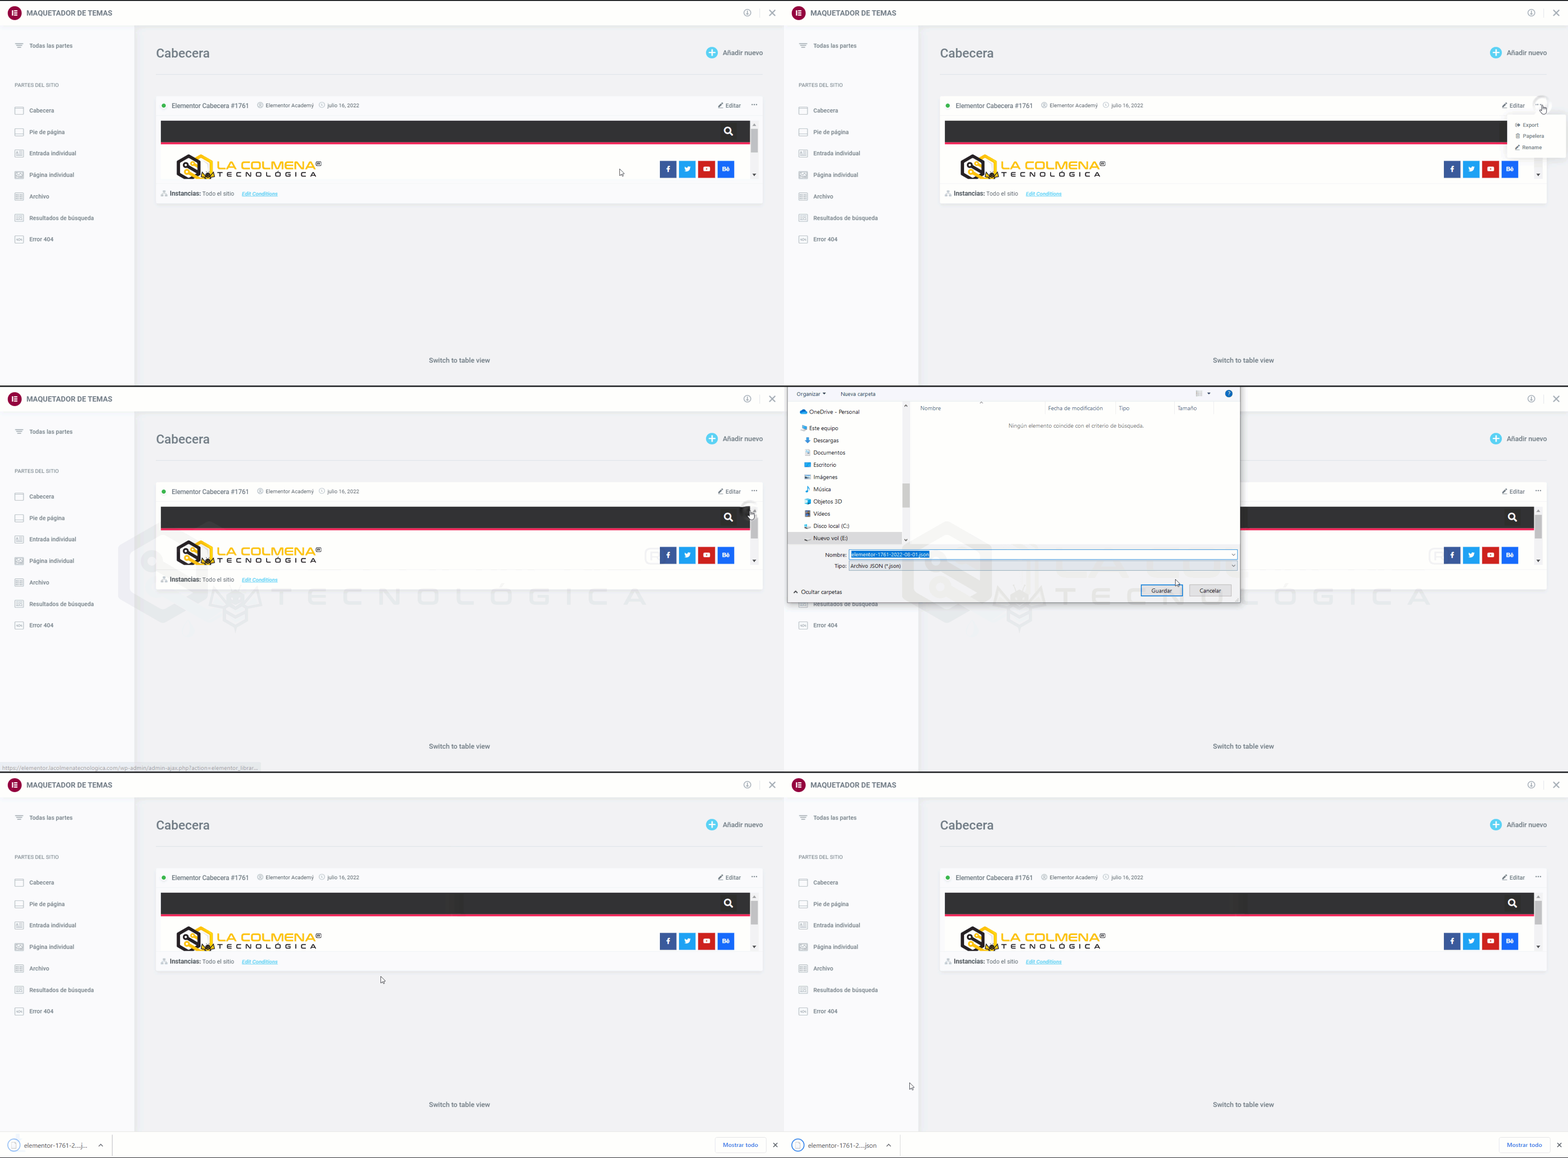
Click the … three horizontal dots at the top right of the template part you want to export.
Choose Export to open a Save dialog and save a .json file to your computer.
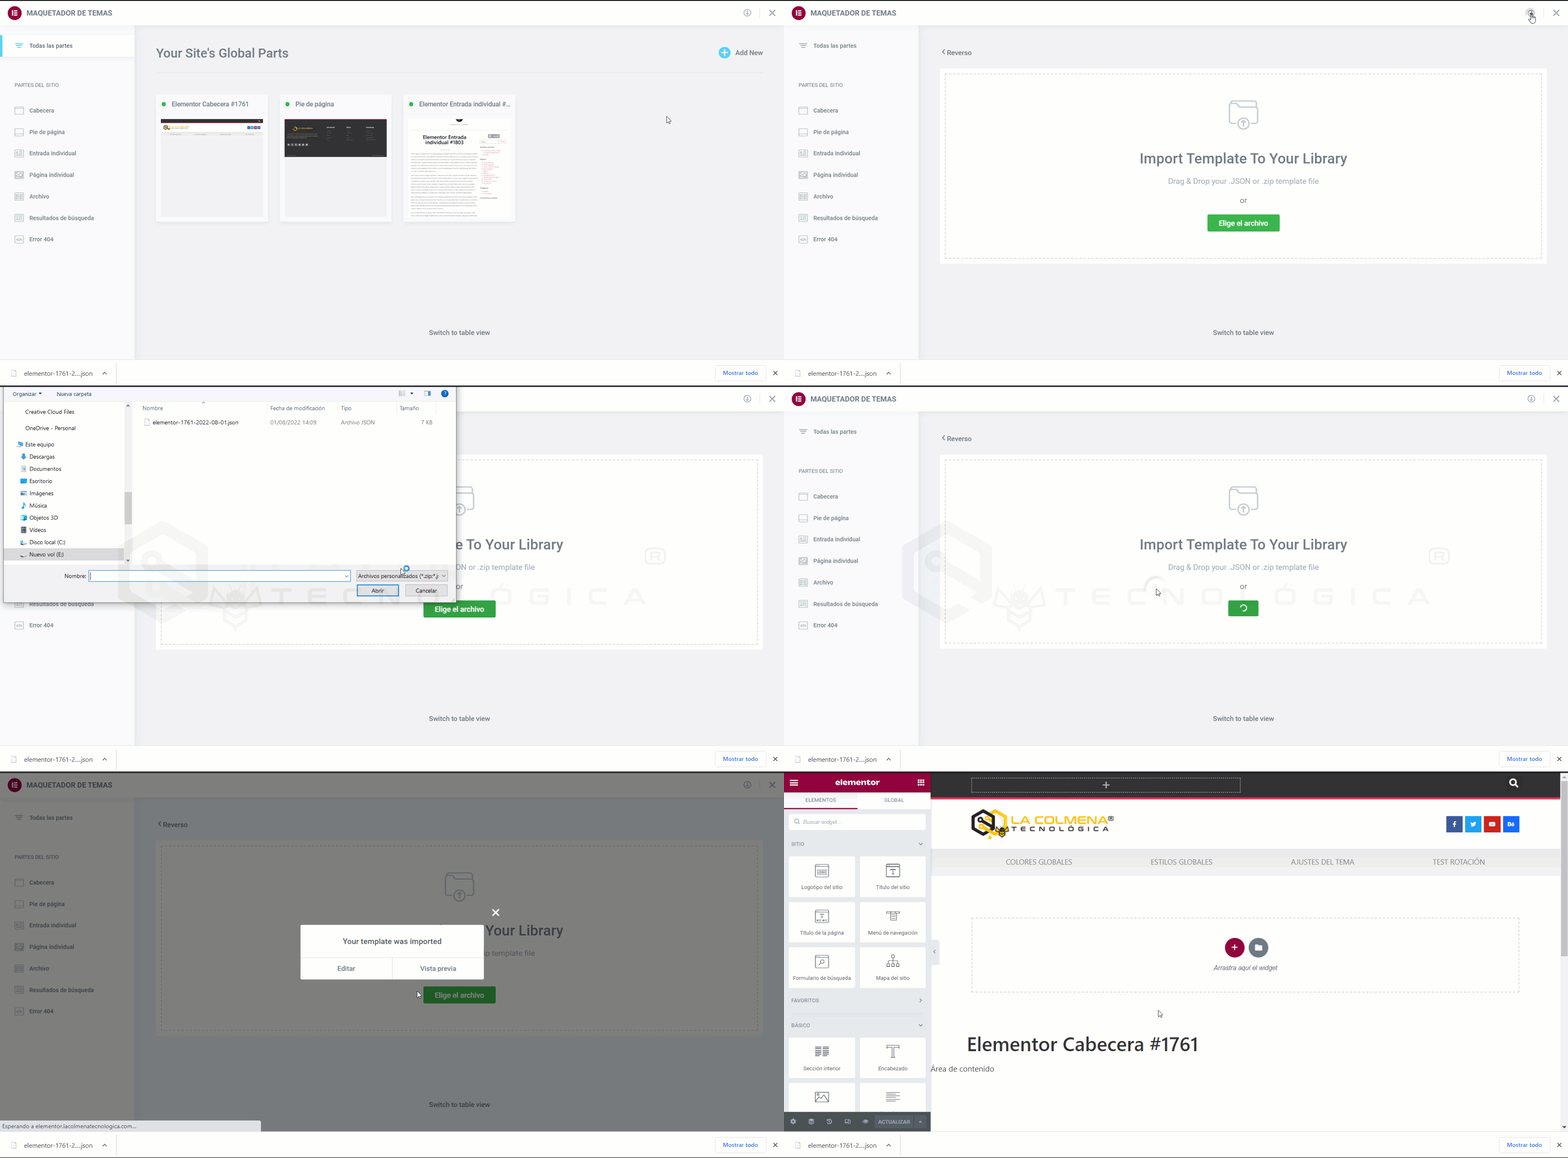
Import a site part
You can also add a new site part by importing a template.
Click the Import icon in the top-right corner of the Theme Builder.
Drag and drop or select a .JSON or .zip file containing the template you want to import.
The template will now be added to your Site Parts dashboard.
Important: for templates to import correctly, unfiltered uploads must be enabled. To enable them, go to Elementor > Settings > Advanced and switch Enable Unfiltered File Uploads to Enable.
Delete a site part
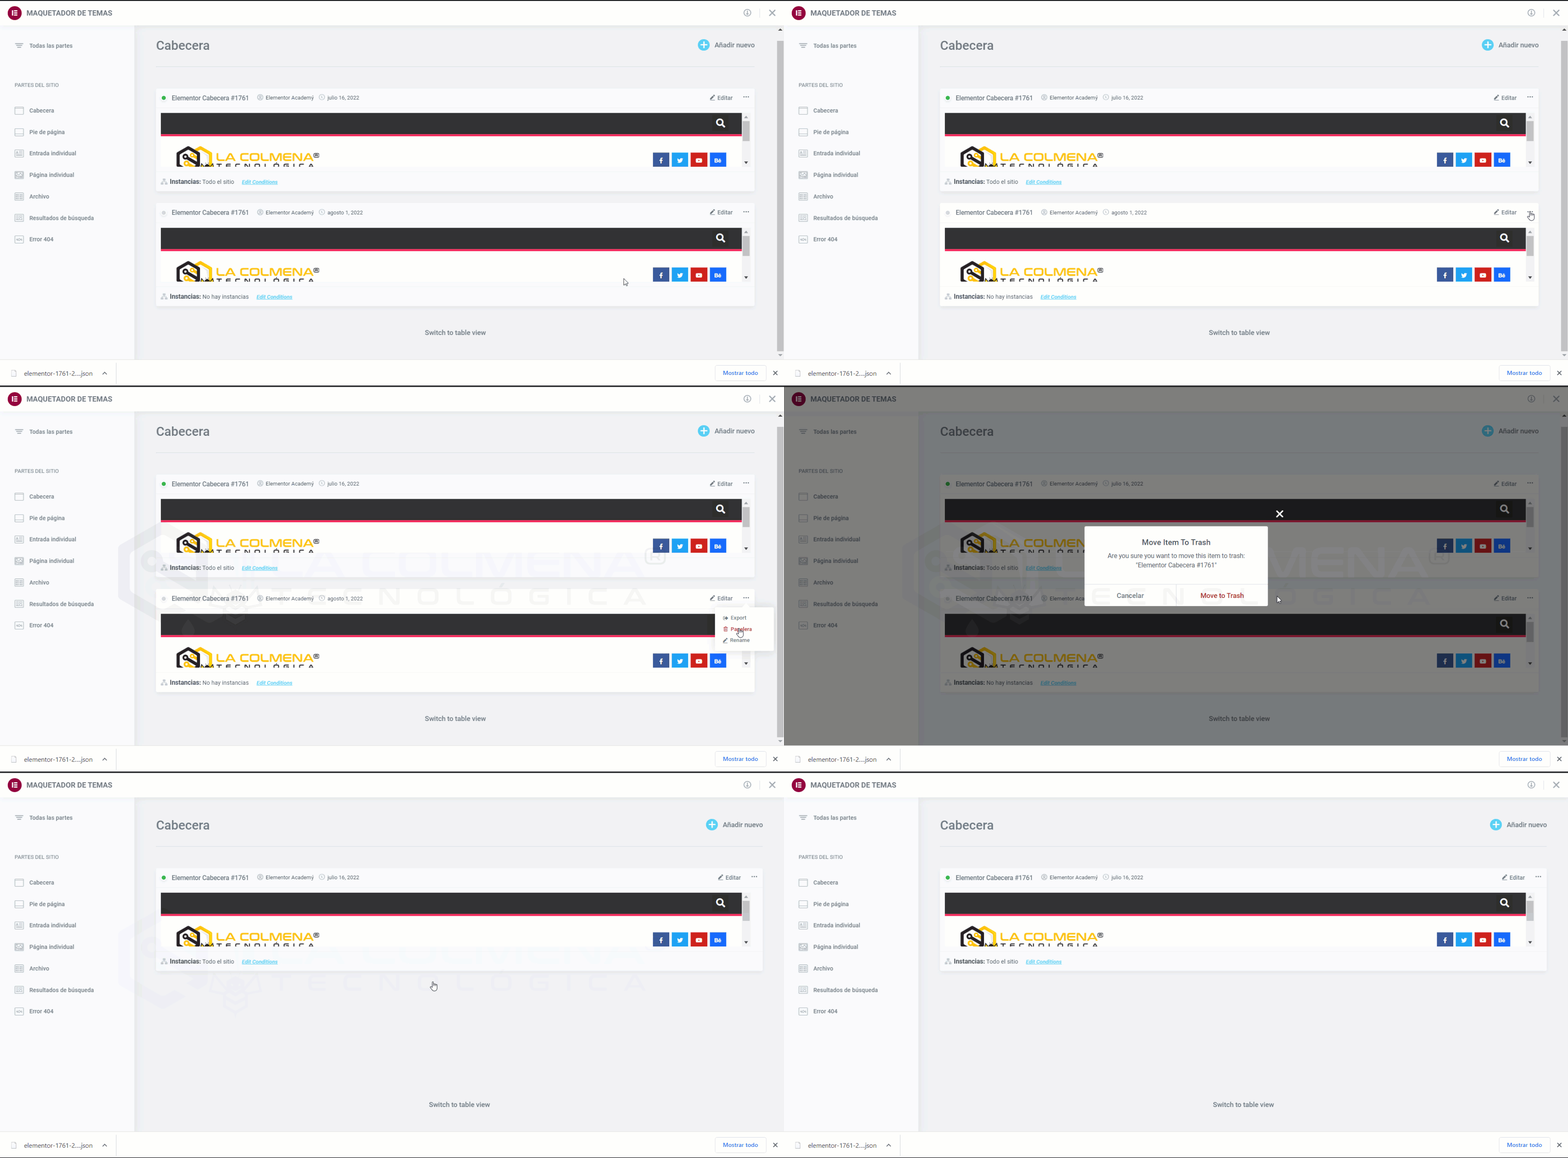
Click the … three horizontal dots at the top right of the site part you want to delete.
Choose Trash, which will open a confirmation dialog Move Item To Trash (move item to the trash).
Click Cancel if you change your mind and decide you don’t want to delete the site part, or click Move to Trash (Move to Trash) to confirm you want to move this site part to the trash.
When we move a document to the trash, we can restore it or delete it permanently from the Templates > menu by clicking Trash.
Rename a site part
Click the … three horizontal dots at the top right of the site part you want to rename.
Choose Rename, which will open the Rename Site Part dialog.
Enter the new name and click Change to complete the renaming process, or click Cancel if you change your mind and decide you don’t want to rename this site part.
Important: Elementor is gradually moving away from the traditional Ajax method (using admin-ajax.php) to fetch data in the Elementor platform, switching to the WordPress REST API system, and this is used within the new Theme Builder. If a website has disabled the WordPress REST API, the new Theme Builder won’t work and content—such as templates or anything else—won’t be displayed. An error will appear saying “Error: you do not have permission to do that”.
Edit display conditions
Later in this topic we’ll see what display conditions are and how to set them. Now we’ll see how to modify a site part template’s conditions from the Theme Builder and from the Elementor Builder.
Modify display conditions from the Theme Builder
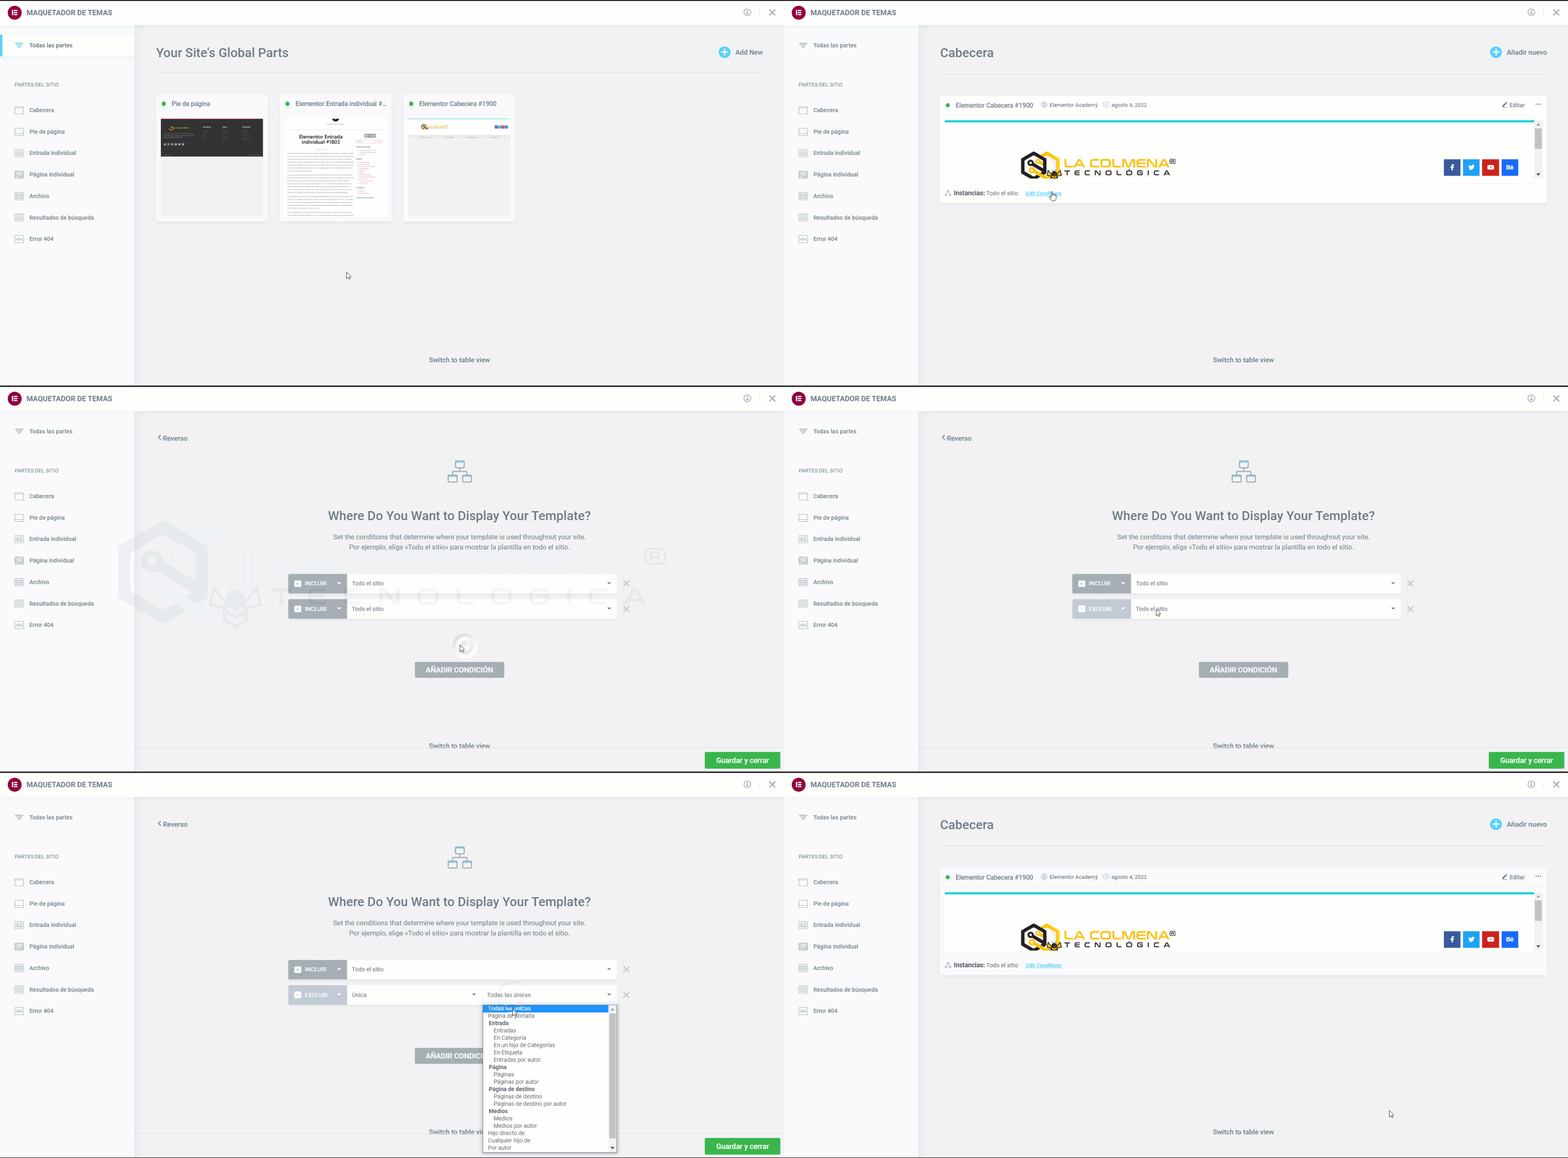
Go to the Theme Builder and click the template whose conditions you want to change.
At the bottom of the box labeled Instances, you can see the conditions already assigned. To edit them, click Edit conditions (Edit conditions).
Here you can add new ones by clicking the Add Condition button, and also edit or delete existing ones.
Modify display conditions from the Elementor builder
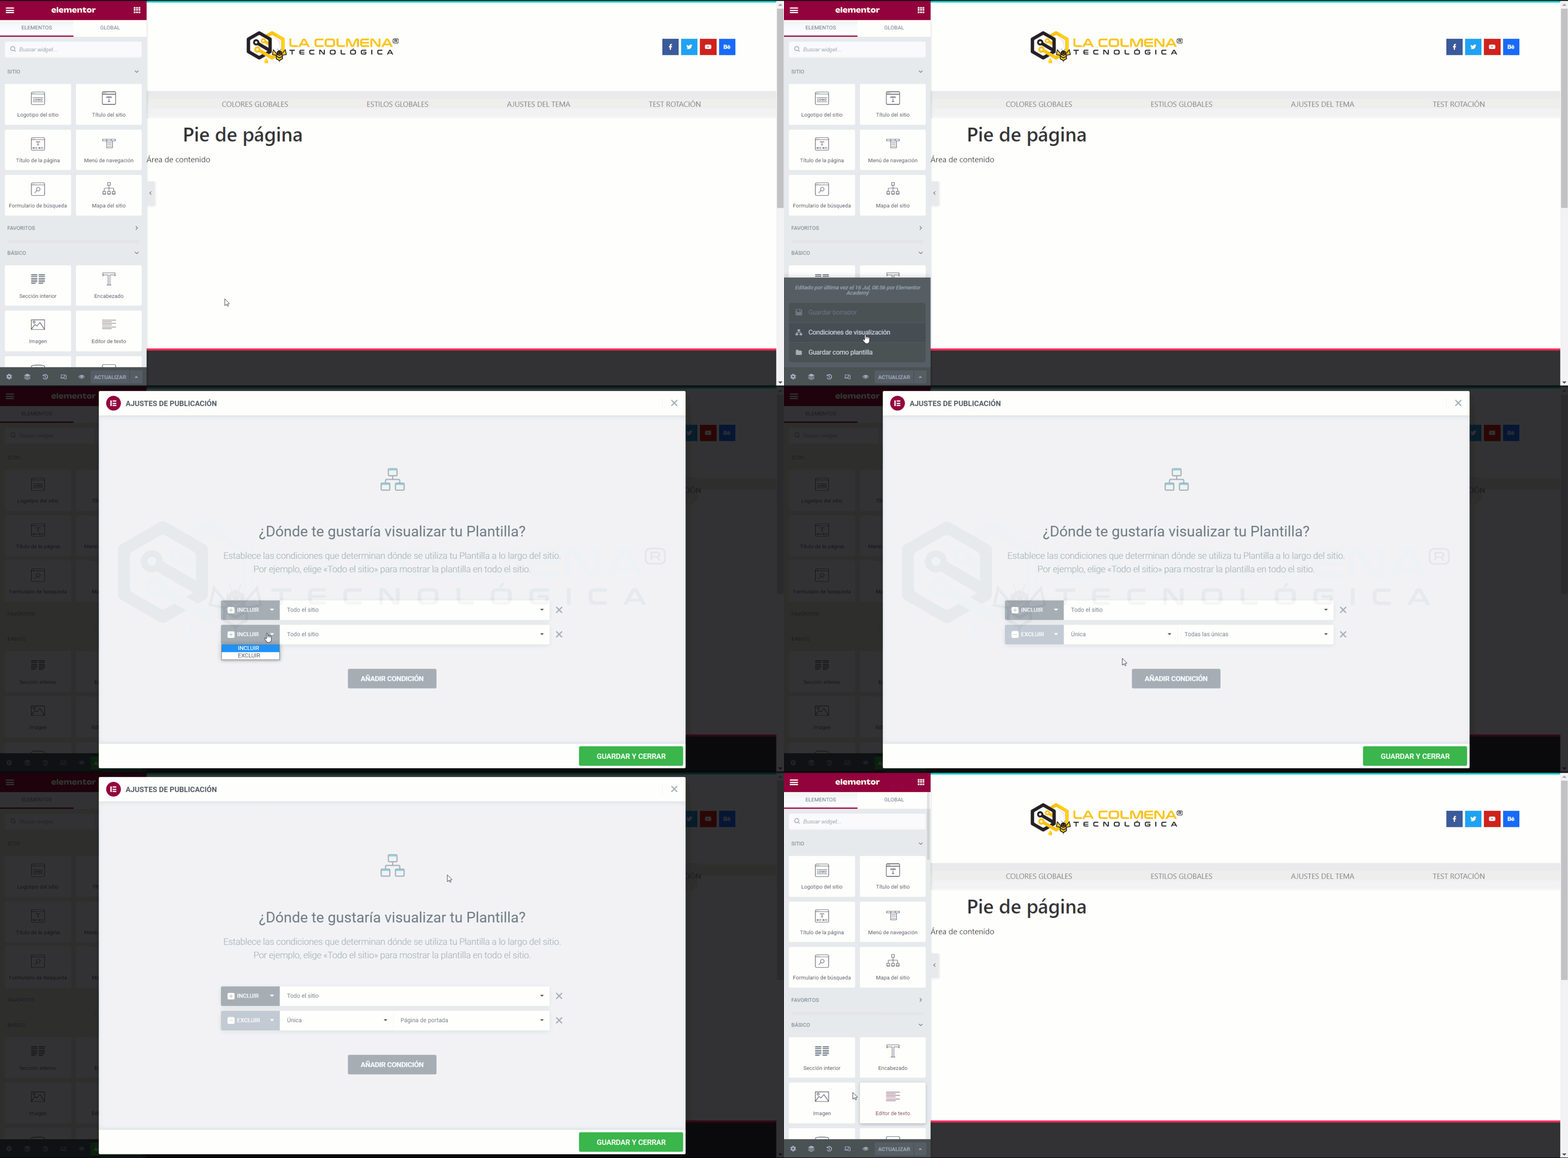
In the Elementor Pro builder, click the small arrow next to the Update button (bottom left). In the pop-up menu, click Display Conditions.
Here you can add new ones by clicking the Add Condition button, and also edit or delete existing ones.
How to create a template from Elementor Pro’s Theme Builder
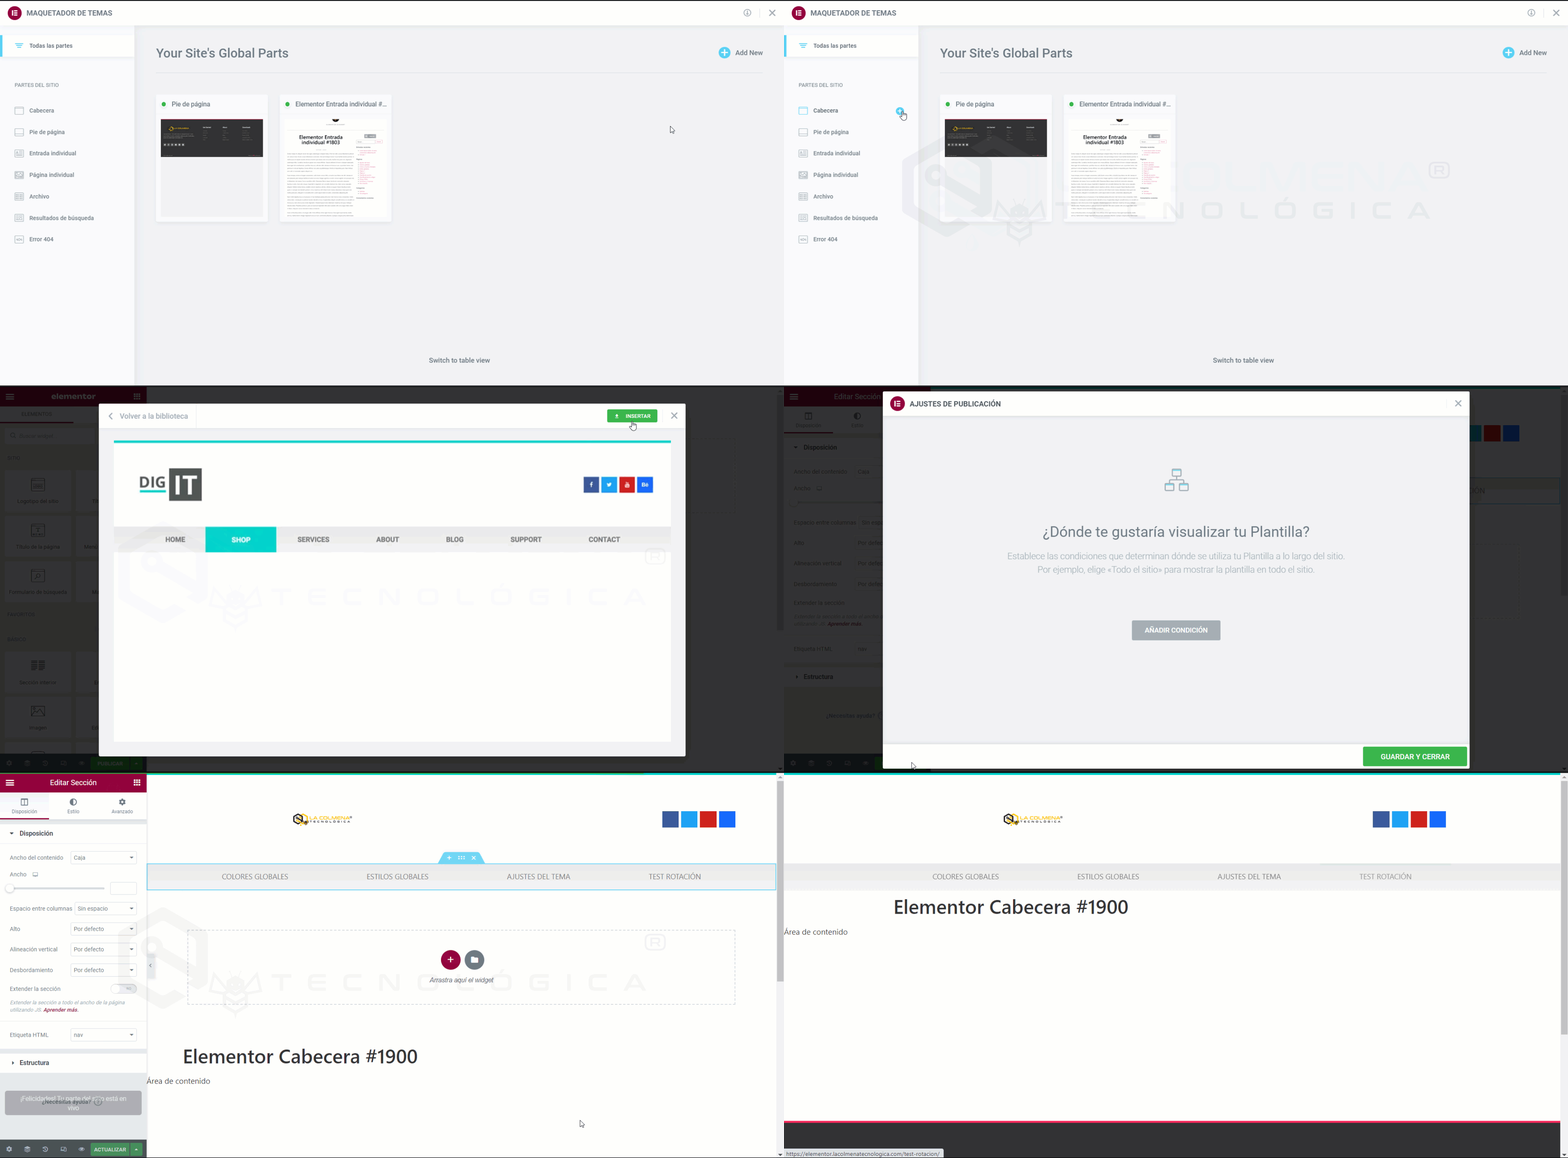
You can easily create a Header or Footer from the Theme Builder by following these steps:
In the WordPress admin panel, go to the Templates menu > and click Theme Builder.
You can click the button next to each category, or click Add new and choose Header or Footer.
Now you can choose a prebuilt Header or Footer template, or create one from scratch.
Once you’ve made the necessary changes to the Header or Footer design, click the Publish button and choose where to publish the Header or Footer. The default is Entire Site.
That’s it! You can now see your custom Header or Footer live on your site.
We can use the pre-designed templates offered by Elementor Pro, or design from scratch with the builder. We can also use a pre-designed template and then customize it to our liking.