
Step-by-step video
What is a Custom Post Type?
Custom Post Types (custom post types), also known as CPT, in WordPress are content types such as posts or pages. Since WordPress evolved from a simple blogging platform into a robust CMS, the term Post remained.
However, a Post Type can be any type of content. By default, WordPress comes with these post types: Post, Page, Attachment, Revision, and Navigation Menu. Other examples of post types are Portfolio, Testimonials, Products, etc.
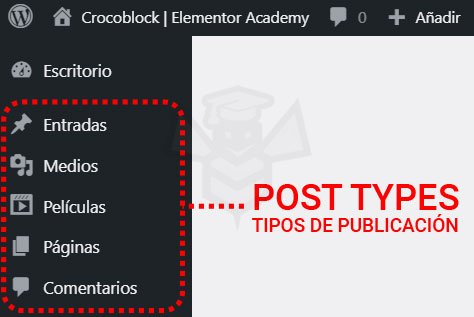
In the image, we can see the Post Types that WordPress includes by default: Posts, Media, Pages, and Comments. And we also see one created by us: Movies.
With the Post Type feature in the JetEngine plugin included in the Crocoblock suite, you can create your own Custom Post Types (custom post types) and name them however you like. For example, if you have a movie website, you might want to create a post type to add movies. This post type can have different custom fields and even its own custom taxonomy structure (for example: custom categories and tags).
What are taxonomies?
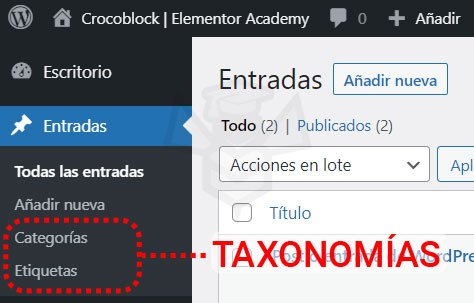
Taxonomy in WordPress is one of those things everyone uses, but they don’t realize they’re using it. WordPress taxonomies, derived from the Linnaean taxonomy method of biological classification, are used as a way to group posts and custom post types.
WordPress has two very popular taxonomies that people use regularly: Categories and Tags, which allow us to classify posts and then get lists of them by filtering by categories or tags.
What are terms in WordPress?
In WordPress, terms refer to the different items included in a taxonomy. For example, a website’s posts have the Categories taxonomy, and within Categories we’ve created different terms that help us classify our posts. We can also create different tags to assign to our posts—each of these tags is a term.
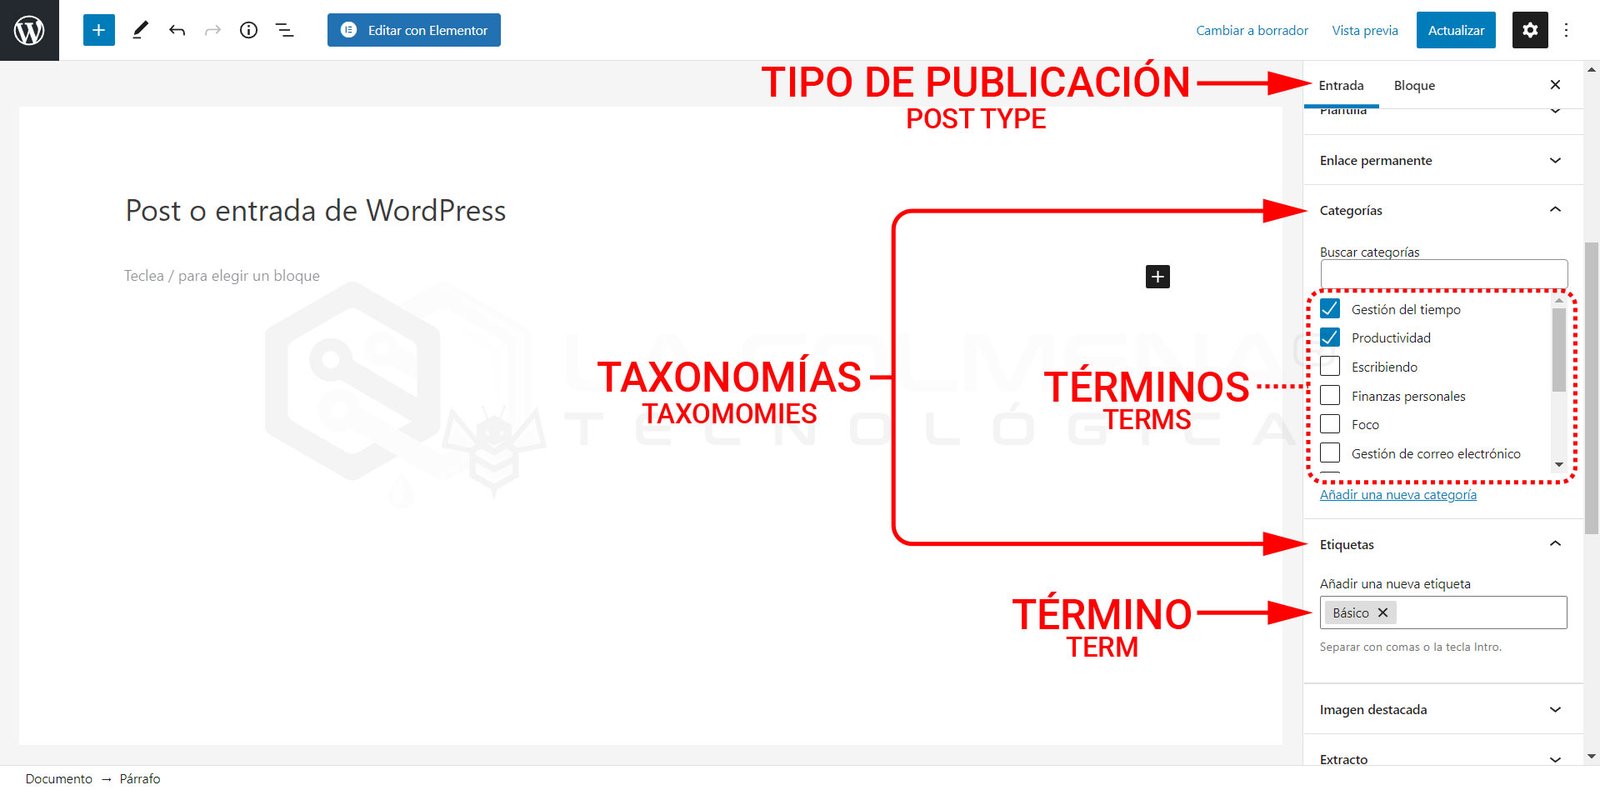
So we can say that the Posts post type has two taxonomies (categories and tags), and within these taxonomies we can create as many terms as we want. As we can see in the image, Time management, Productivity, Writing, … are terms in the Category taxonomy. And Basic is a term in the Tag taxonomy. The difference between these two taxonomies is that categories are hierarchical and tags are not.
1. How to create a new Custom Post Type or CPT
First, you need to install and activate the JetEngine plugin from the Crocoblock suite. If you haven’t done it yet, go to the WordPress admin panel, open the Crocoblock section in the menu, and click the Update & Installation menu option. From here you can install and activate any of the plugins in this suite.
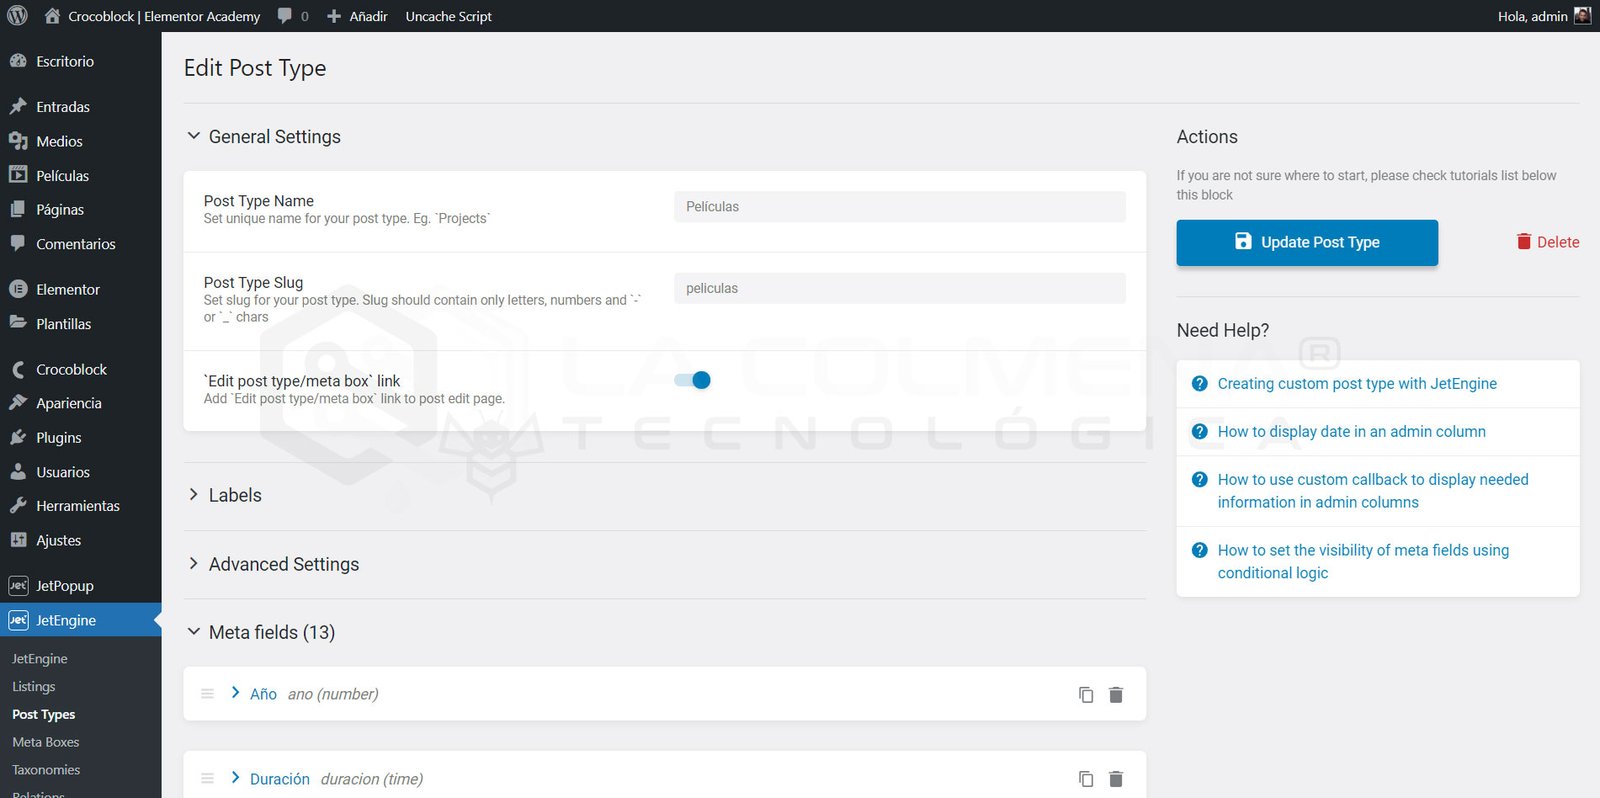
Go to the WordPress admin panel, open JetEngine in the left sidebar menu, and click Post Type.
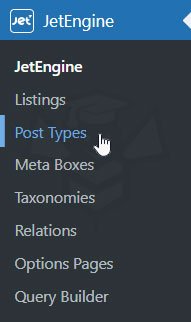
Here you’ll see the Custom Post Types list, where all your CPTs will appear once you have them. Click the Add New button to create your first CPT.

2. Configure your CPT
Now you need to fill in the information required to create your new custom post type.
General Settings
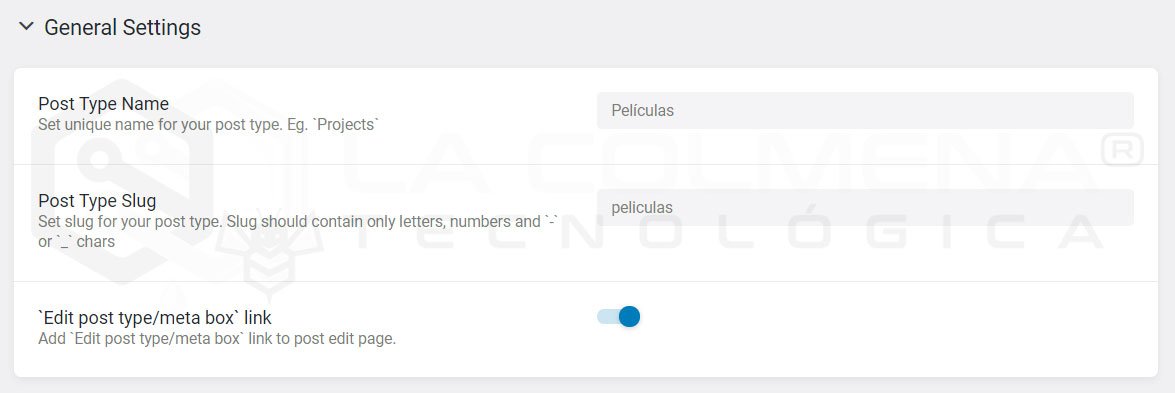
- Post Type Name (Post type name). This is the CPT title that will be visible in the post types list.
- Post Type Slug (Post type slug). It’s generated automatically from the name you entered above. The slug will be used for this CPT’s archive permalink, e.g., https://domain.com/movies.
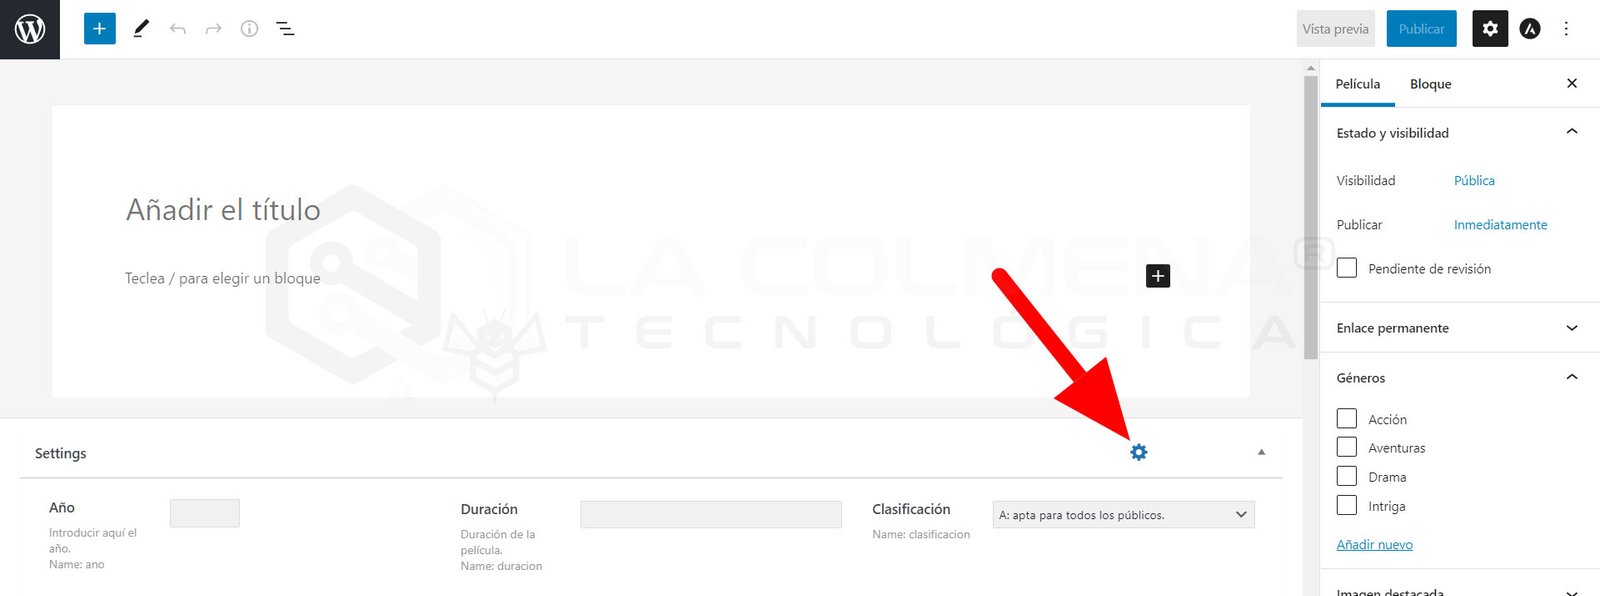
- “Edit post type / meta box” link (“Edit post type / meta box” link). This option creates a shortcut from each edit screen for posts of this custom type to the page you’re on now. If enabled, a small gear icon appears in the top-right corner of the meta box block on a post edit screen. When the user clicks it, they’ll be taken to the Custom Post Type edit page.
Labels
Since the Custom Post Type is visible in the WordPress admin panel, its name will be used for various options. In the Labels block, you can translate all these labels. For example, instead of Add New Post, you can change it to Add new movie. Review the list of labels and update their translation. In the next image you can see an example of all the translations.

Advanced Settings
In the Advanced Settings block, there’s a set of features connected to the CPT shown in the WordPress dashboard.
If these options are hard to interpret, just leave them at their default values.
- Is Public (Public). While this option is enabled, the CPT will be visible and accessible in the dashboard, and can be seen by both admins and users.
- Exclude From Search (Exclude from search). You can create a CPT that only admins will use. In that case, you can enable this option and posts of this custom type won’t be available to the front-end search tools (what users see).
- Publicly Queryable (Publicly queryable). This toggle is connected to Is Public (Public). If enabled, queries for this CPT can be made on the front end (what users see).
- Show Admin UI (Show admin UI). If you disable this option, the tab or link to edit posts of this custom type will disappear from the dashboard. You’ll be able to see the list of posts but not edit them.
- Show Admin Menu, Show in Naw Menu, Show in Rest API (Show in admin menu, Show in navigation menu, Show in the API Rest). These three toggles let you configure the CPT’s visibility more specifically. You can choose to hide the CPT from the admin menu, the navigation menu, or the REST API.
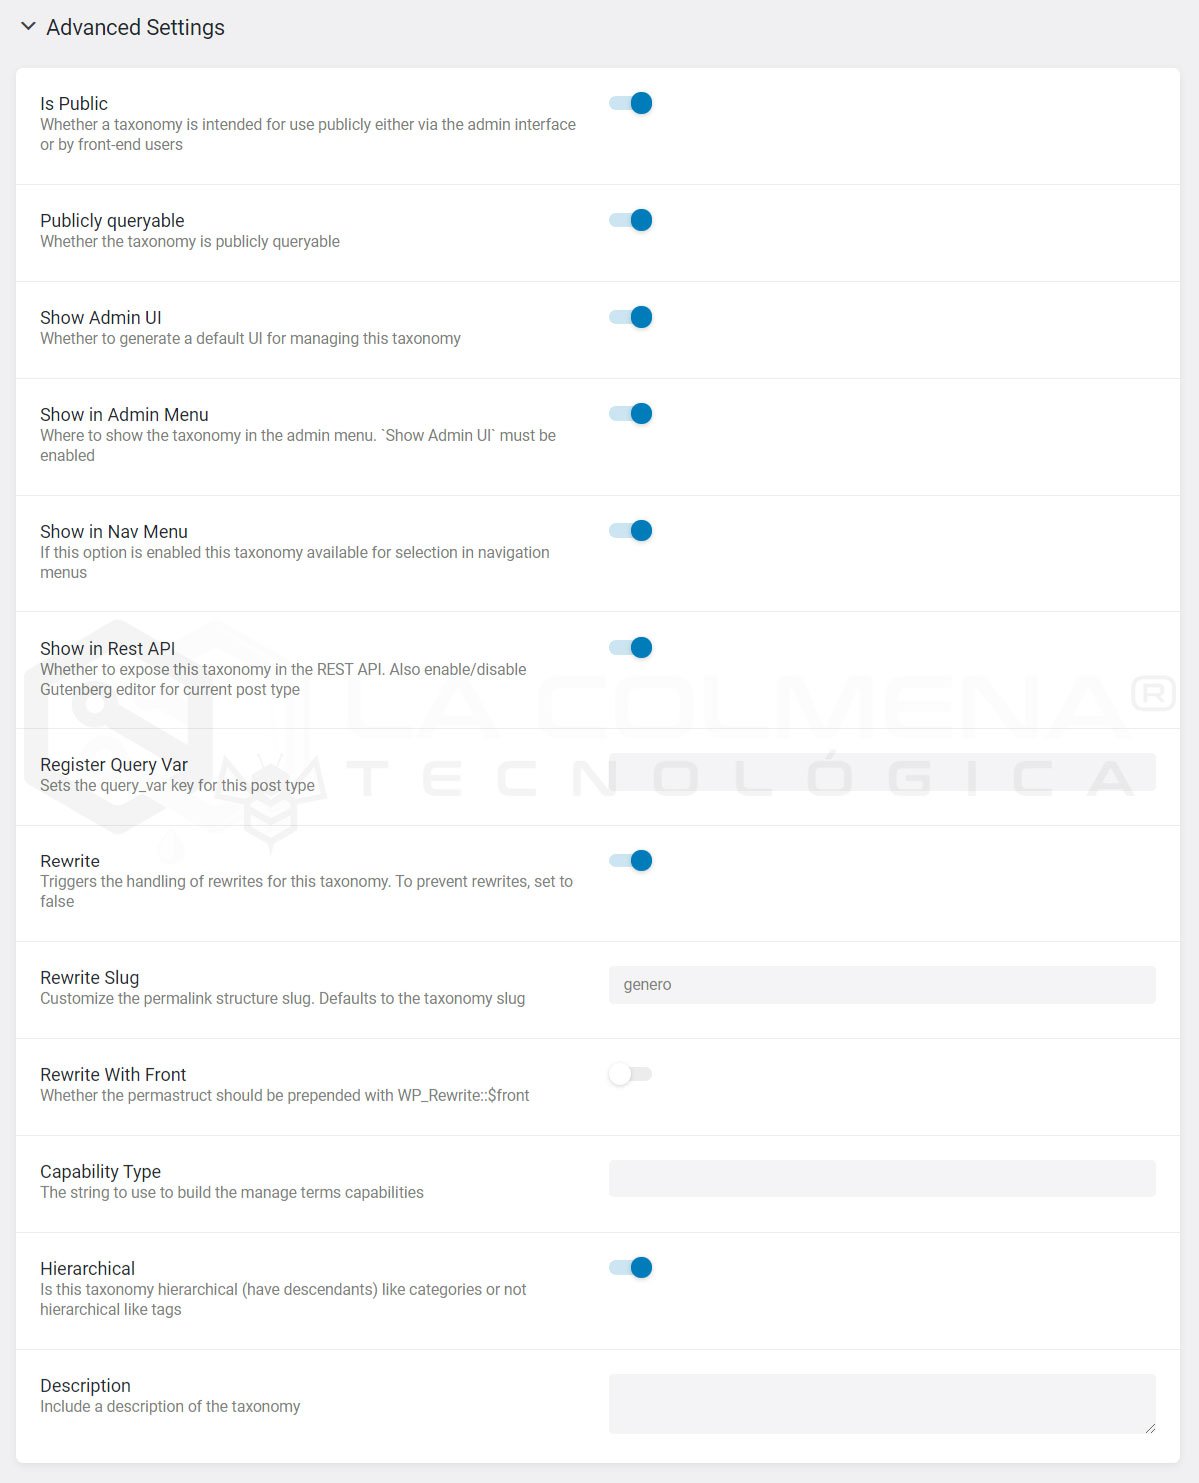
- Register Query Var (Register query var). If you enable this toggle, a query_var will be registered for this CPT.
- Rewrite (Rewrite). Enables rewriting the archive slug for this post type.
- Rewrite Slug (Rewrite slug). To use this field, the previous option (Rewrite) must be enabled. From here you can rewrite this post type’s slug and change it to another one.
- Rewrite With Front. Similar to the previous one, but via the $front property.
- Capability Type (Capability type). In this field, you define which string WP will use to build this CPT’s capabilities; by default, post.
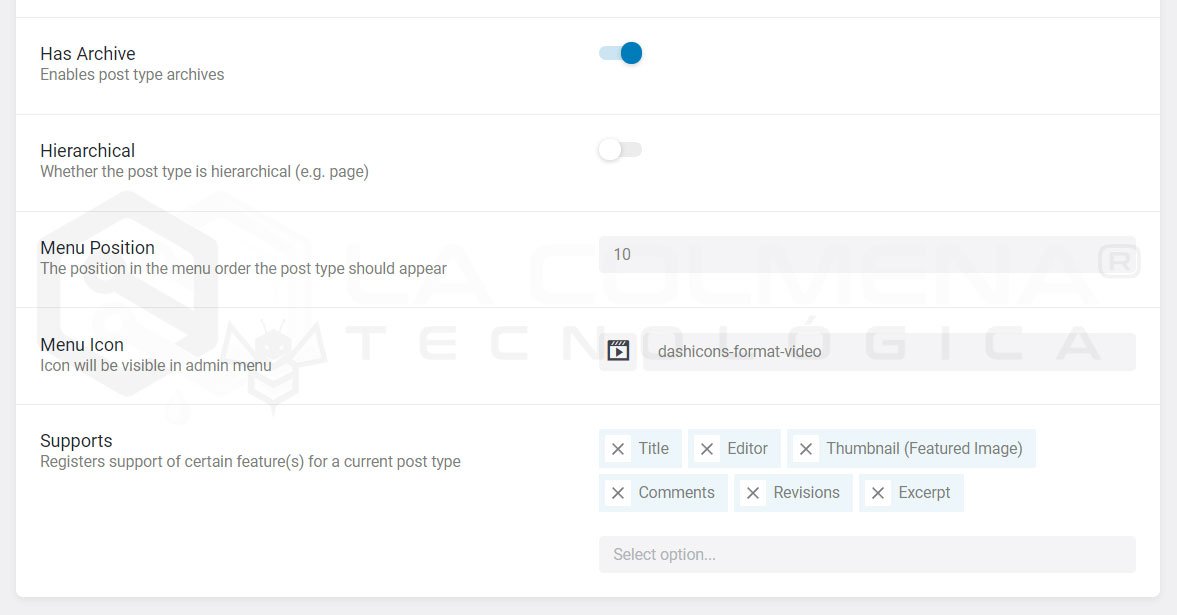
- Has Archive (Has archive). Enable this toggle if you want the CPT to have a posts archive. The posts archive is the page that shows the list of all posts.
- Hierarchial (Hierarchical). If you want this post type to be hierarchical, enable this option. This means posts can have a parent post, like pages do.
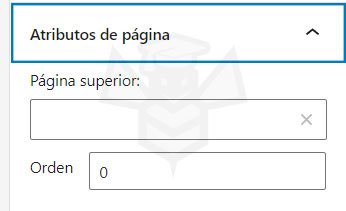
- Menu Position (Menu position). The number you enter here will be the position number where this CPT’s tab will appear in the WordPress Admin Panel navigation menu.
- Menu Icon (Menu icon). Each tab in the WordPress admin panel navigation menu has an icon. Here you can choose one for your CPT tab.
- Supports (Supports). From this dropdown, you can choose the additional support blocks that will appear on the CPT editor page. You can include: Title, Gutenberg Editor (Editor), Comments, Revisions, Trackbacks, Author, Excerpt, Page Attributes, Featured Image (Thumbnail), Custom Fields, and Post Formats.
Meta Fields
Now we’ll see how to configure the custom meta fields created with the JetEngine add-on, and we’ll take a closer look at the field types.
What is a Meta Field?
Meta fields let you add additional information to your custom post, which you can then display on the front end (what users see) with the help of dynamic widgets. You can also use them to filter the posts list.
In the case of simple posts like Posts, they only have a title, the body we edit with the Gutenberg editor, and a featured image. But with JetEngine we can add meta fields of different types as we like. These are all the meta field types that JetEngine’s Post Type feature lets us add:
- Text
- Date
- Time
- Datetime
- Textarea
- WYSIWYG
- Switcher
- Checkbox
- Iconpicker
- Media
- Gallery
- Radio
- Repeater
- Select
- Number
- Colorpicker
- Posts
- HTML
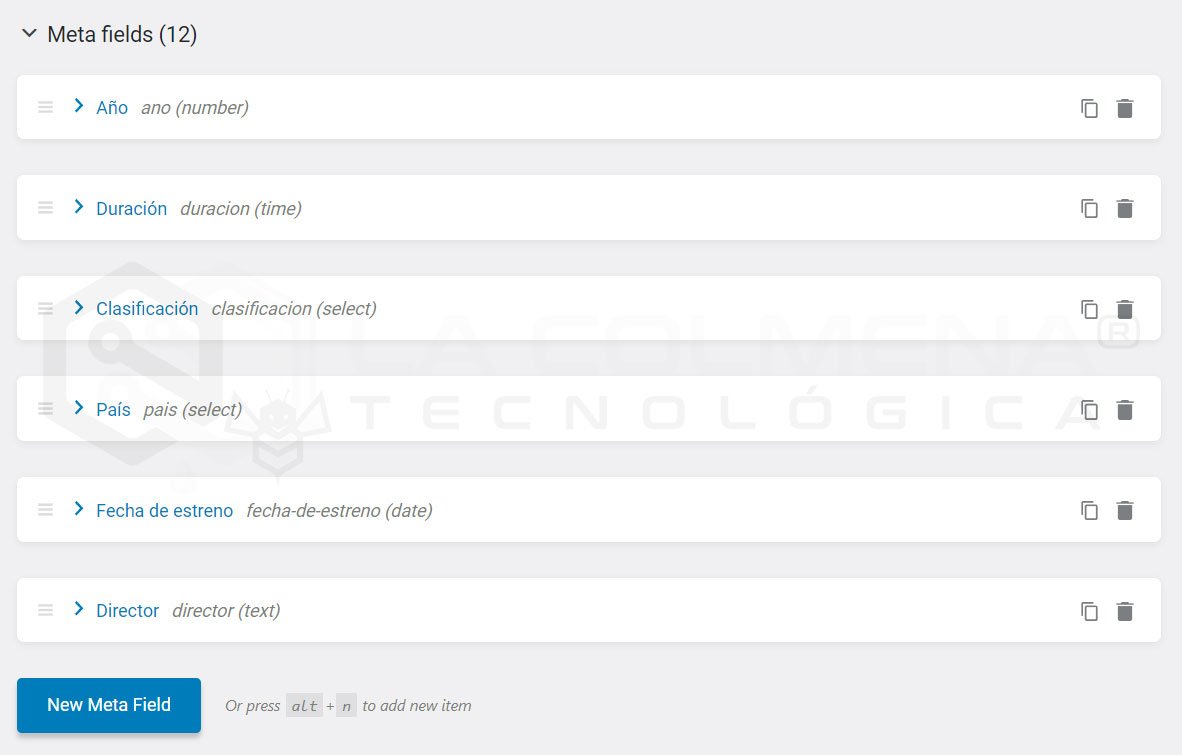
You can drag and drop the fields to reorder them by hovering your mouse pointer over this icon

Meta field settings
To create a meta field, first click the New Meta Field button. Then fill out the form for this new meta field.
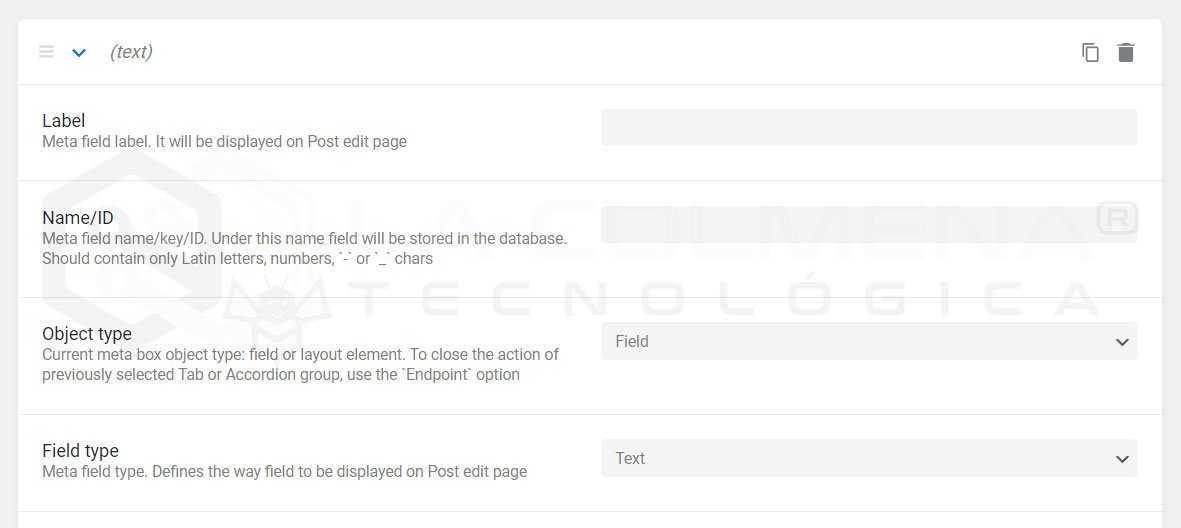
- Label (Label): enter the field title here. This is how it will be shown to you and other users later on.
- Name/ID (Name/ID): this value is generated automatically based on the text you enter in the Label field. If you want to change it, keep in mind this ID must not include spaces and make sure it only contains letters and numbers. Autocomplete will also add a random number to the name if it isn’t unique. Fields with similar IDs could confuse you and cause issues if you want to use them elsewhere. That’s why autocomplete avoids using similar IDs.
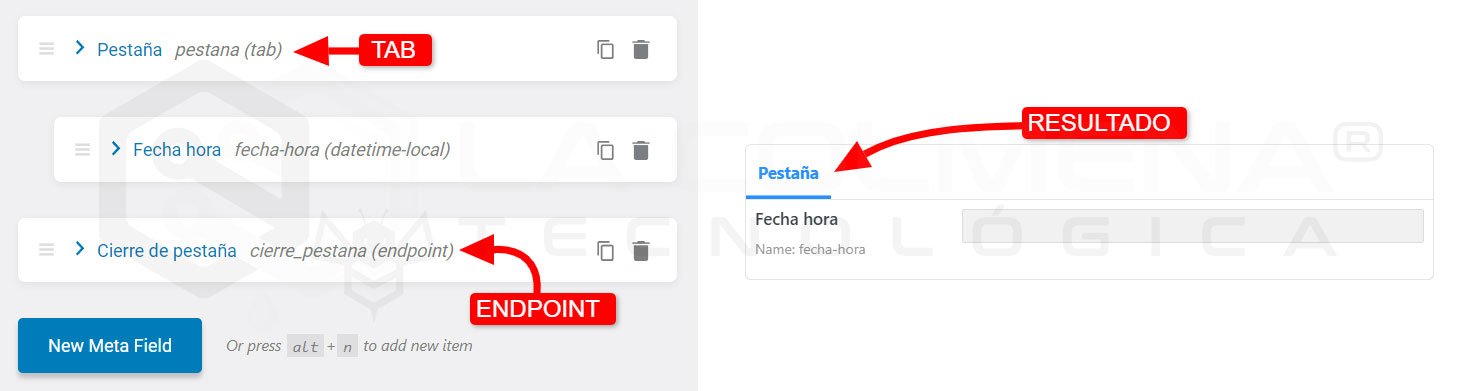
- Object type (Object type): here you can choose the object type. The Field option means you’ll be able to add values there. Tab, Accordion, and Endpoint will create a specific layout. You can group one or more meta fields in a Tab (using Tab + Endpoint) or in an Accordion (Accordion + Endpoint).
Remember you can drag and drop the fields to place them between Tab and Endpoint or between Accordion and Endpoint—use this icon for that
Meta field types
When you select “Field” in Objet Type (Field type), we now have to choose which type of field we want to use. We’ll do this in the Field Type (Field type) option. Next, we’ll look at each type.
Text
If you want to add an additional field with custom text to the post type, this type fits your needs perfectly. You can add extra information about posts using this field. You can also specify the maximum number of characters allowed in the field.

Date
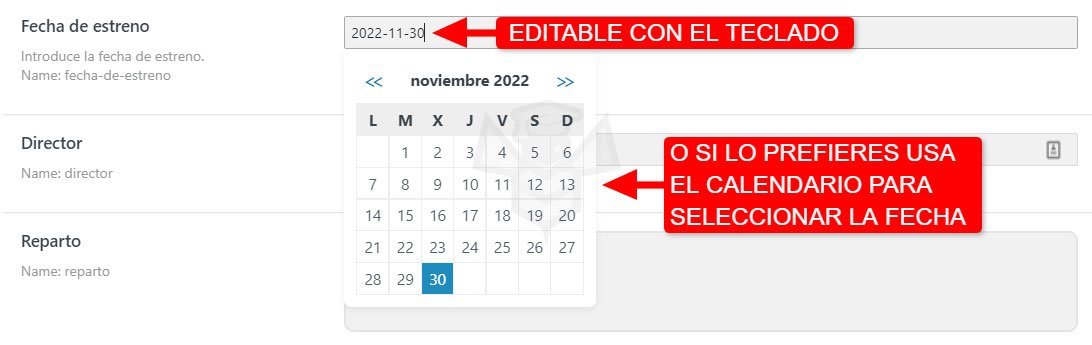
This meta field is ideal for adding dates for events, meetings, conferences, etc. You can also save the date as a timestamp by enabling the Save as timestamp toggle, which will let you run queries and filters by date. This meta field lets you add the date manually or via a calendar picker—whichever you prefer.
The date input format is yy-mm-dd, e.g., 22/12/30, but don’t worry—when we display this field on the front end (what users see), we can format the output however we like.
Time
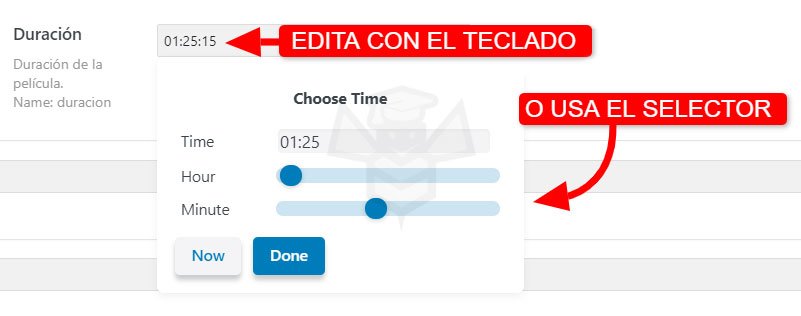
This is an appropriate type for adding a timestamp to your posts. Add a specific time for events, meetings, conferences, or a duration in this meta field. You can use the picker to select hours and minutes with sliders, or edit with the keyboard using the hh:mm:ss format. From the keyboard you can enter hours, minutes, and seconds, for example 01:25:15.
Datetime
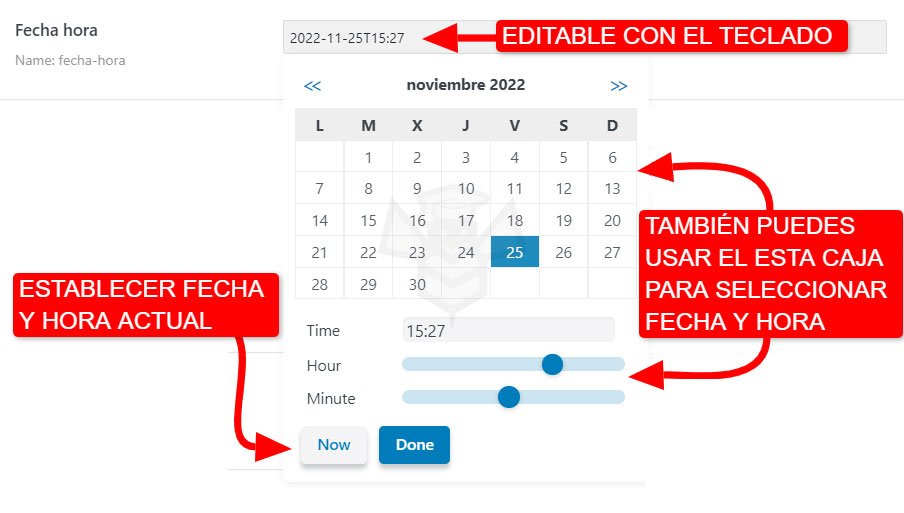
It lets you select the date and time in the same place. You can also save the date and time as a timestamp by enabling the Save as timestamp toggle, which will give you the ability to run queries and filters by date. This meta field lets you add the date and time manually or via a calendar picker—whichever you prefer.
The date input format is yy-mm-ddThh:mm, e.g., 22-11-25T15:27, but don’t worry—when we display this field on the front end (what users see), we can format the output however we like.
Textarea
You can use this type to add a text area to posts with a line-by-line text layout. You can also set the character limit for this field value.

WYSIWYG
This meta field type includes a basic rich-text editor that lets you format the text as you like by adding bold, italics, size, color, bullets, links, etc.
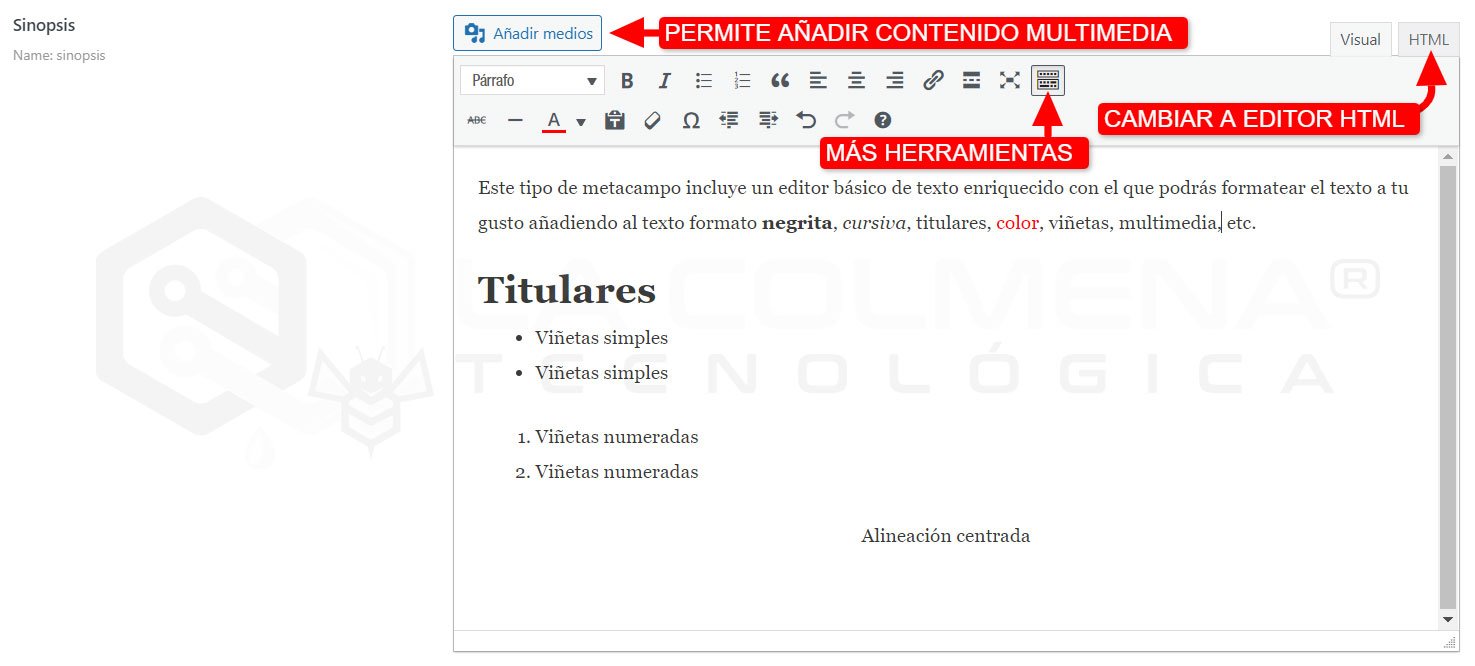
Switcher
You can add a switcher as a custom field to your posts, products, events, etc., which lets you enable/disable the appropriate option in the meta field block. You can also use this switcher to set conditional display logic for another meta field. For example, if this switcher isn’t enabled, one or more other meta fields won’t be shown.

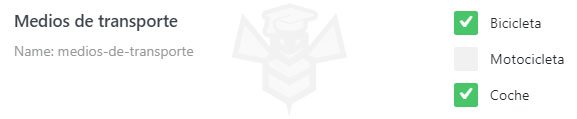
Checkbox
This type gives you the option to add checkboxes with different options. You can add one or several, and add these options manually or via a glossary you can create from the JetEngine > JetEngine > Glossaries menu. Creating a glossary lets you reuse that same glossary across different meta fields, even in other Post Types.
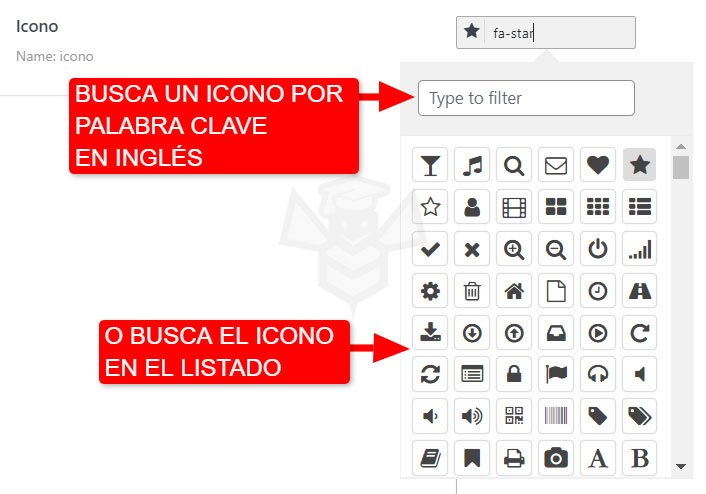
Iconpicker
This meta field includes an icon picker that lets you choose an appropriate icon for each post.
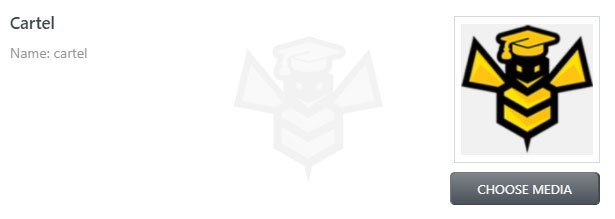
Media
This type will help you add a media file—an image in particular—although you shouldn’t forget you can also use the featured image to add an image to the post. You can also add any file type you can upload to the WordPress media library (PDF, MP3, MP4, …).
Gallery
This type will help you add one or more media files to the post, especially images, although you can also add any file type you can upload to the WordPress media library (PDF, MP3, MP4, …).

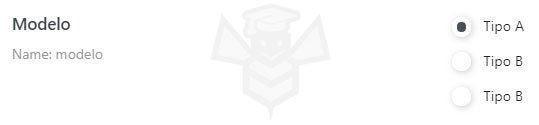
Radio
The radio type is perfect for adding radio options. They differ from checkboxes in that with radio buttons you can only select one of the available options. You can add the available options manually or via a glossary you can create from the JetEngine > JetEngine > Glossaries menu. Creating a glossary lets you reuse that same glossary across different meta fields, even in other Post Types.
Repeater
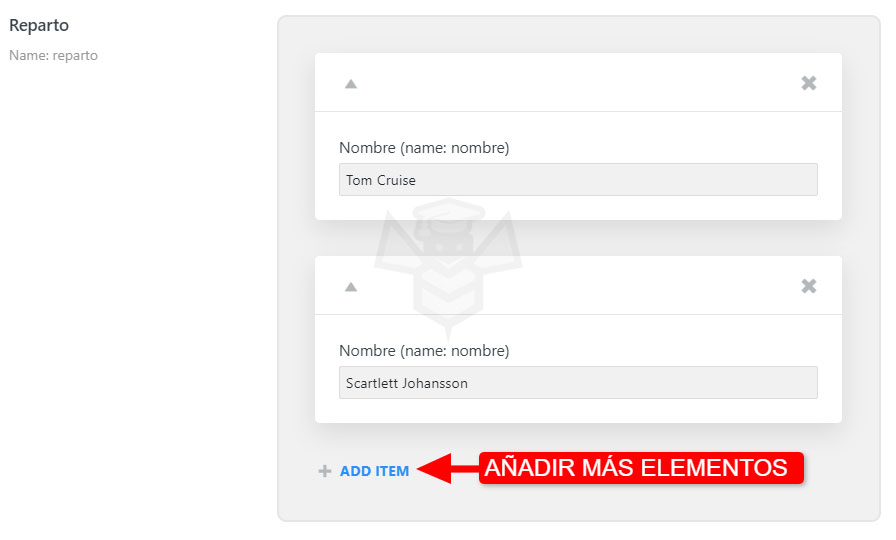
This type will help you add a content block with an undefined number of items—you can add as many as you need. You can also select the meta field type (Text, Date, Time, Datetime, …), and you can include more than one meta field in each item.
Select
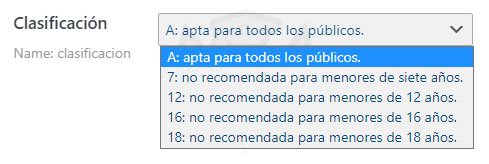
Use this content type to add a dropdown selector for the post. If you enable Allow to select multiple values, you’ll be able to select multiple options at once. This value can also be displayed using its own callback for a dynamic field.
Number
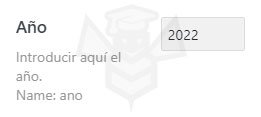
If you need a field that can only be filled in with numbers, this one is perfect.
Colorpicker
With this meta field type, you can select a color using the color palette or by typing its hex code.

Posts
This type lets you select a post from another CPT or even from the same CPT you’re creating.

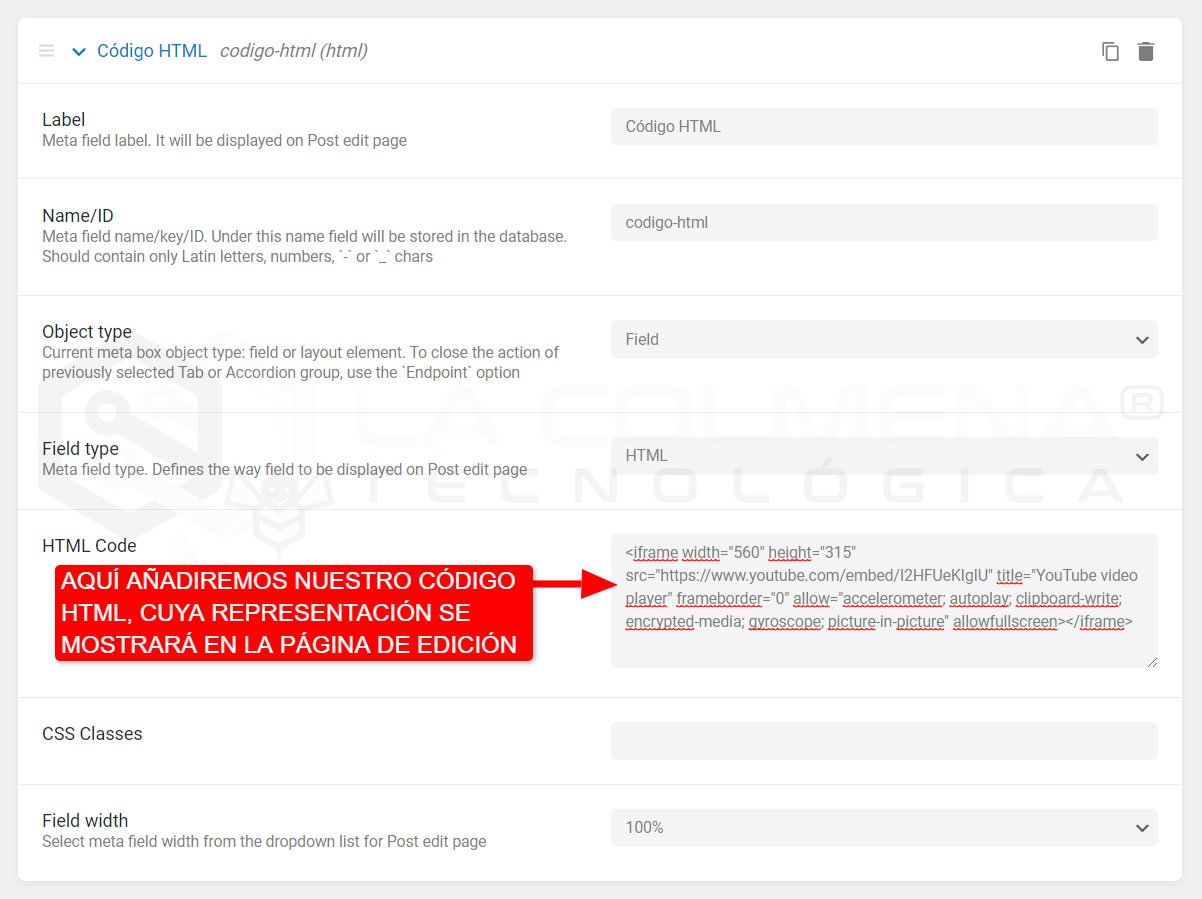
HTML
You can add custom HTML code to this meta field. It will be useful for inserting embedded code such as videos, audio, documents, etc. This code won’t be shown on the post edit screen; what you’ll see is the output of the code itself, which can be useful for adding help for the post editor. This meta field doesn’t actually store anything—it only renders the code we enter on the edit screen.
Custom values in Checkbox and Radio types
ATTENTION!
The following functionality can be used for custom posts, custom taxonomies, and the options page.
When you choose the Checkbox or Radio meta field types, two additional options appear: Allow Custom (Allow custom options) and Get options from the glossary (Get options from the glossary).
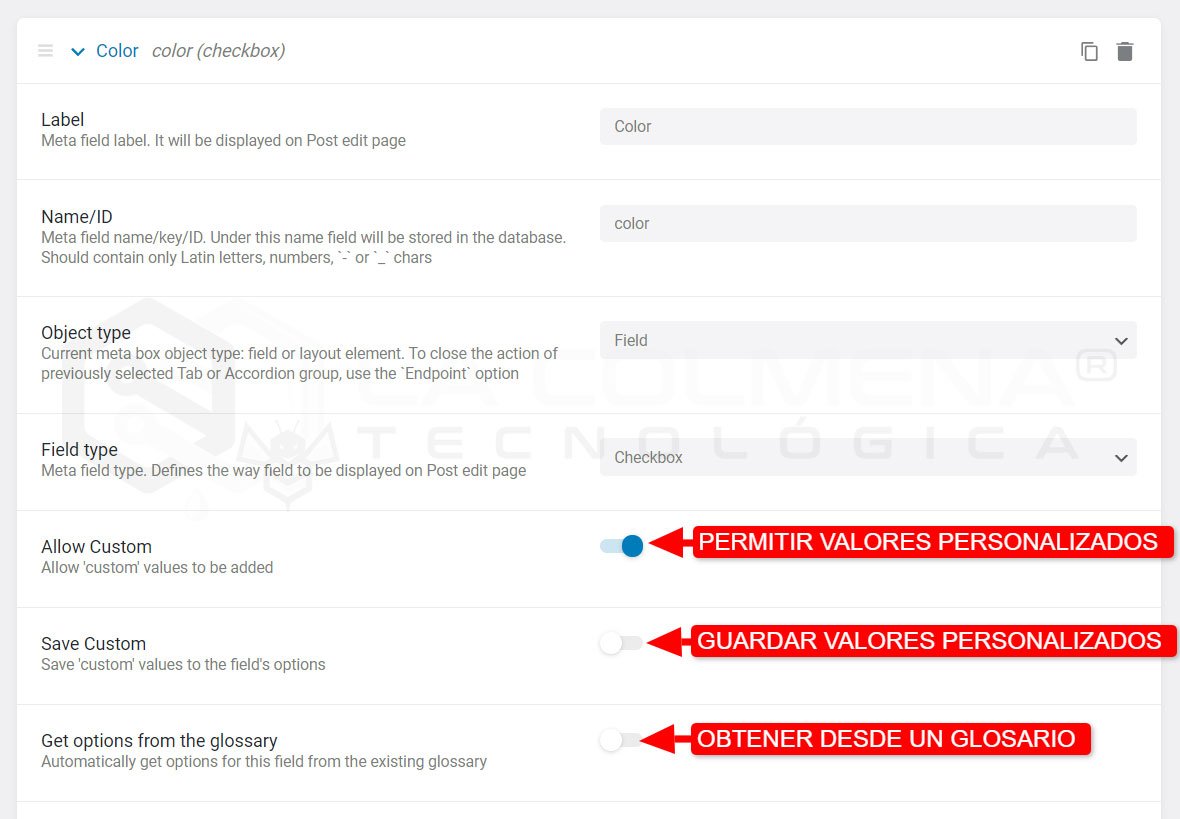
Allow Custom
This option lets you add custom values to those fields, saving them in the current post’s database but without saving them in the default values list.
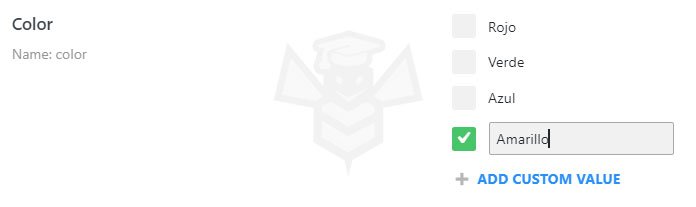
If you want those custom values to apply to all posts in the CPT, enable the Save Custom (Save custom) option and all its posts will contain this new value.
ATTENTION!
The Radio meta field is configured by analogy with the checkbox described above.
Get options from the glossary
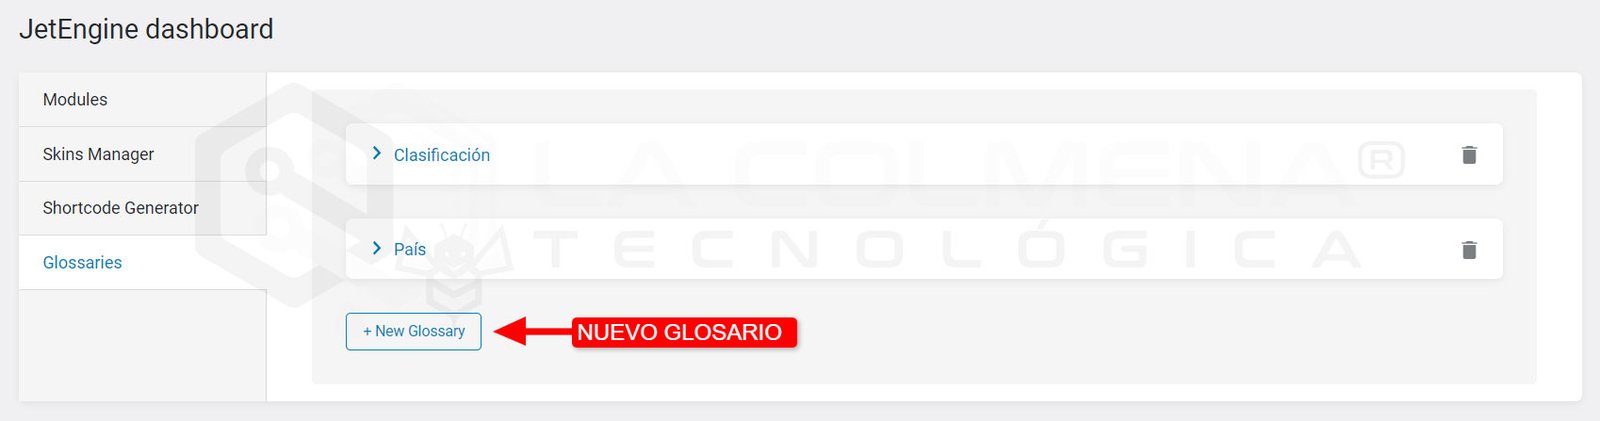
If you enable this option, it will let you add options from a Glossary to the list. You’ll be able to specify the specific glossary. To create a new glossary, go to JetEngine > JetEngine> Glossaries and click the +New Glossary (New glossary) button.
Save as array
When this option is enabled, the checked values will be stored as a simple PHP array. You need to use this option if you’re going to edit this field in a front-end form. If you don’t enable Save as array, the field won’t be pre-filled in the form.
NOTE!
It’s recommended to enable this option when creating the meta field. If you fill this field in your CPT and then enable the Save as array option, the field will reset and you’ll need to add the data again.
Other meta field parameters
There are the Description and Field width parameters, where you can add informational text for the editor and set the meta field width.
You can specify the Character limit and set a Default value for the current field. In addition, you can enable the Is required option to make the field mandatory.
The Conditional logic field lets you make fields visible only if conditions are met.
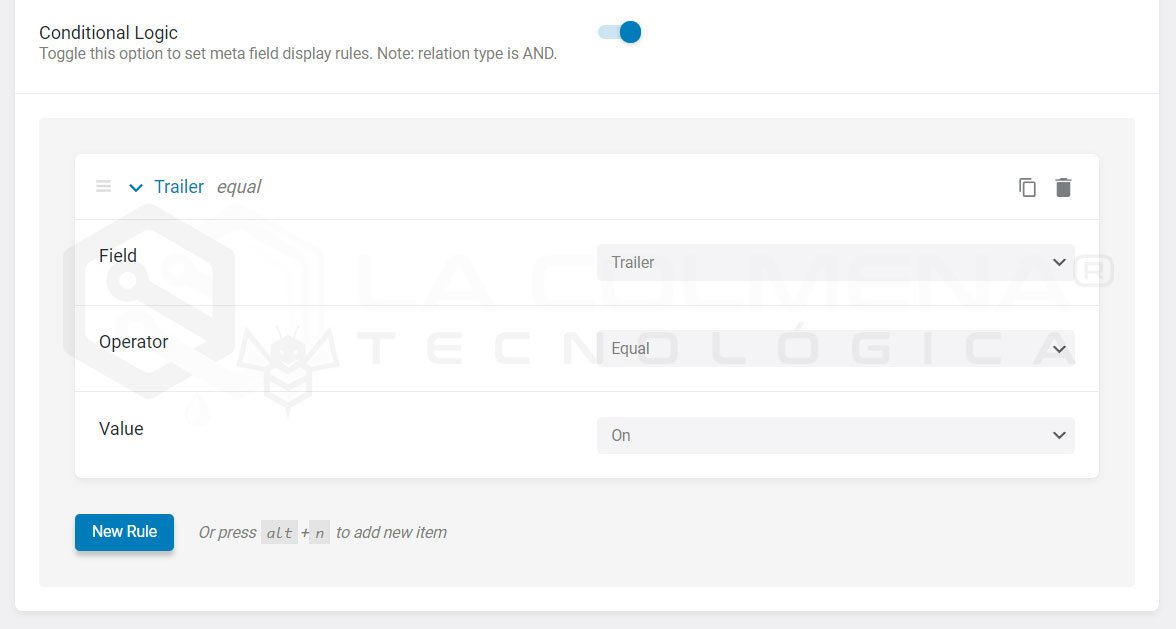
NOTE!
The Default value option is available only for text field types.
After you’ve added as many meta fields as you need, click the Update Post Type (Update Meta Box) button to save the changes.
You can display the content you’ve added in custom meta fields using Elementor in listings and templates.
Create taxonomies for a JetEngine Custom Post Type
In the WordPress admin panel menu, click JetEngine > Taxonomies and then click the Add New button to continue and create a new taxonomy. The process is very similar to creating a CPT. There are the same blocks: General Settings, Labels, Advanced Settings, and Meta fields.
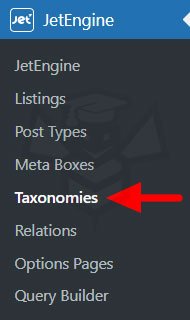
Remember that at the beginning of this post I explained what Taxonomies and Terms are.
1. General Settings
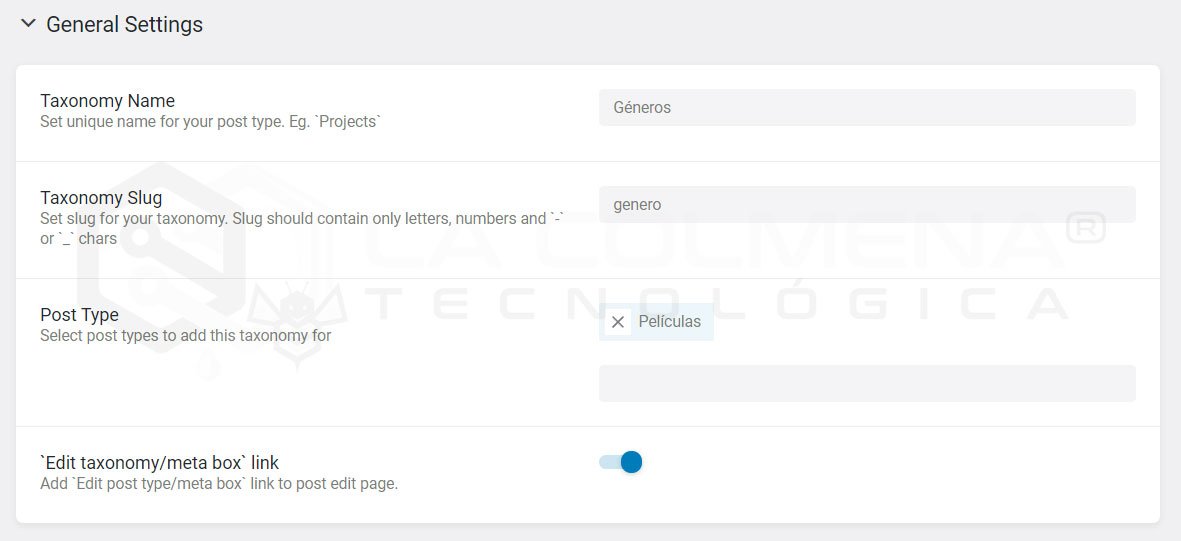
In General Settings there are fields such as:
- Taxonomie Name (Taxonomy name): set the taxonomy name, for example Projects or Portfolio, depending on the post type this taxonomy will be created for.
- Taxonomy Slug: it’s filled in automatically. The slug must be made up only of letters (without accent marks), numbers, and ‘-‘ or ‘_’. For example taxonomy_name.
- Post type: from the list, choose which post type this taxonomy will be created for. It can be one we created ourselves or an existing one.
- ‘Edit taxonomy/meta box’ link: In my opinion, this is useless. In the Post Type screen it has a function, but in the case of Taxonomies I haven’t seen it do anything.
2. Labels
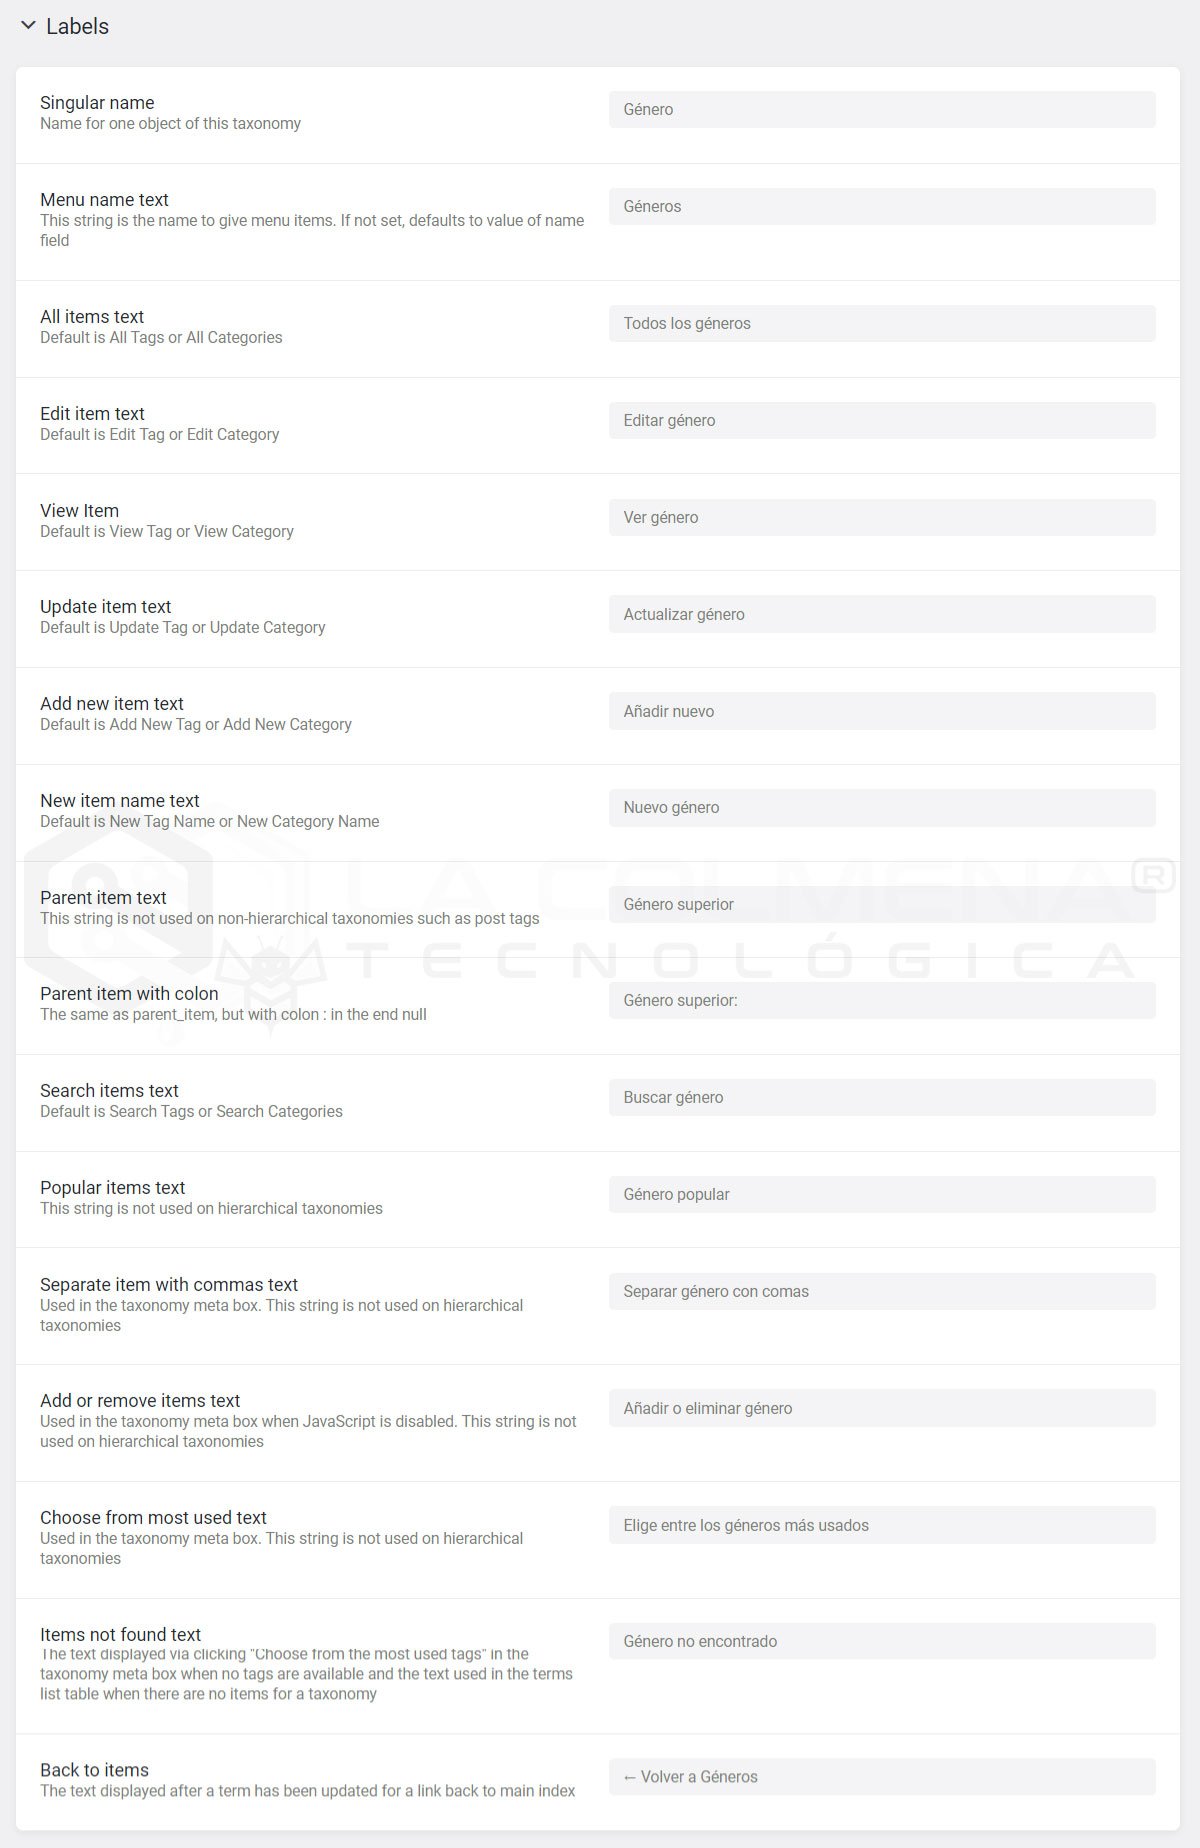
Since the taxonomy is visible in the WordPress admin panel, its name will be used for various options. In the Labels block, you can translate all these labels. For example, instead of Add New Category, you can change it to Add new category. Review the list of labels and update their translation.
In the next image you can see an example of all the translations for a category type I’ve called Genre (designed to create movie genres).
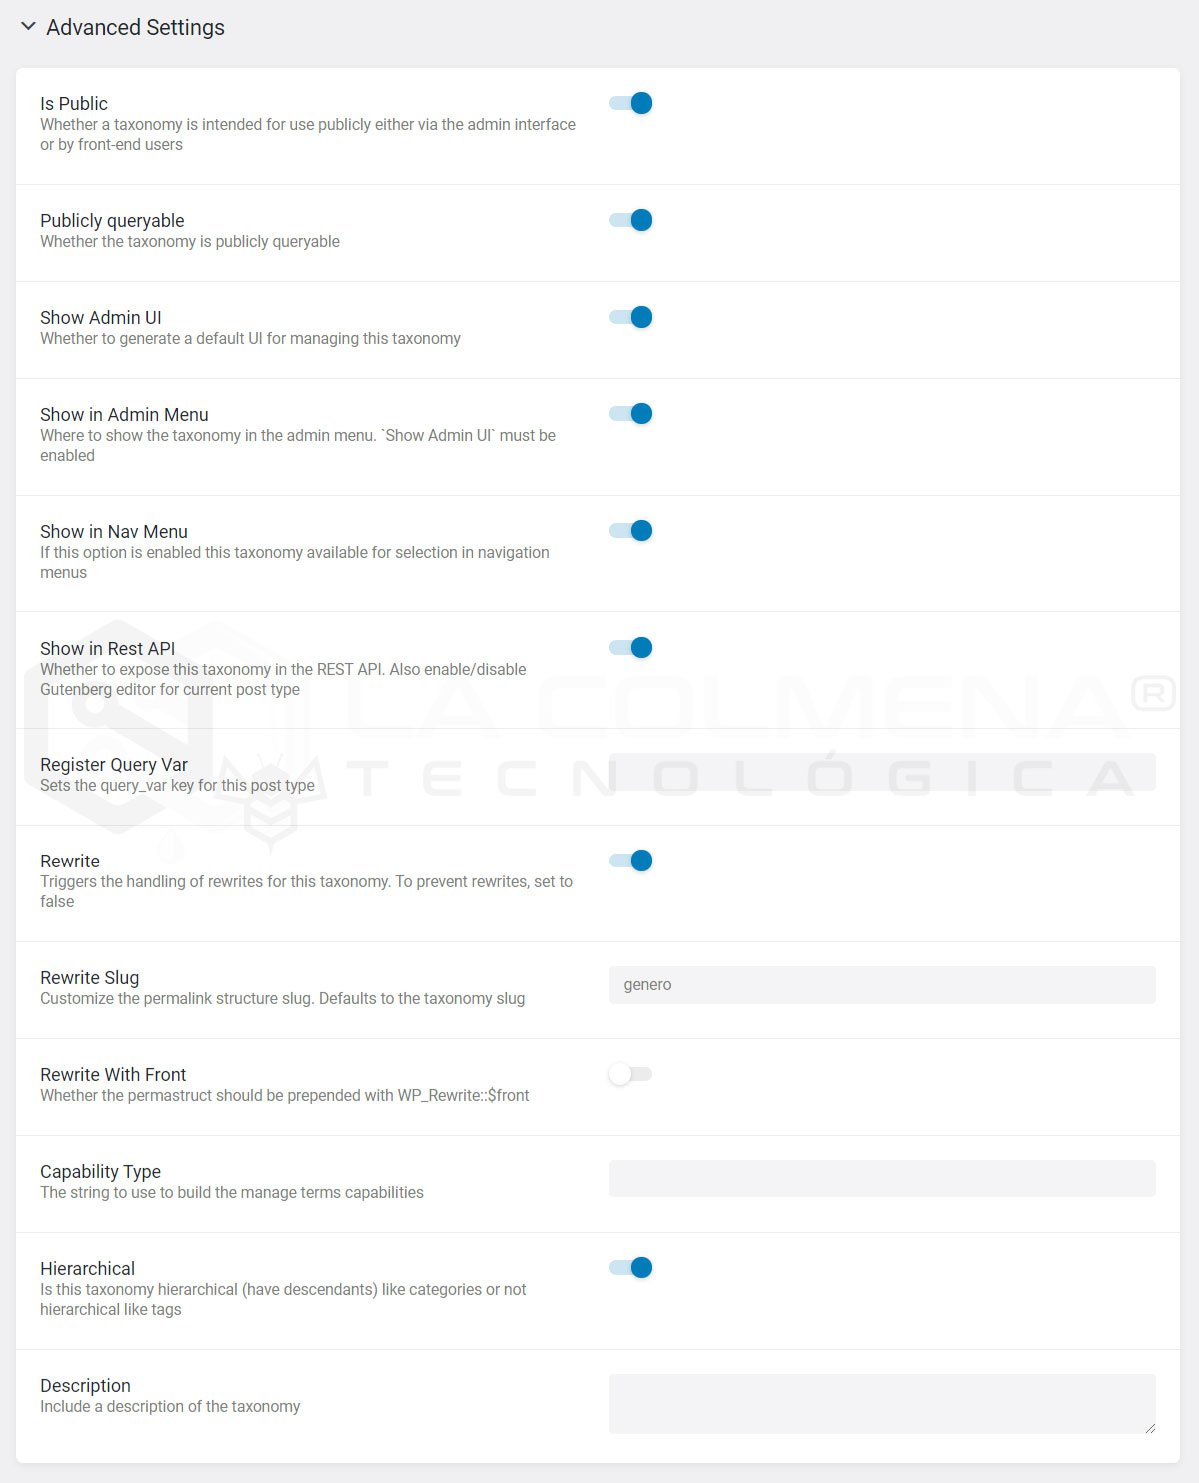
3. Advanced Settings
This block lets you configure how the taxonomy is displayed. You simply decide whether you want it to be public or shown in the admin menu, etc. The only option worth highlighting is Hierarchical. If we enable this checkbox, it will be displayed the same way Categories are displayed in Posts; if you leave it disabled, it will behave the same way Tags behave in Posts.
It has the same options as in the Post Type screen that you can see here.
4. Meta fields
Use them to display any additional information for the taxonomy, such as media, radio options, repeaters, etc. You can also customize the field widths to take up less space and arrange them side by side.
It works exactly the same as in Post Types, which you can see here.
Add and edit taxonomy
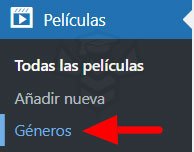
Once you’ve created the taxonomy, you’ll be able to add and edit terms from the WordPress menu.
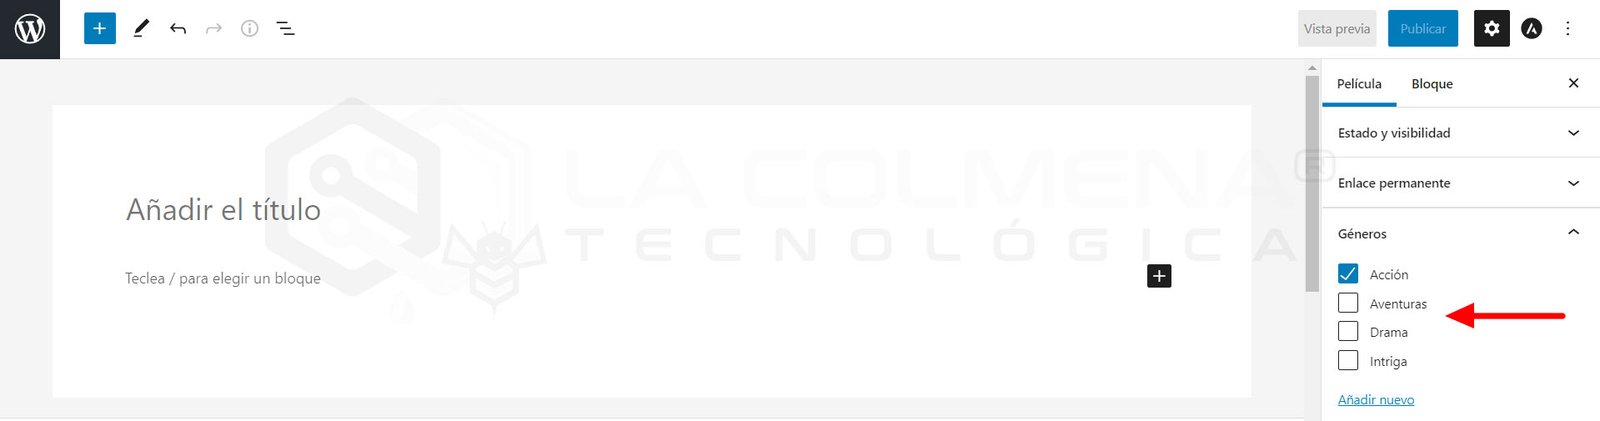
You’ll be able to select the terms for a custom post in the right-hand column.
If you’ve made it this far, I hope this tutorial has been helpful. If so, it would be great if you left me a rating.