
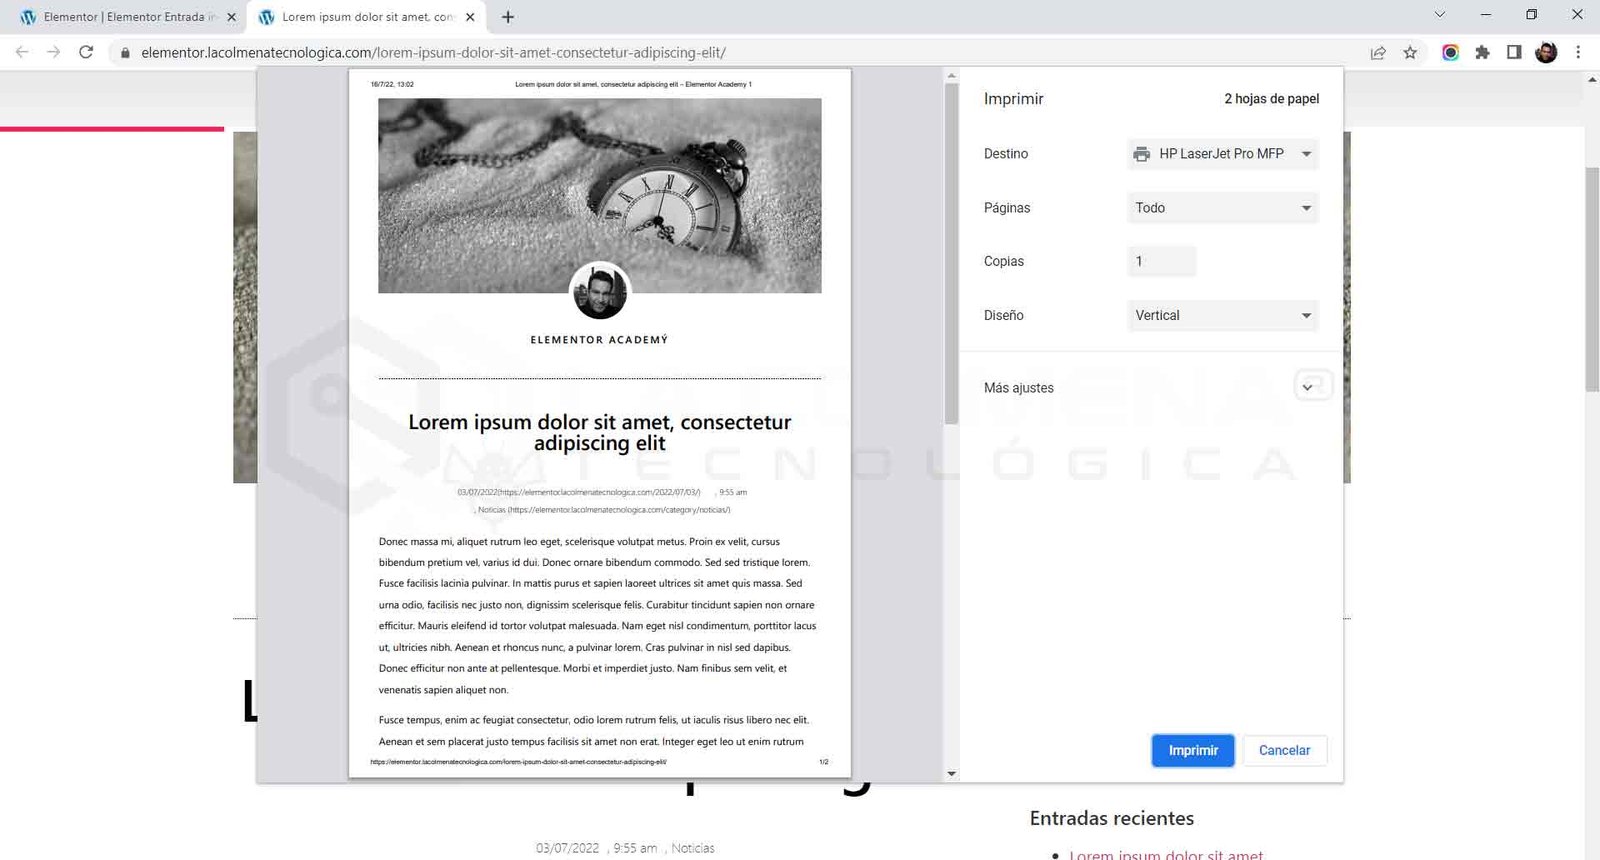
Step-by-step video
How to Print a Web Page
Sometimes we need to print the content of a web page to have it printed on paper. Browsers (Google Chrome, Microsoft Edge, Mozilla Firefox, Apple Safari, and Opera) include a function for this that makes the task easier. We can invoke this function from the browser itself but also from Elementor, so before anything else let’s see how we can print a web page.


The keyboard shortcut to print the active page in any of the above browsers is CTRL+P (Windows) and Command+P (Mac).
How to Print a Web Page with Google Chrome?
Google Chrome is by far the most popular internet browser, with a 70% share of users who prefer to use this browser. To print the active page, follow these steps.
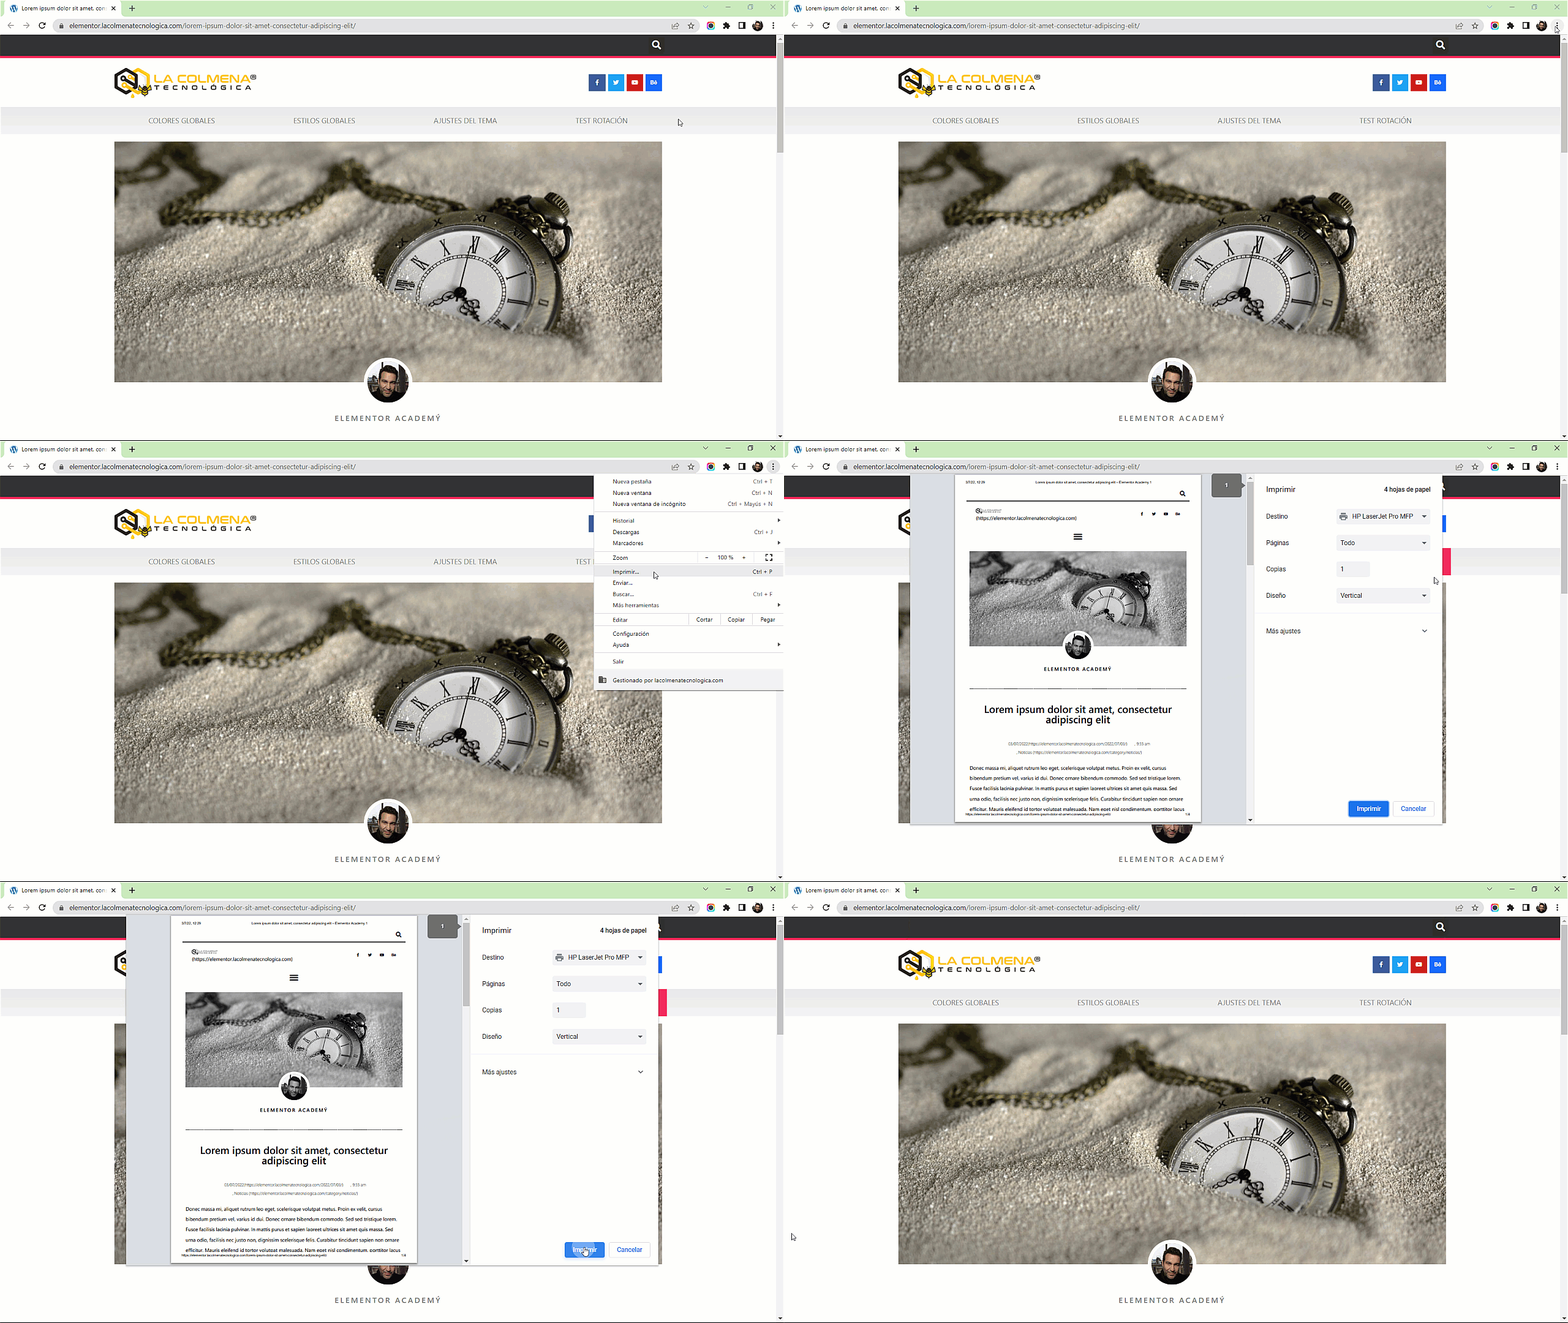
- Open the page you want to print.
- Click on the Google Chrome customization menu
 and from the pop-up menu click on Print…
 - The print configuration window will open and you’ll only need to click the Print button.
How to Print a Web Page with Edge?
Microsoft Edge is the successor to Microsoft Internet Explorer, which at one time was the most widely used, mainly because it came integrated into the Windows operating system. Microsoft Edge remains the default on computers running Windows 10 and later, and is currently the second most used browser with an 8% share.
Microsoft Edge has a significant performance advantage over Google Chrome in terms of memory usage. Simply put, Edge uses fewer resources. Chrome used to be known for its low RAM usage, but these days it has increased significantly.
Just like Google Chrome, it includes a function to print a web page that is extremely simple—let’s see how it’s done.
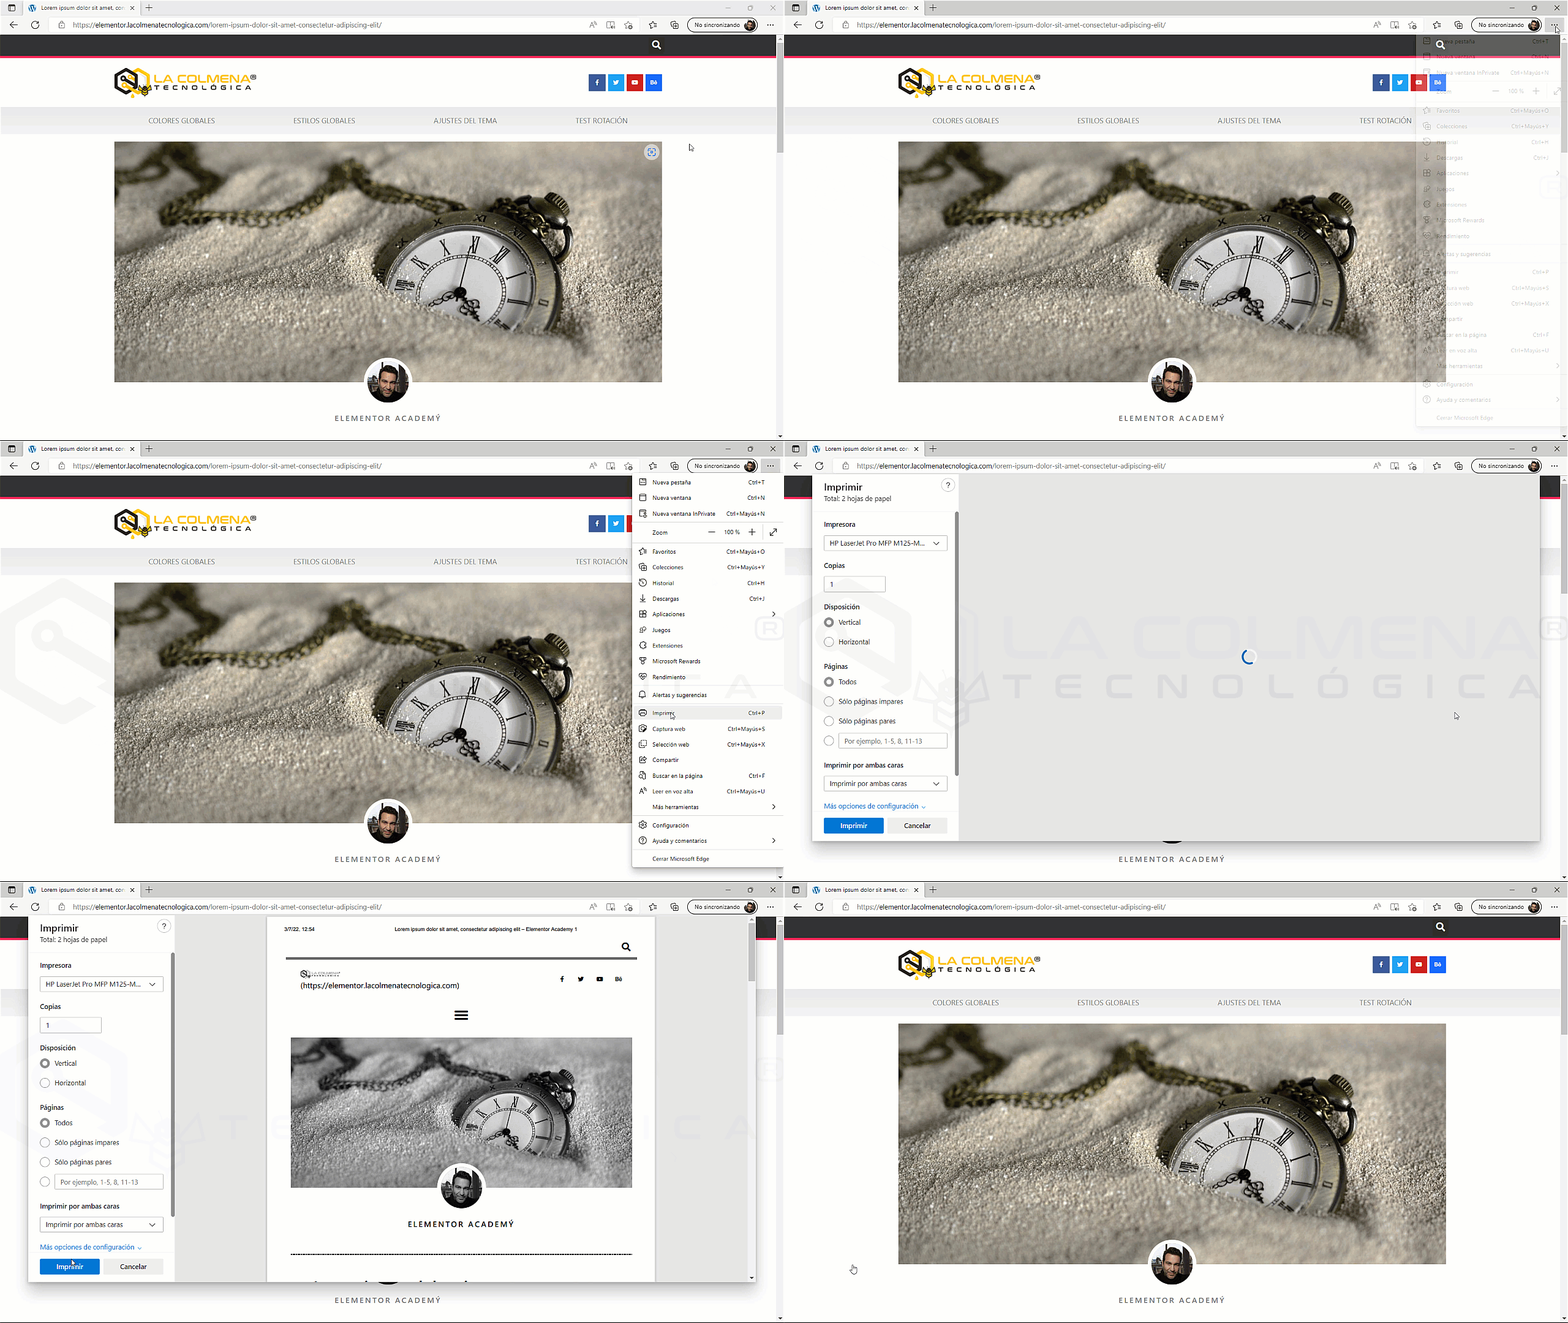
- Open the page you want to print.
- Click on the Edge Settings and more menu … and from the pop-up menu click on Print.
- The print configuration window will open and you’ll only need to click the Print button.
How to Print a Web Page with Firefox?
Mozilla Firefox is a robust browser that stands out from the rest for its security and speed. It’s my preferred browser since I like the web developer tools better than those in Chrome or Edge. Below we’ll see how we can print a web page.
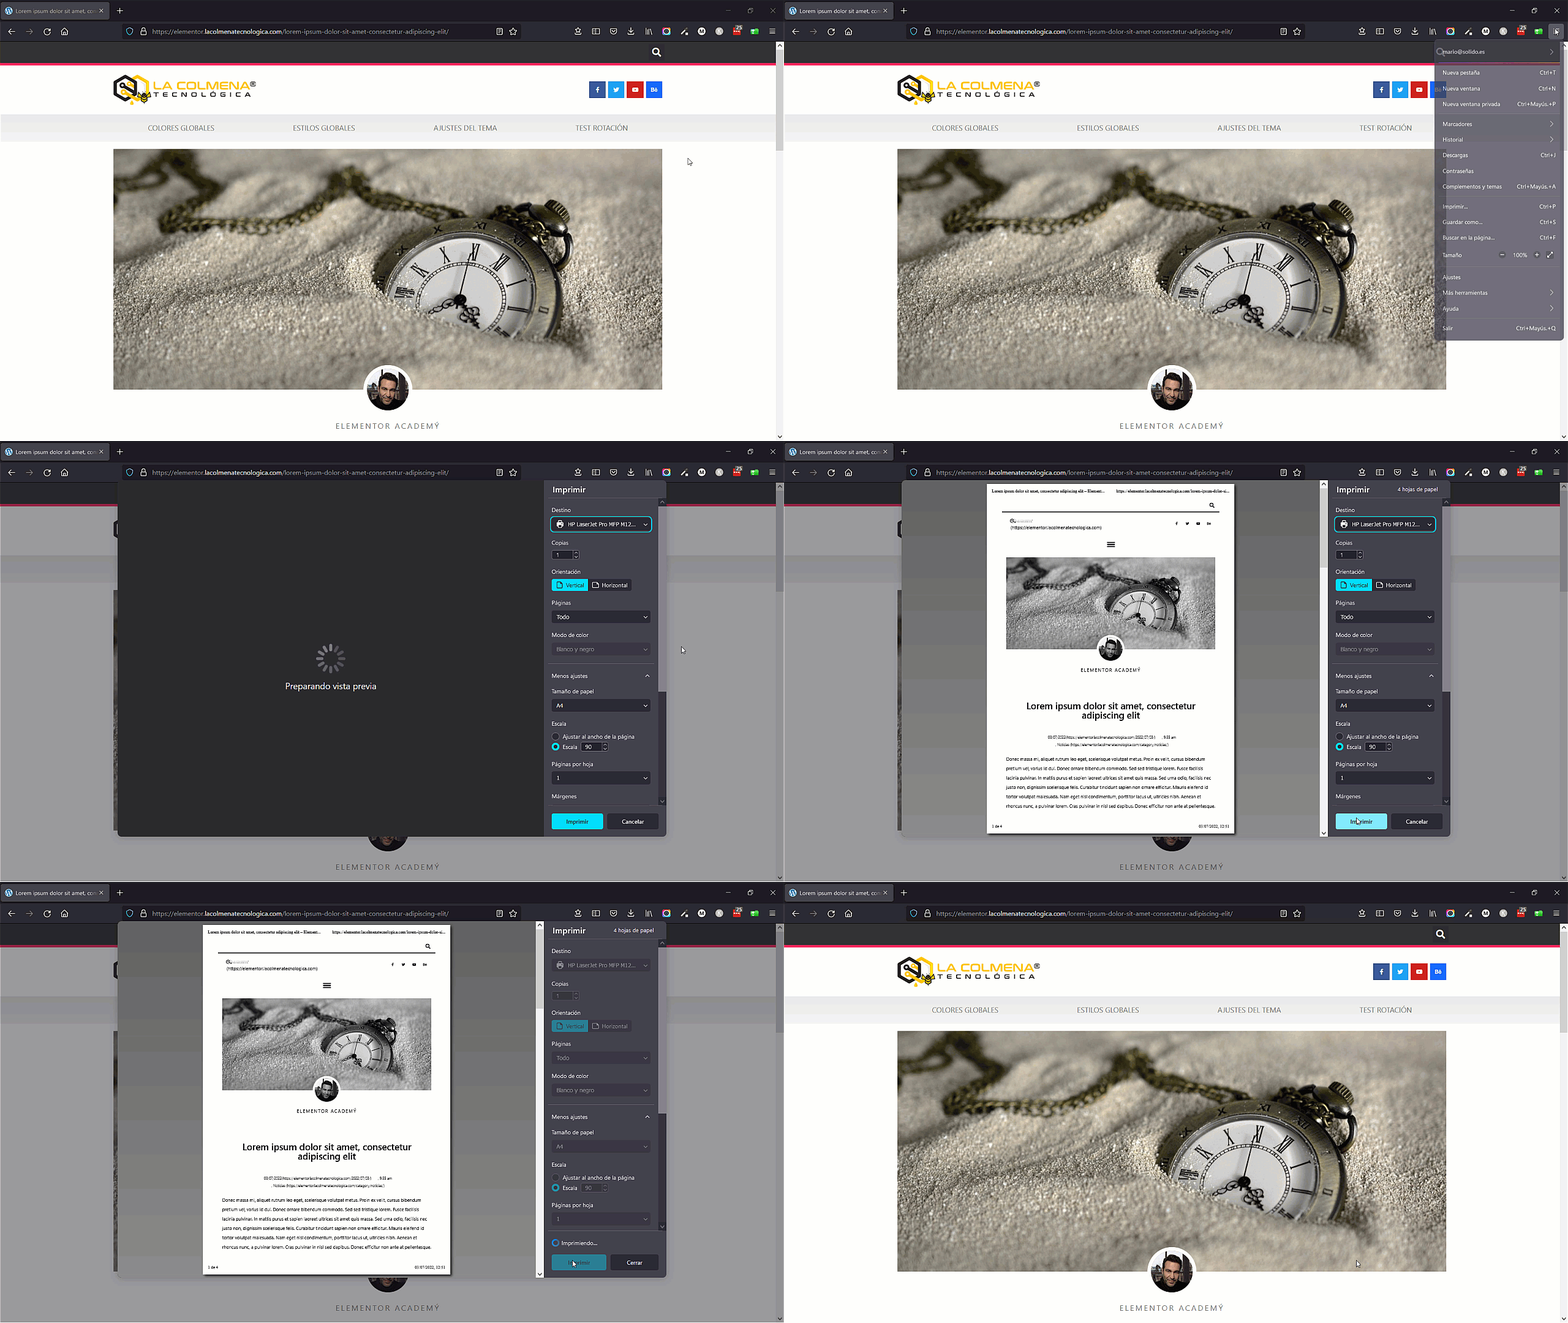
- Open the page you want to print.
- Click on the application menu
 and from the pop-up menu click on Print…
 - The print configuration window will open and you’ll only need to click the Print button.
Add a Button to Print the Active Page
We can add a button to print the active page, for example in the Single Post template or on any page, so the user can invoke the browser’s print page function by clicking this button. Let’s see how to do it.
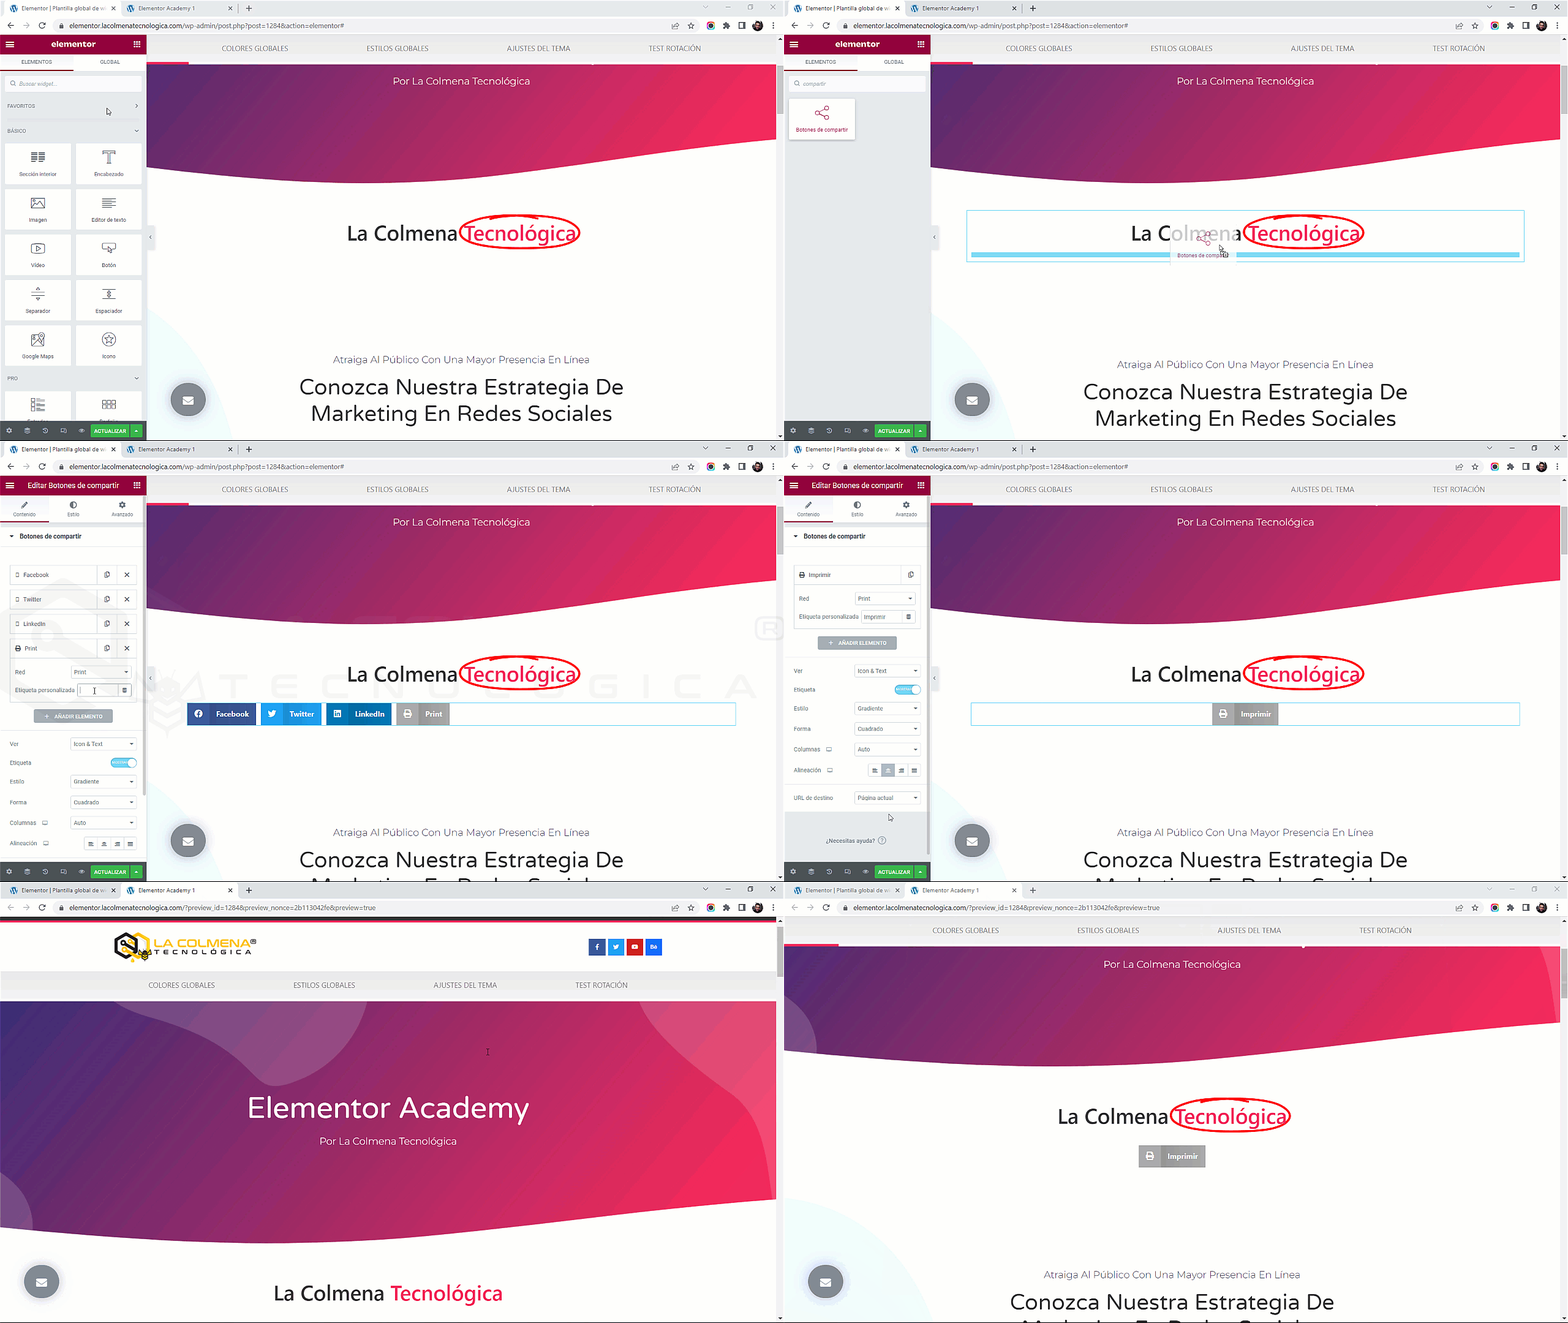
- In the Elementor builder, click on
 search for the Share Buttons widget and drag it to the part of the document where you want to insert it.
 - In the Content tab, click the +Add Item button and under Network select Print.
- Now you can customize the button’s text and styles to your liking.
Create a CSS Class to Hide Parts We Don’t Want Printed
The page styles for printing don’t have to be the same as those we use to display it on a screen (computer, tablet, or mobile phone). When printing, we may want to hide certain parts (header, footer, sidebar, …), change margins, colors, fonts, etc. We can do all of this by including the @media print rule in our custom CSS styles.
We can change many styles, but we won’t go into detail and will simply see how we can hide the parts of our page or template that we don’t want printed. Let’s look at an example:
@media print {
     header {display: none !important;}
     footer {display: none !important;}
     .noimprimir {display: none !important;}
     body {background: #fff !important;}
}
In the example above we see how we’ve created a series of CSS classes within the @media print rule that will only be used when printing the document, so they won’t affect how we view it on screen. Let’s see how to add this code to our custom CSS in Site Settings:
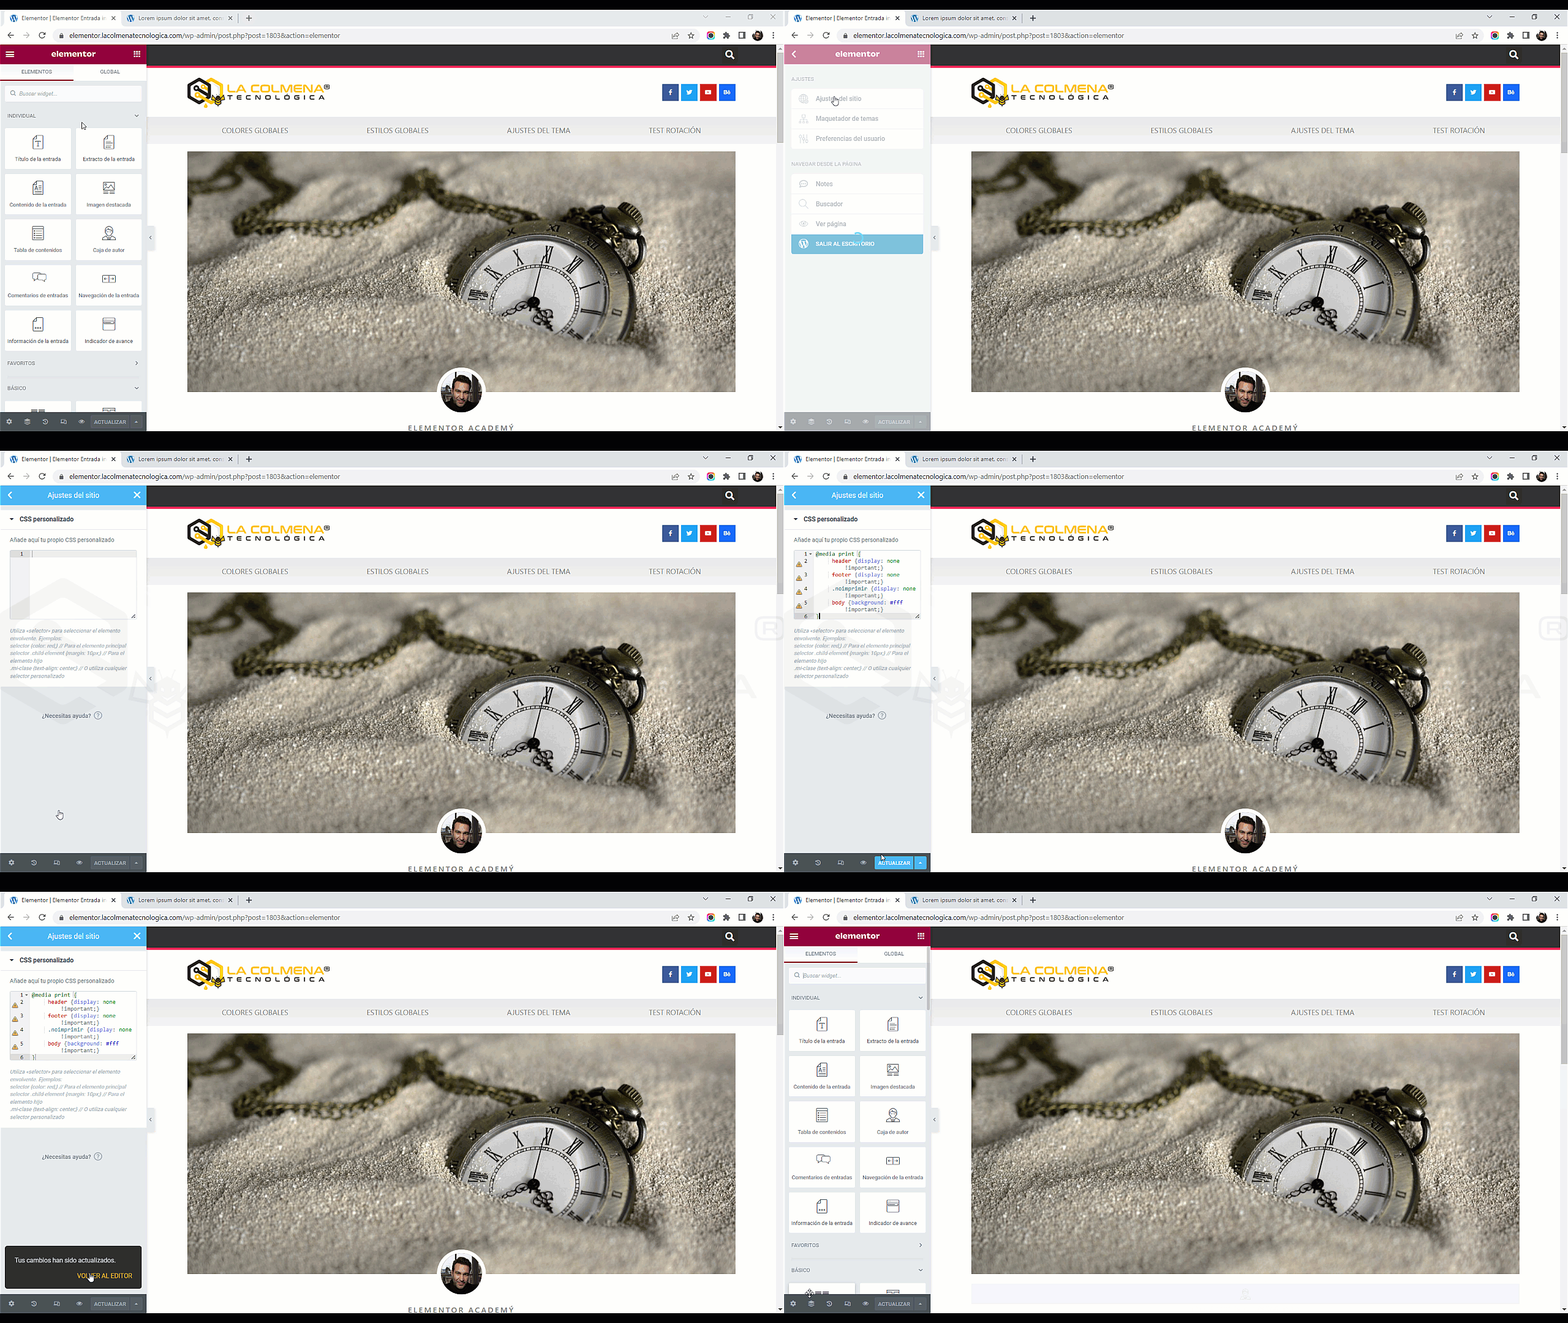
- Launch the Elementor builder by entering any page or template.
- Click on the Hamburger menu
 in the upper left corner.
 - Click on Site Settings.
- From the options panel, click on Custom CSS.
- In the Add your own custom CSS here box, insert the code you need.
Basically we’ve hidden everything inside the header and footer for printing, and we’ve also included a .noprint class to assign to elements we don’t want printed, such as the print button itself, comments, etc. Finally, I’ve included a body class to set the background to white—this is only necessary if we’ve configured the background with some color.
The !important rule is used to add more importance to a property/value than normal. In fact, if you use the !important rule, you will override ALL previous style rules for that specific property on that element.
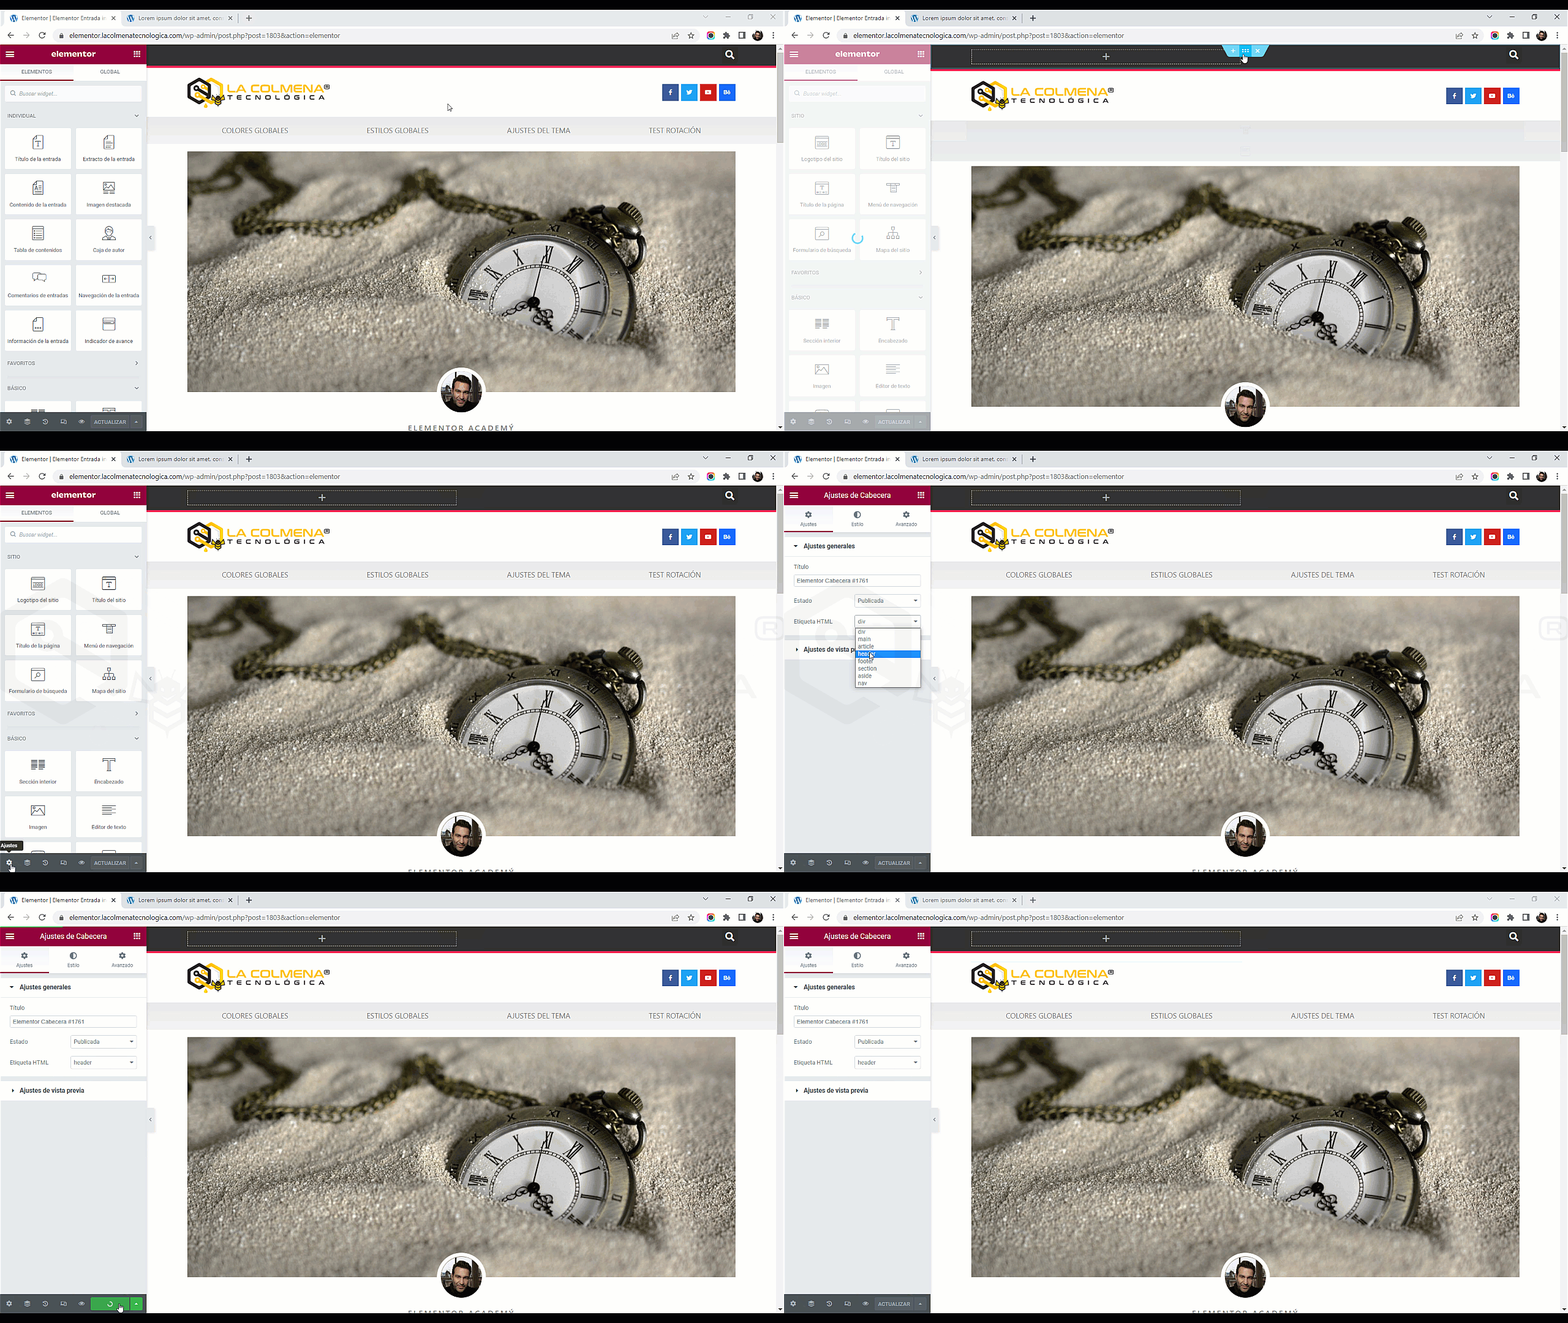
We must keep in mind that for the header and footer classes to work, we must have assigned these HTML tags to the Header and Footer templates. Let’s see how we can do this:
Links of Interest
- CSS Media Queries | W3 Schools